Hi! I am back with another Silhouette Challenge today. I missed last months but in March I added some pizzaz to the top of this little table with an Irish Blessing design. The project for this month is much, much easier. I would say easy peasy! I decided to create a bottle opener.

Silhouette Challenge
I love this Silhouette Challenge and I am so glad that Cat from Pocketful Of Posies hosts it every month. Each month we are given a theme to work with. Since Father’s Day is approaching the theme was “Man Up”.
I had to really think about what I wanted to make for this since I don’t do a lot of “man” projects. The bottle opener came to me and I thought it would be a fun project.
Supplies Needed:
I have included some affiliate links for your convenience. You can read my full disclosure here.
Scrap piece of wood – It just needs to be big enough for the letters/words you choose
Wood Stain
Ceramcoat Cadet Grey Chalk paint
Ceramcoat Antique Wax
Foam Brushes
Drill
Sander or sanding blocks
Screws to attach the bottle opener
Getting Started With Your Bottle Opener
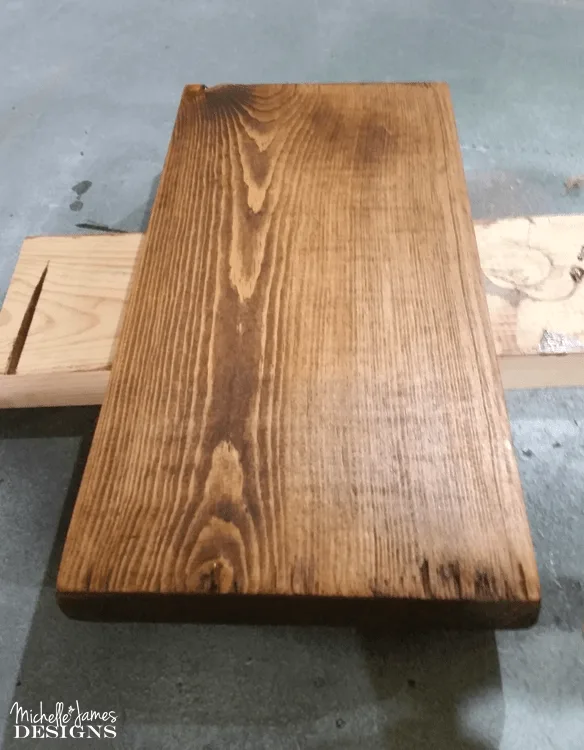
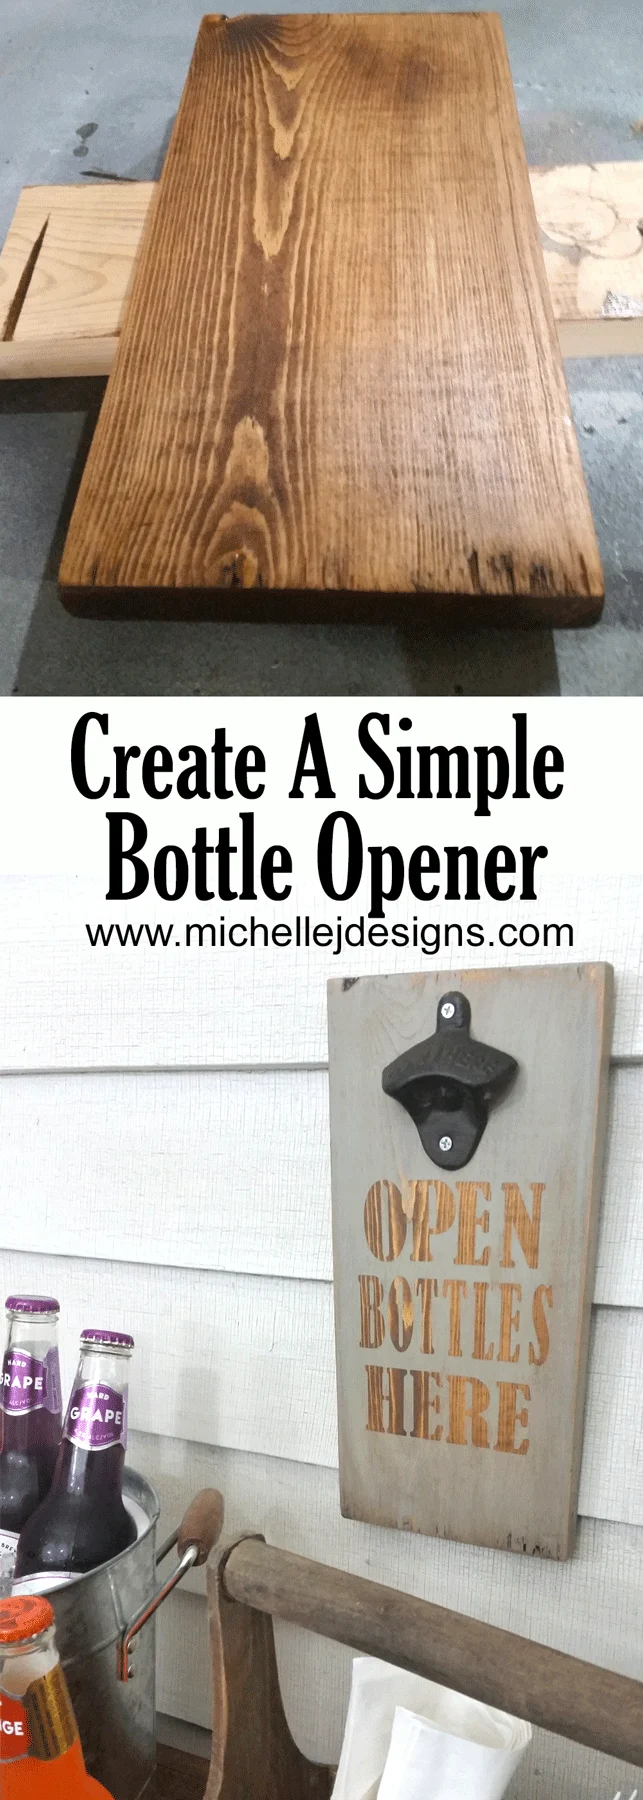
I did not cut this piece of scrap wood at all. I just dug through our pile of scrap pieces until I found one the size I wanted. But it is 5.5″ wide by about 10″ tall.
Sanding the board is the first step. The palm sander is my friend! It took all of about 3 minutes and I was done. I really hate sanding.
When the sanding was done I used some wood stain that we already had and stained the board on all sides.

Cutting Out The Letters
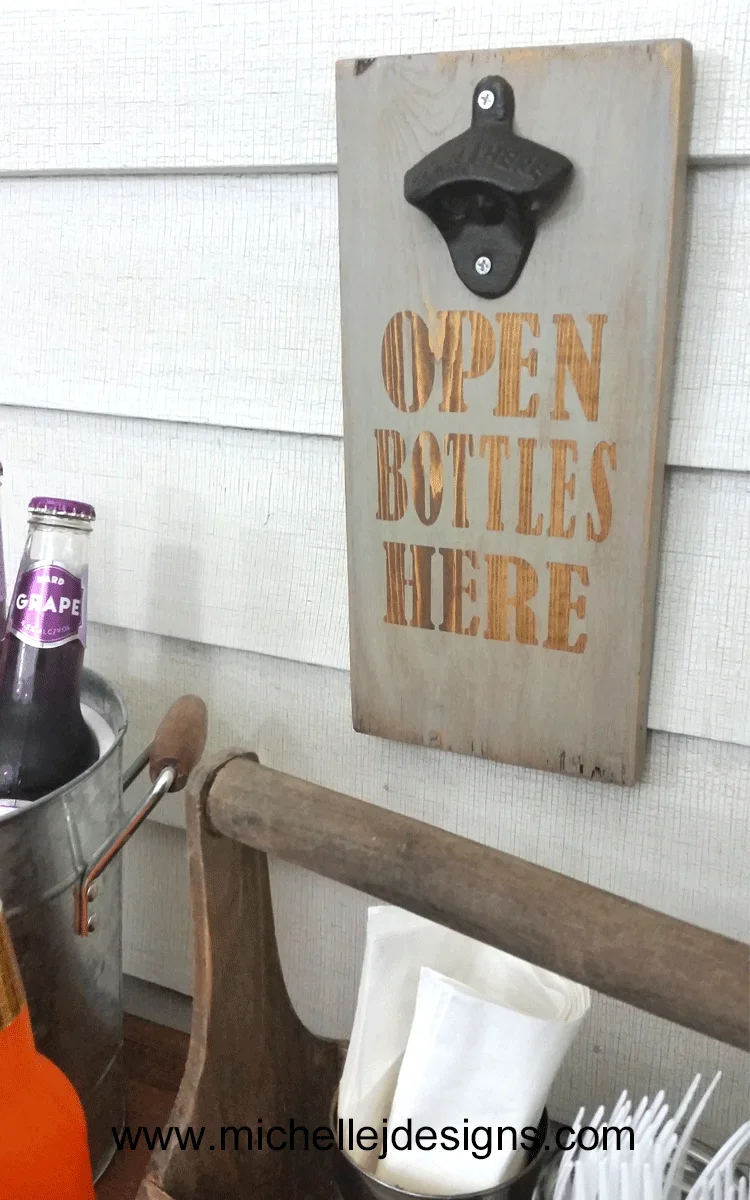
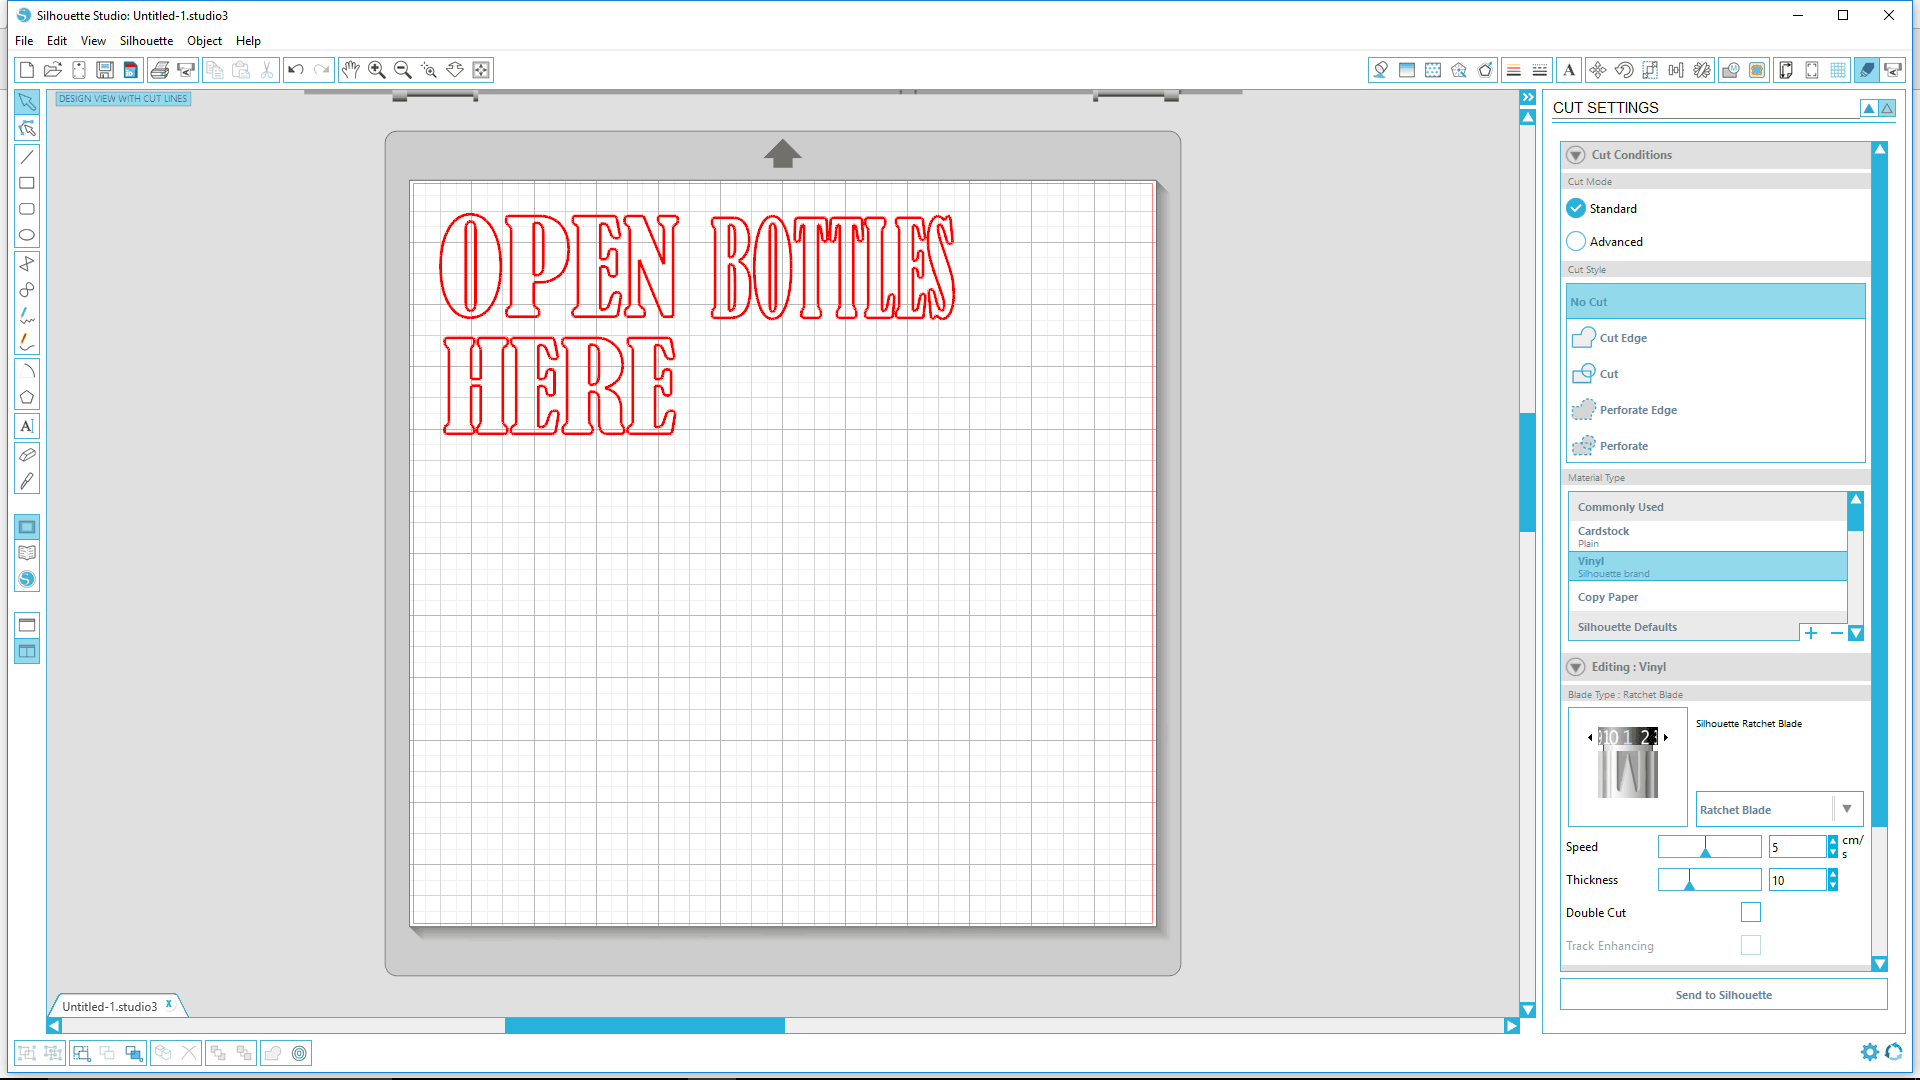
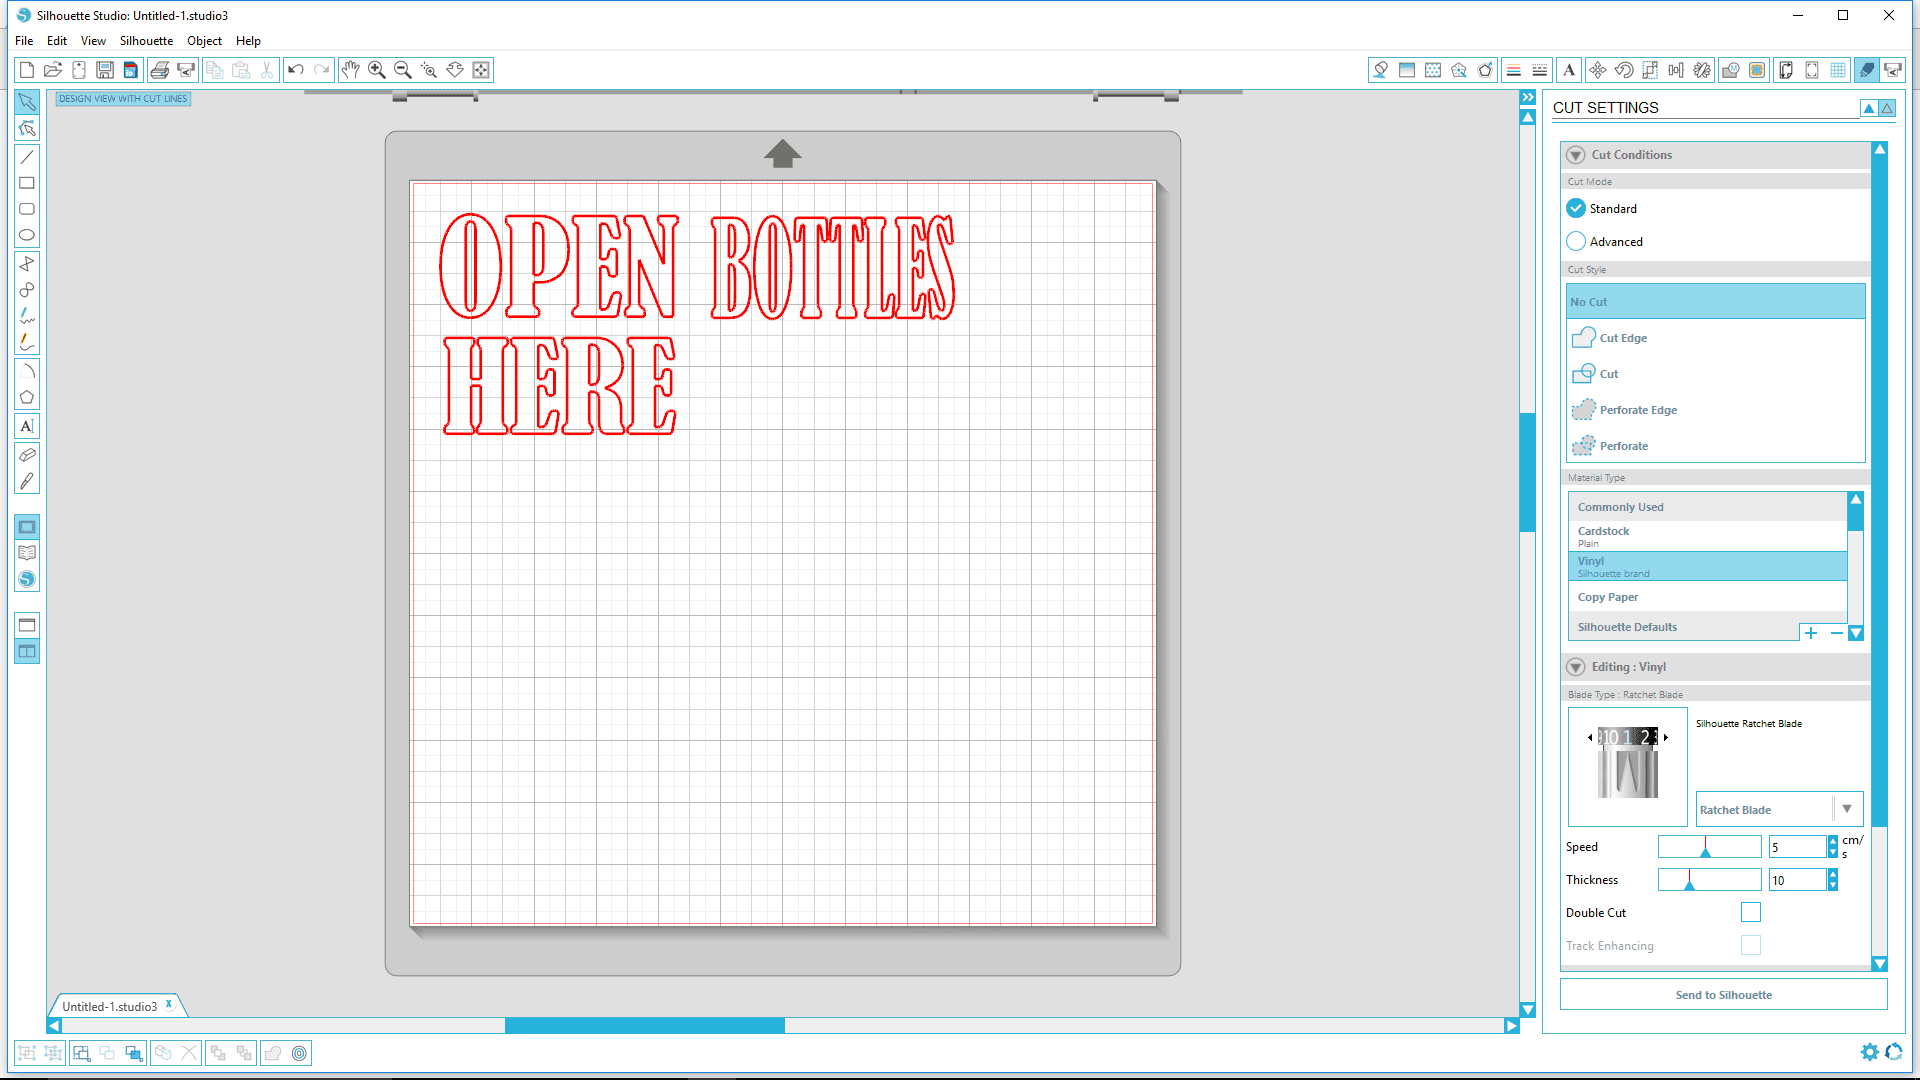
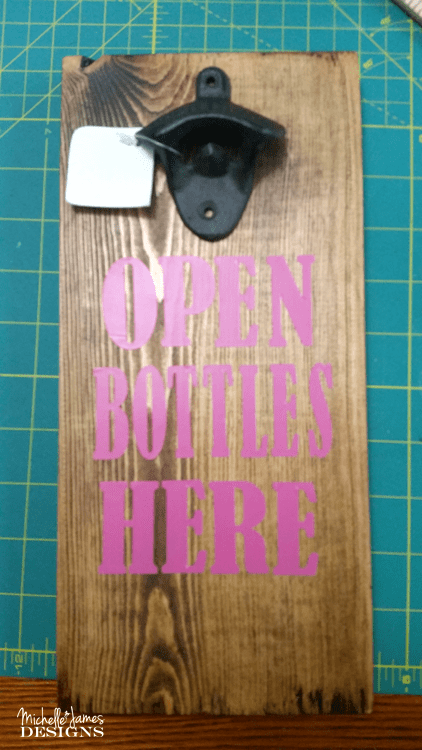
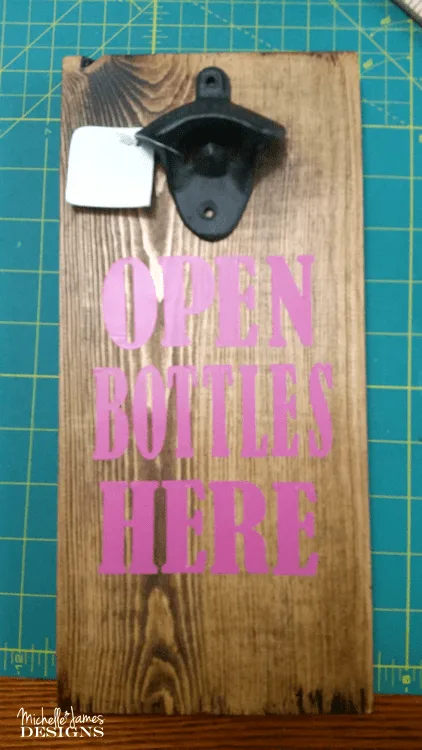
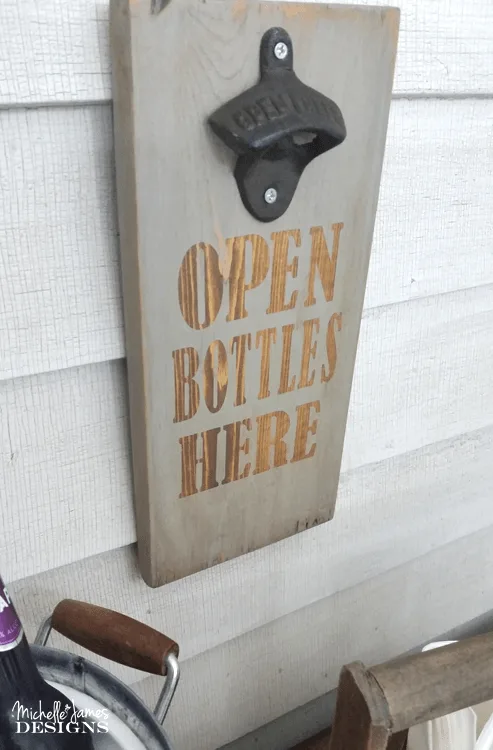
Next came the Silhouette part of the project. I needed letters to mask the wood. I decided on “Open Bottles Here” for my words and kept them approximately the same width and height. Because of this the word “bottles” has slightly smaller letters but it creates a uniform look even though it ended up being a little longer as well.
Here is the screen shot of my design.
The vinyl is the perfect material for masking. I got a piece ready on the cutting mat. The suggested needle depth is 1 but I always use a 2. This seems to work well for me.
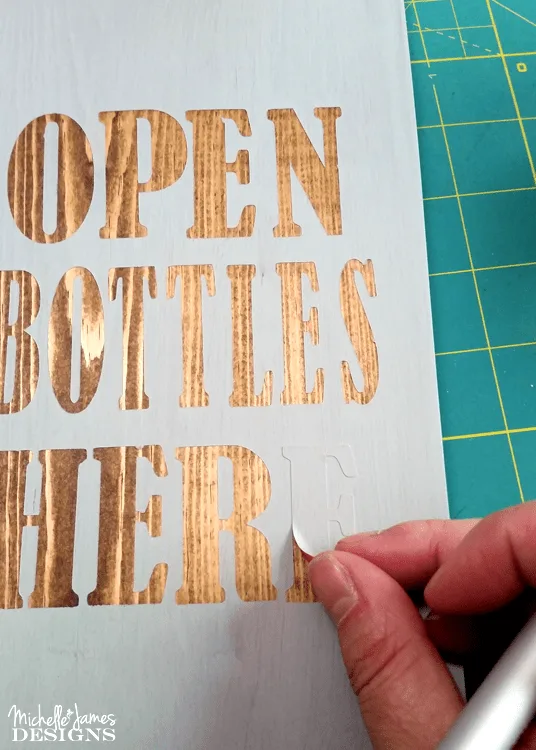
Once the letters were cut I placed them onto the wood as a mask. Do you like my pink vinyl? I had to get something girly in their right?
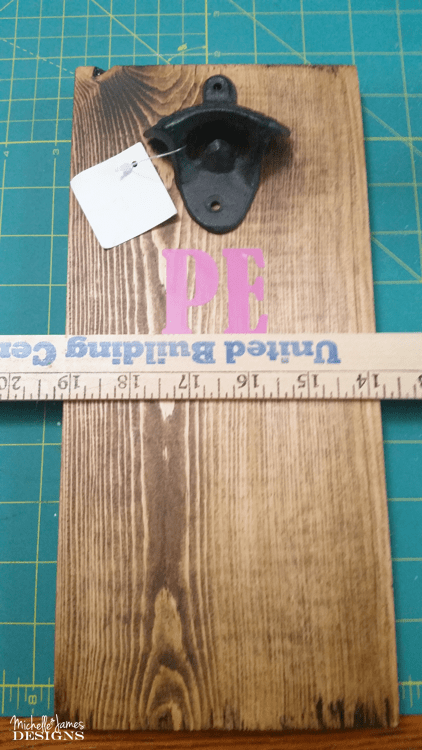
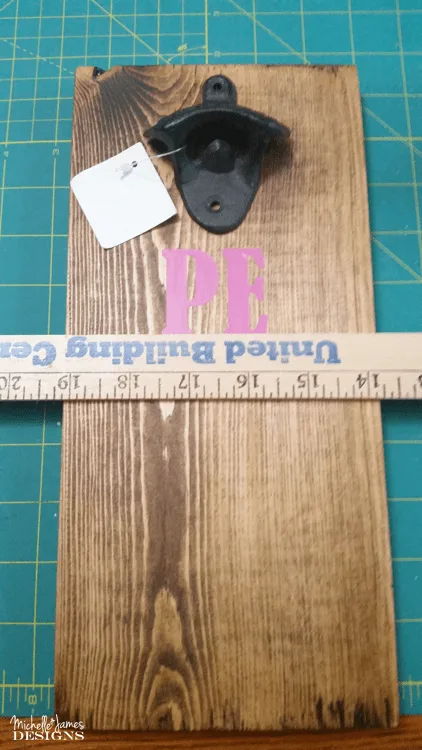
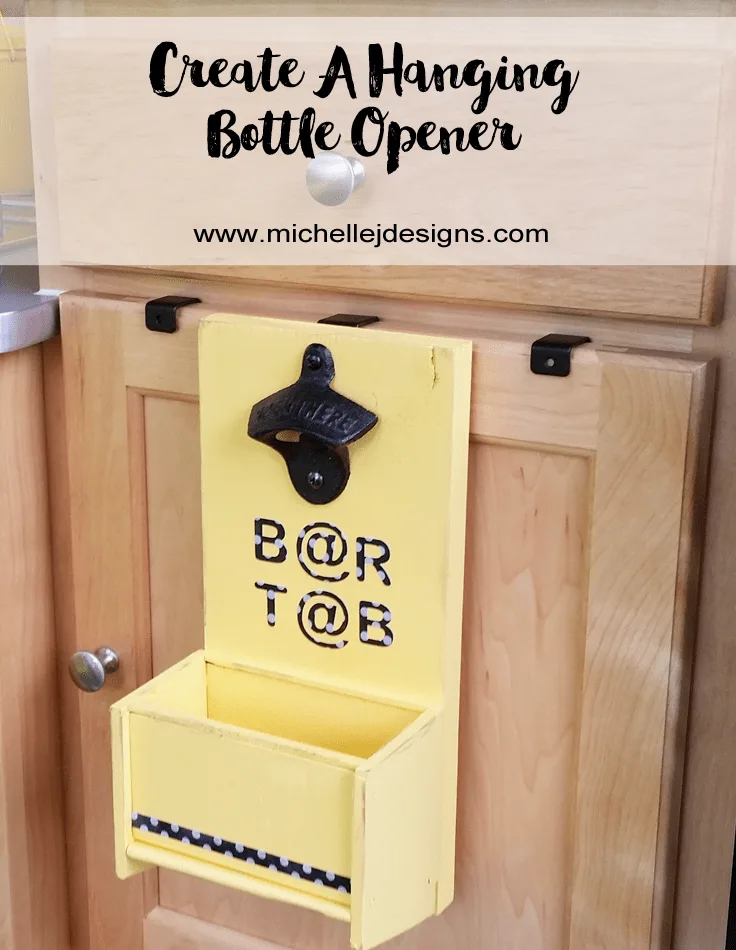
A ruler helps to keep things lined up. I also placed my bottle opener at the top so I knew how much room to leave for it. I was debating whether or not to add a small wire basket to the bottom so I left a little bit of room just in case. In the end I decided not to but if the bottle caps get left around I still may add one later.
It took a little bit of moving the letters around until I was happy with the placement. Be sure they are completely adhered to the wood. We are painting over them and don’t want the paint to bleed underneath.
Painting The Wood
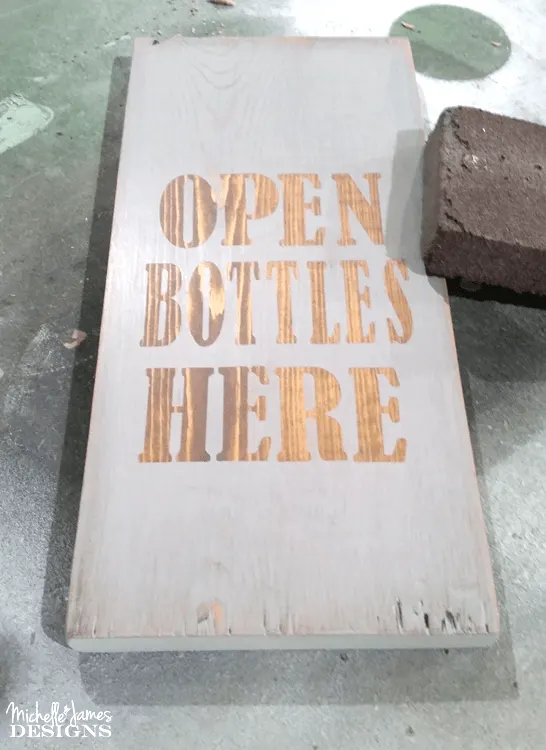
This is the fun part! I used a foam brush and my new Ceramcoat chalk paint in Cadet Grey. It is a light grey and was perfect for this project.
I only gave it one coat then was able to peel off the vinyl letters to reveal the stain underneath.

I love that. After admiring it for a few minutes I used a sanding block and gave it a good sand.

Finishing Up!
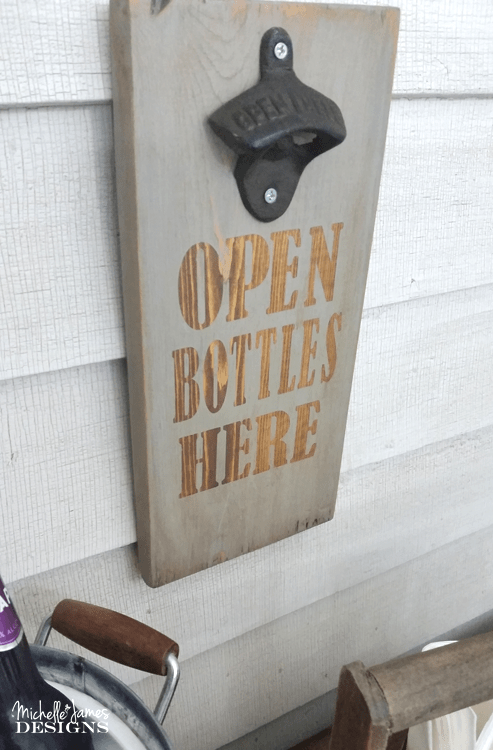
The next steps are the fun finishing touches. First was the wax on the top of everything. I love the wax for two reasons. It tones down the paint color a little bit and second it gives it a nice, smooth finish.
The wax I used for this was Ceramcoat Antique. This and the grey paint are from Plaid. I do not find them online at any of the major hobby stores such as Hobby Lobby and Michaels but I do find them on Amazon and I have to say that I really like them.
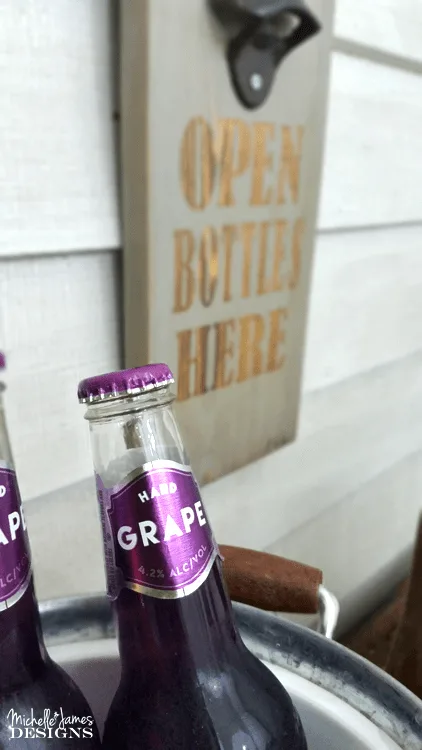
When the wax is dry it is safe to add the bottle opener and I added a picture hanger on the back to hang it up.
Then it is finished!


What do you think? If you like it don’t forget to pin it!

You will love all of the other blogger’s awesome projects as well. Be sure to click on the links below and read about all of them.

How to Make an Easy DIY Bottle Opener – Michelle James Designs
DIY Drink Local Beer Opener – Rachel Theodoro
Etched Glass Gifts for Dad – Morena’s Corner
DIY Personalized Tap Handle – Uncookie Cutter
DIY Fathers Day Candy Banner – Pocketful of Posies
DIY Treasure Chest Toy Box – Houseful of Handmade
Thanks so much for stopping by today!
Michelle


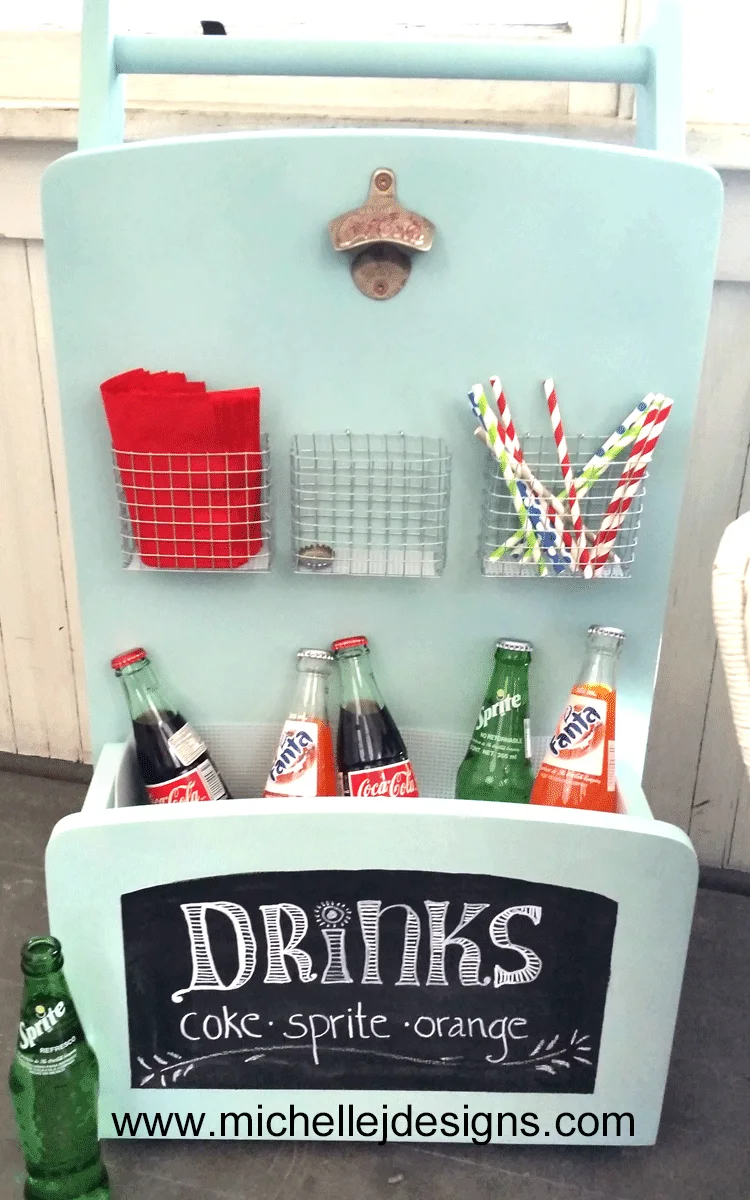
Drink Station From An Old Table Top

Create A Hanging Bottle Opener


joannamatt@mightyessays
Friday 12th of May 2017
This is awesome.I need to do this soon! Thanks Michelle for sharing this.
Love, Joe https://mightyessays.com/
Michelle
Friday 12th of May 2017
Thank you! It was so super easy!
Michelle James
Thursday 11th of May 2017
I think I just found the perfect gift for my Dad!! This is awesome! Love the stain you used & the letters are perfect! You are so creative! ????
Michelle
Friday 12th of May 2017
Thanks Michelle. It was fast. I love that kind of project sometimes.
Sue
Thursday 11th of May 2017
Yes I love it. There is nothing more enjoyable than using an old-fashioned bottle opener like this and I admire what you created.
Michelle
Thursday 11th of May 2017
Thanks Sue. I really was a fun, easy and fast project and it is useful!
Morena
Thursday 11th of May 2017
I love it! Great project!
Michelle
Thursday 11th of May 2017
Thank you Morena!
Nancy Janssen
Thursday 11th of May 2017
Dang, Michelle; that won't open a wine bottle! Pretty cute tho!
Michelle
Thursday 11th of May 2017
Hi Nancy! Yes I should have a little pocket on the side for a corkscrew huh? You are brilliant! I can still add that on.