I have been wanting to make a messenger bag for a while. Just check out my Sewing Projects Pinterest Board. There are many messenger bag pins toward the bottom of that thing.
I had purchased a pair of jeans at our local Horizon’s Unlimited Second Hand Thrift Shop and as always they needed to be hemmed. This time, though I was thinking about hemming them to capri length. Capri’s are probably out these days but I still like them and did not have a denim pair. So, when I hemmed them I had a ton of denim left over (because I am short) and I saved it because that is what I do.. You never know when you may need a substantial piece of denim….right? I am back to that Trash It or Craft It question again.
This denim along with some left over fabric and a pair of my son’s childhood cargo shorts all came together be a fantastic messenger bag.
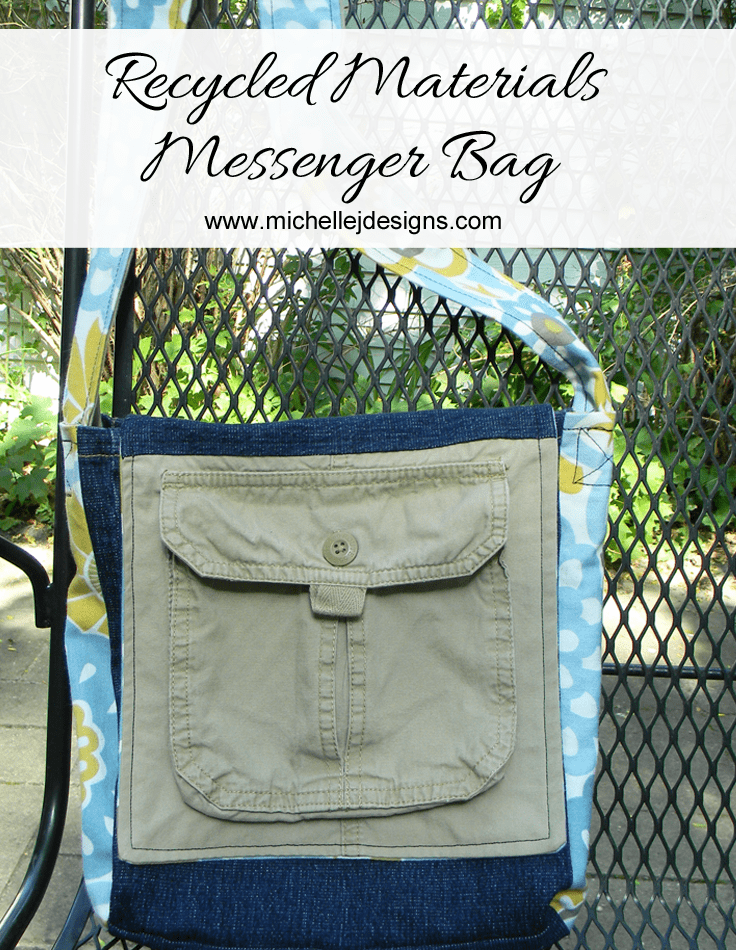
Recycled Materials Messenger Bag
This is a tutorial but I have to mention, again, that I am what I call a “lazy” sewer. I can show you what I did but I did not have a pattern and I “eyeballed” the pieces to size then used the first piece as a pattern to cut the second.
Supplies needed:
Fabric scraps
Denim scraps
Old pair or cargo shorts
scissors/pinking shears
sewing machine
These are pictures of what I had . I did not have a huge amount of anything so, for example, the strap is pieced together to make a long enough strap. You get the picture. Let’s start from the beginning.
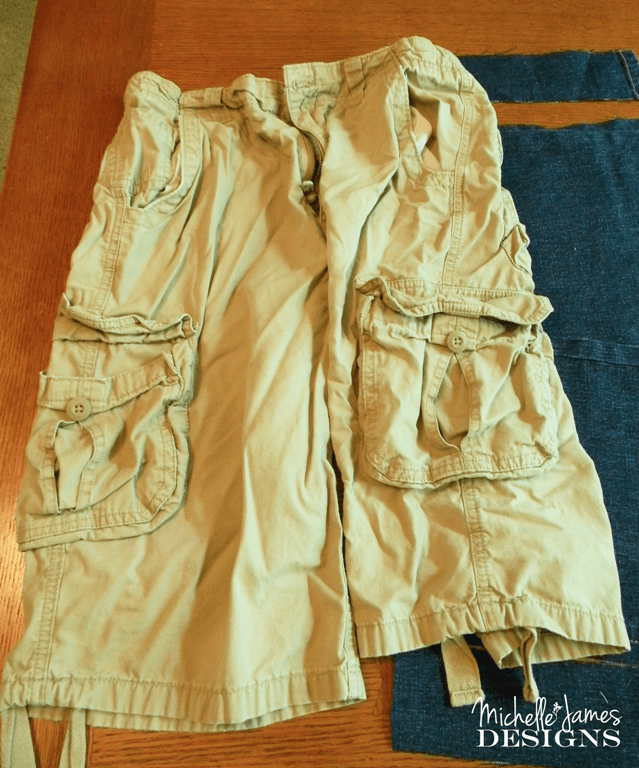
Brian’s old cargo shorts. Size 14 so they must have been in the extra closet for at least 4 or 5 years. I don’t know why I still have them. Moving on!
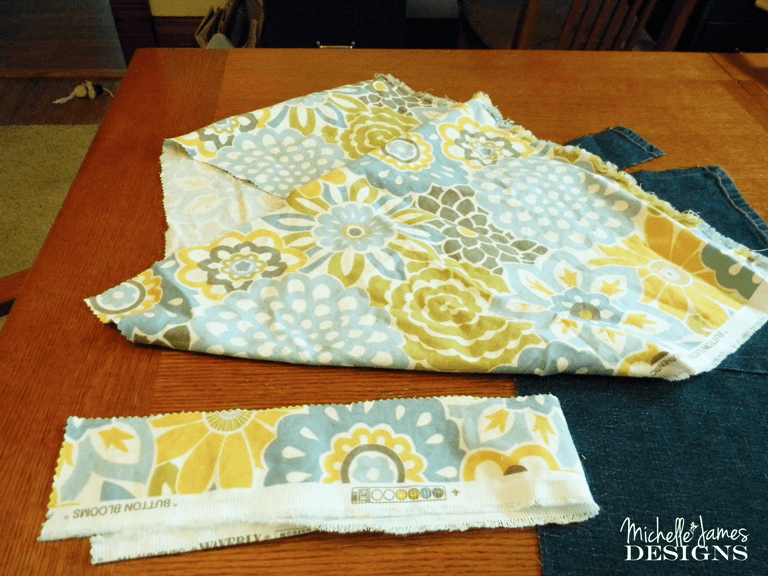
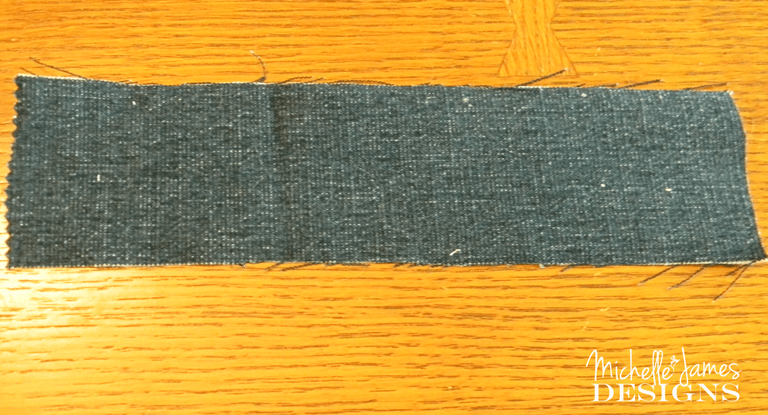
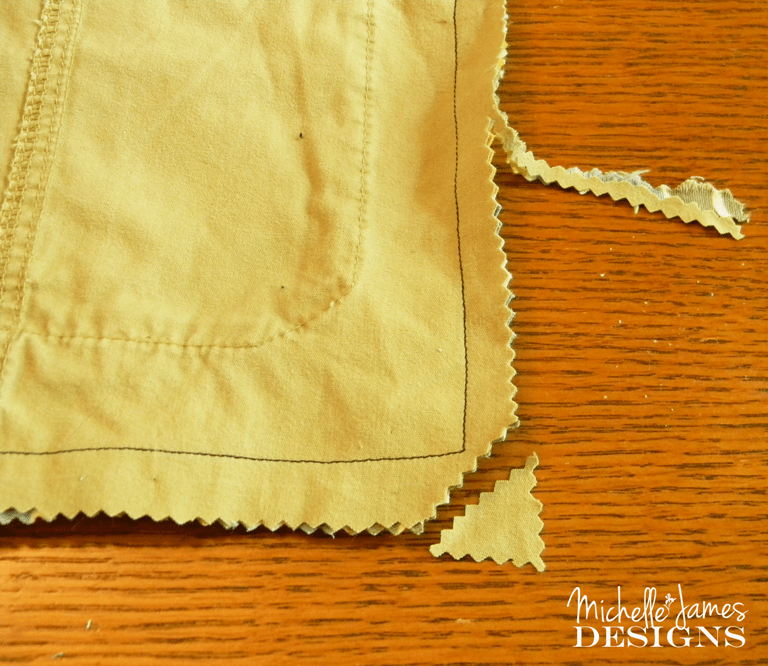
I cut my denim pieces about 11 inches long by about 9 1/2 inches wide. This was the length I had left over from my hem and I wanted the bag to be rectangle.
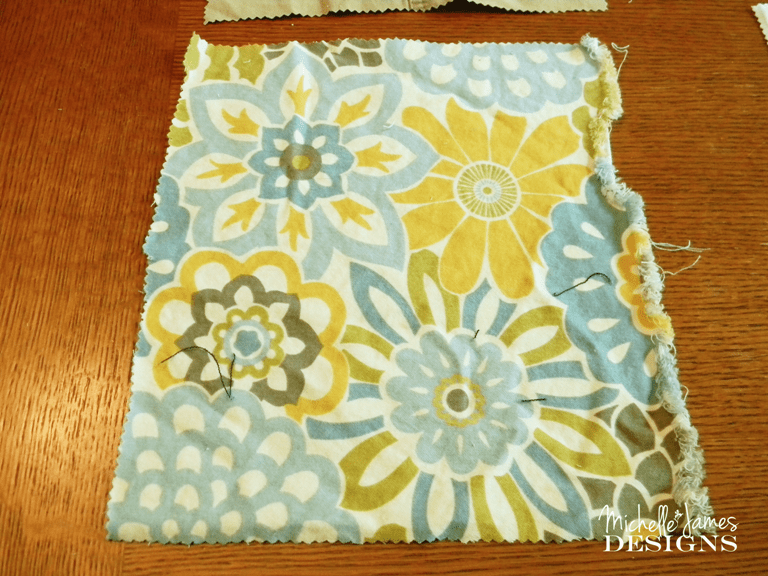
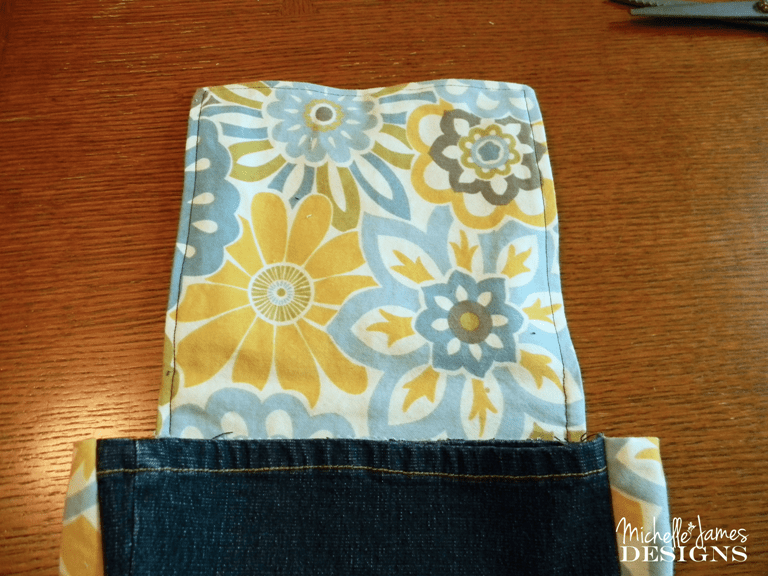
Then using the floral fabric I cut some side pieces. They were a little longer than the denim pieces because I needed to finish off the top of them and they were about 3 inches wide.
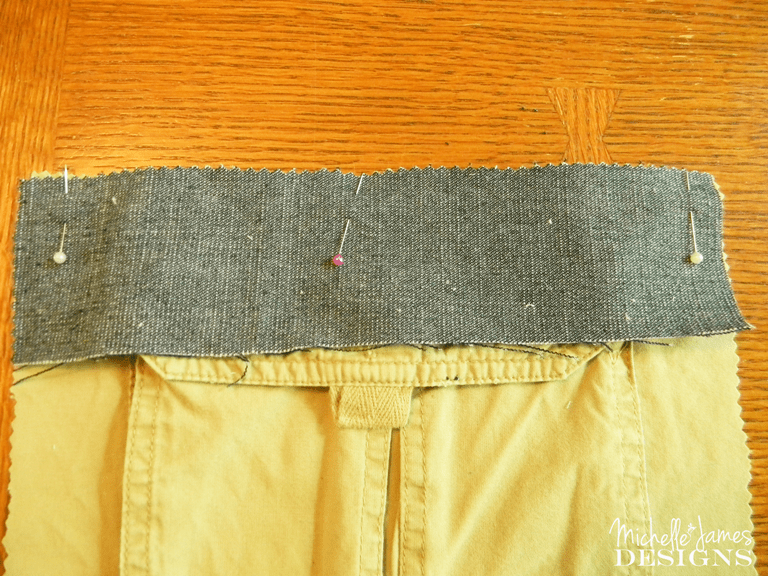
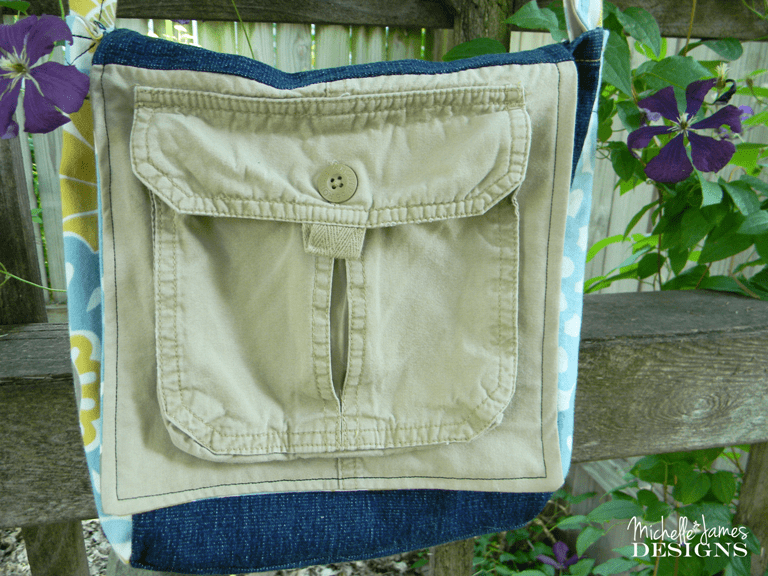
Then I cut the fun pocket from the shorts. I left as much fabric as I could above the pocket then cut it so it was slightly thinner and somewhat shorter than the front of the bag (denim piece).
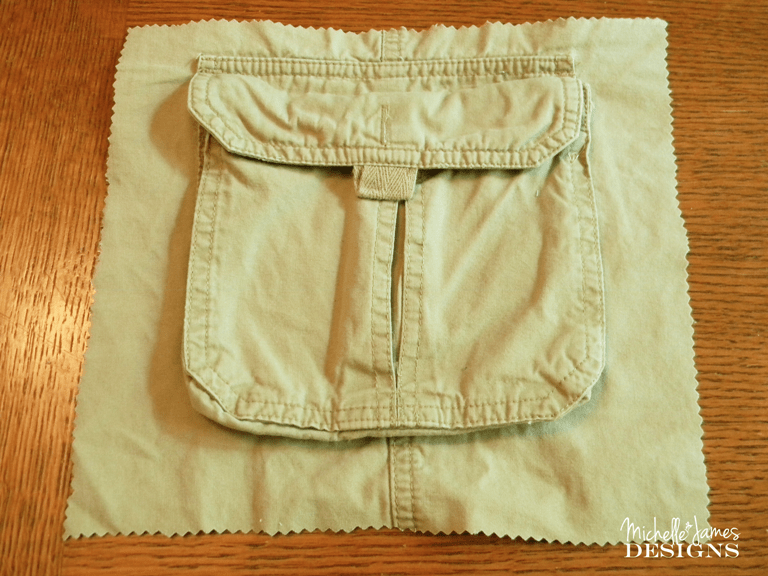
It ended up being 9 inches tall by 9 1/2 inches wide. I knew it was too short to flip from the back of the bag to the front so I added another piece of denim to the top of it. It was the same 9 1/2 inches by 3 inches.
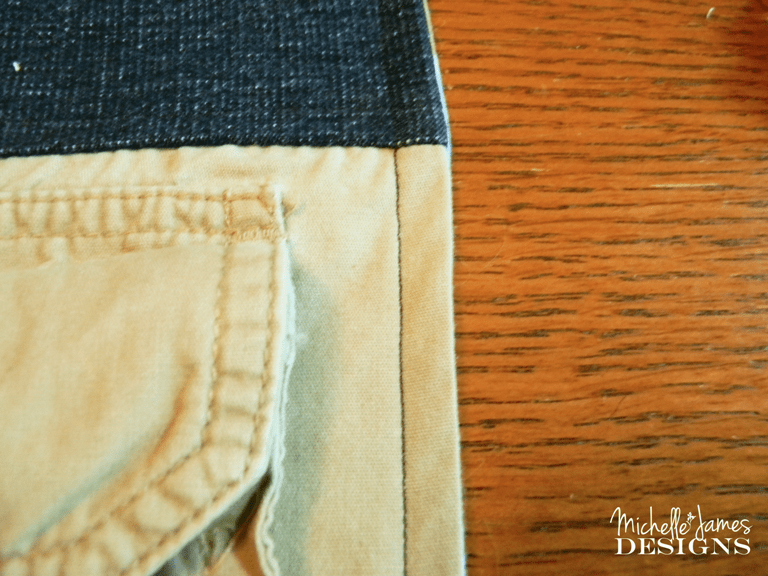
I put right sides together and stitched it to the top of the cargo pocket piece.
Then I ironed the seam up (away from the pocket) then I stitched over the top of the denim to make it lay flat. It is hard to see because the thread is the same color as the denim but it is there. This picture is jumping ahead a little bit but i wanted to show the stitching.

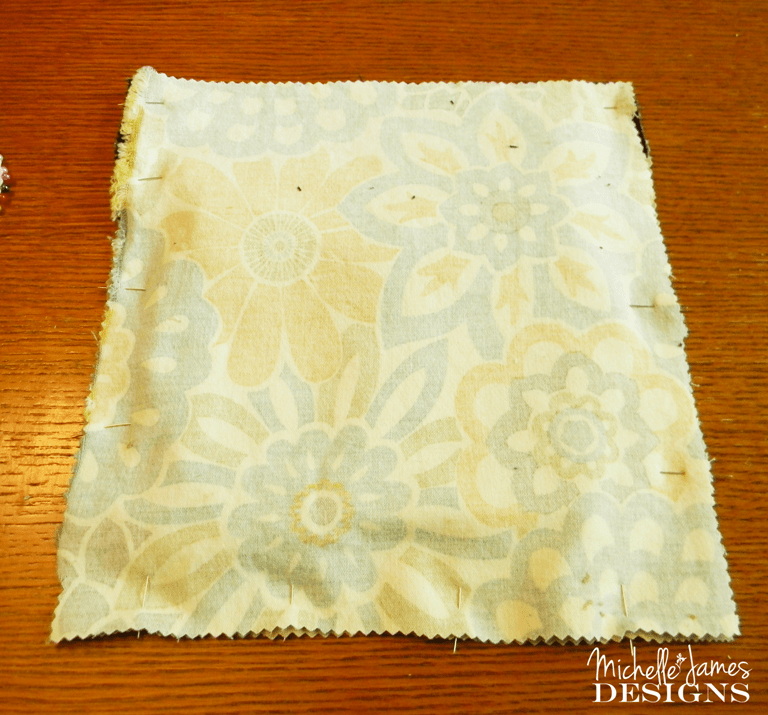
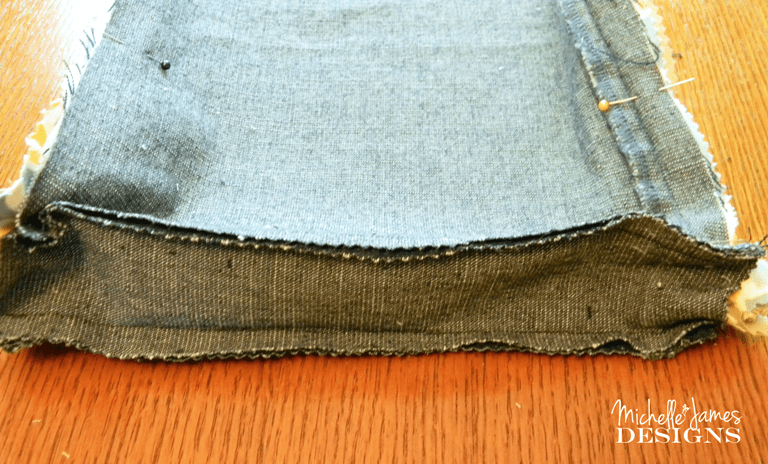
Then I cut a lining piece from the floral fabric. It is the same size as the two other pieces when stitched together.
It looks terrible in this picture. I ironed it before sewing the two together.
With right sides together I stitched the two sides and the bottom. I left the top open to turn it right side out. Plus I wasn’t sure what to do next and I didn’t want to have to take the seam out.

This is what the other side looked like before I sewed them together.
After I stitched I clipped my two bottom corners and trimmed the seams a little so they wouldn’t be so bulky inside.
Then I turned it right side out, ironed it good and stitched along the edge for some detail. It also helps to secure the lining better.
Then I started working with the front and the back of the actual bag. I needed to get the bottom piece attached to them.

The bottom piece is about 3 inches wide and is the same size in length as the top of the denim pieces.
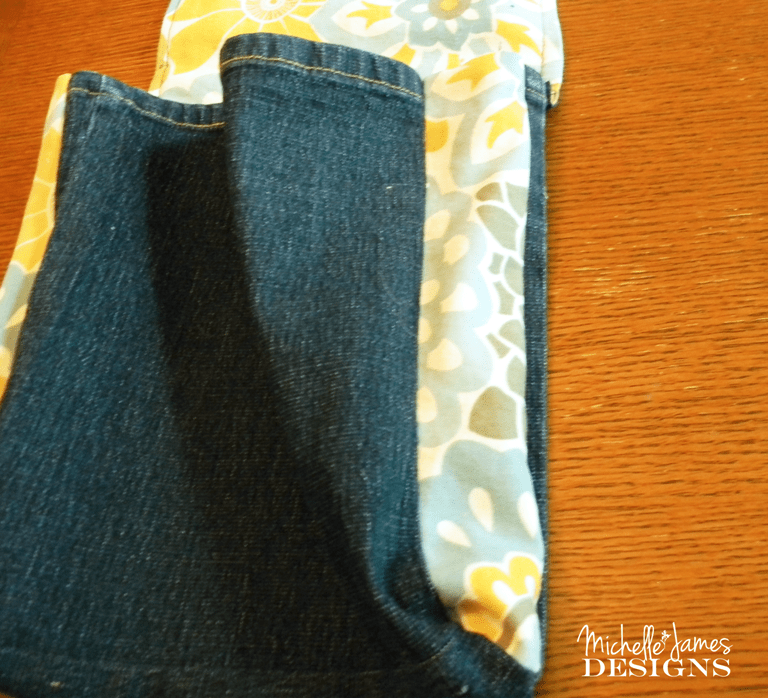
After this I worked on the side panels. I had decided that since I was not lining the entire bag I needed to at least line the side pieces. They were much thinner than the denim and I thought it would look funny. So I cut pieces from the cargo shorts to match the size of the side pieces I had already cut from the floral fabric.

I placed them right sides together then pinned and stitched the top so they would have a finished edge when placed in the bag. Which is our next step.

Matching the top edges I pinned the side panels down one side then across the bottom piece then up the other side. This step and stitching this is the hardest part of the bag. I wasn’t sure it would quite work out. When I finished one side I would stop with the needle down, then pivot the fabric to turn the corner. It was bulky and hard to know if I was truly at the bottom and ready to turn or not. This is when a professional comes in handy. But, I made it work.
This was what the bottom of the bag looked like before I stitched the sides. After I finished the stitching I turned right side out.
Next it was time to add the front pocket panel to the bag. This get stitched to the top of the back of the bag so it can flip over the top of the opening to keep thing from flying out.
Put right sides together and stitch.

Now it needs a handle. Messenger bags usually have a long handle so I got out one I had purchased and made mine about the same length. I pieced together some of the floral fabric and some of the cargo shorts to make two long pieces of 59 inches.
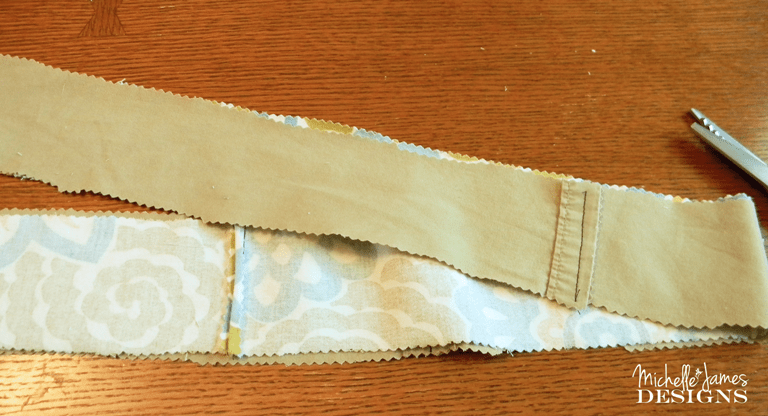
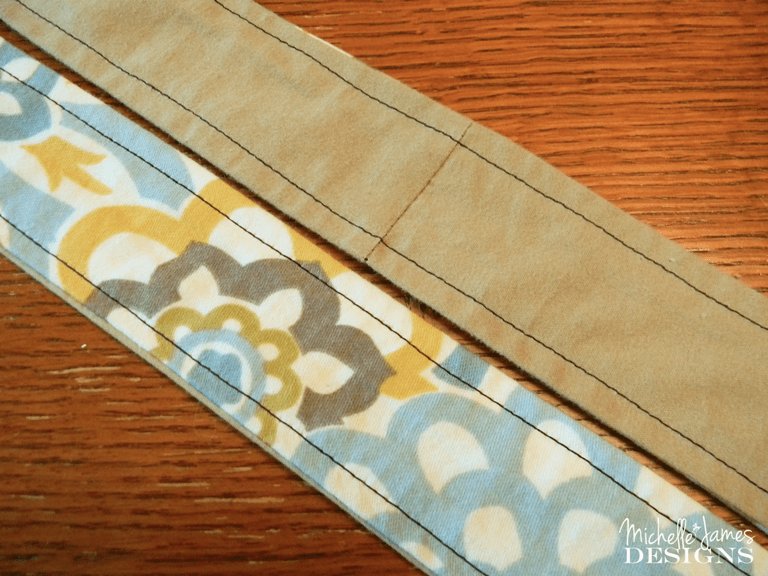
I place them right sides together and stitched the two, very long sides and one end. So three sides. After I stitched it I turned it right side out and ironed it. Then I top stitched to two long sides.
Then I stitched to the bag to the side panels. I am sure there are much better and more professional ways to do this but it worked and I am happy with it.
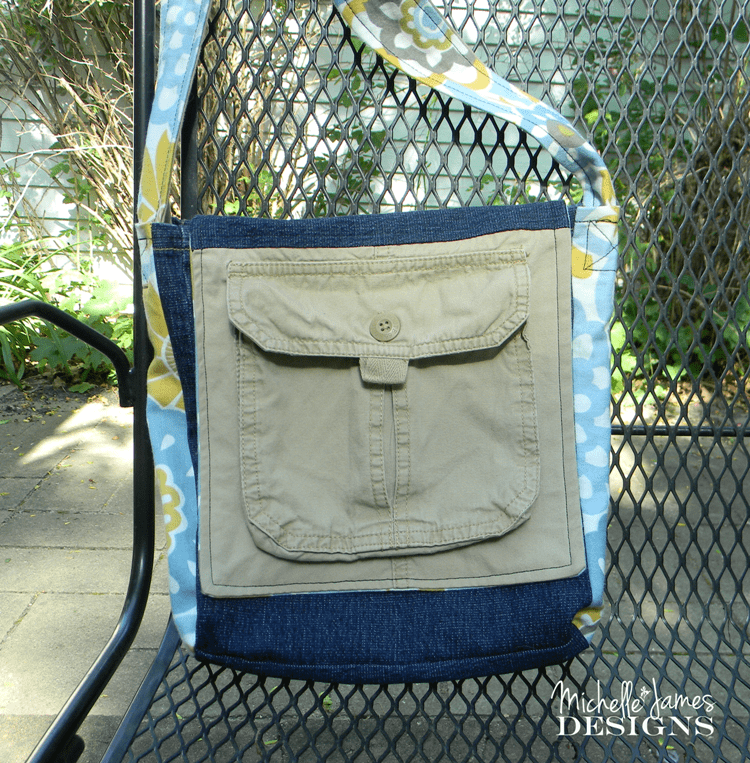
I am not very good at selfies so I took it outside to get some better lighting for the finished messenger bag. What do you think?

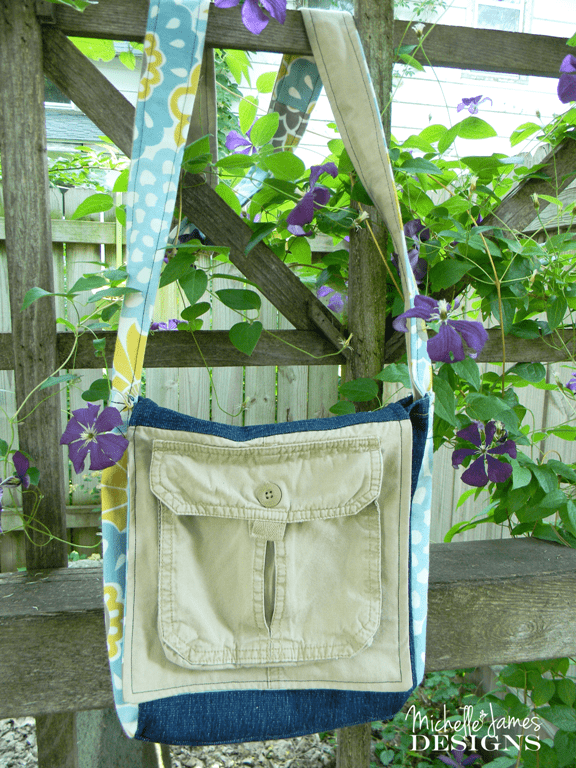
It was a fun bag to make and it took me about 4 hours. So, it takes a little bit of time but I think it was well worth it. Plus I upcycled a pair of shorts and used some scraps of fabric that (in someone else’s house) probably would have been tossed.
If you made it to the end of this post you get a pie! Well, I am not really going to give you a pie but you deserve one for sticking with me. I appreciate it!
I am sharing this post at:


Kids Bag
Friday 3rd of July 2020
Wow, it's just awesome how perfectly you made a bag from recycled materials. Thanks for everything.
Michelle
Monday 6th of July 2020
Thanks! It was a fun project!
Stella Lee@ Purfylle
Tuesday 14th of July 2015
I would never have realised this was an upcycle project if you hadn't told me. Your bag looks awesome.
Michelle
Tuesday 14th of July 2015
Thanks Stella Lee! That just made my morning!
Sonja
Saturday 11th of July 2015
This bag turned out great! I LOVE your use of leftover/scrap fabric. I find myself asking that question "trash it or craft it?" more and more. Sonja at www.sustainmycrafthabit.com
Michelle
Sunday 12th of July 2015
Thank you Sonja. I do ask myself that question over and over again. Most of the time I end up keeping it but not in a hoarder kind of way! LOL!
Kristine Hart
Friday 10th of July 2015
That is so cool! Gosh I want to learn to sew! (Among 20 other things!) Really, I'd buy that in a sec. I'm slightly obsessed with purses/bags, and pens. Go figure! Found your post at Pretty Pintastic Party Kristine :)
Michelle
Saturday 11th of July 2015
Hi Kristine! Ha Ha! Make me an offer! LOL! Thanks so much. I am glad you like it. I learned to sew in 4-H in Paradise, California when I was a kid. I am not great but I can get fairly simple things done. I love purses and bags too. Thanks so much for taking a look at my project.
Nina Lewis
Friday 10th of July 2015
I'm dropping by from the Home Matters Link party. This is a WONDERFUL idea! I've been wanting a messenger bag -- and now I've got the perfect pattern for one. Thanks so much for sharing.
I have a link party that I am trying to grow. I invite you to share this idea (and a couple of others) at my Grandma Ideas Sharing Time link up at http://grandmaideas.com. I think my readers would LOVE this idea, too.
My linkup is open Wednesday through Friday at midnight Mountain Daylight Time. So there isn't much time to link up today. I hope to see you there! If you can't make it, maybe you could participate in my link up next week.
I also have a giveaway where you can win 3 movies (Woman in Gold, Big Eyes, and The King's Speech) and a $25 gift certificate. I invite you to enter my giveaway. (There aren't too many entries so you have a great chance of winning!)
All the best, Nina
Michelle
Saturday 11th of July 2015
Hi Nina! Thanks for inviting me to your party and for stopping by to comment. I did link up once and I think I got busy the next week. I am loving the reminder!