Create a quick and easy kitchen sign using StyleTechCraft vinyl and a pre-made wood sign. Add any text to customize just for you!
Don’t you just love crafts that are quick and easy but look fantastic when you are done?
ME TOO!
Let me show you how I fancied up a pre-made sign into a custom sign for my…well, my husband’s kitchen!
You could probably find a great sign to use at the Dollar Tree for this.
If you LOVE Dollar Tree crafts and gifts then you are definitely in the right place.
This time I just happened to see this particular sign in Walmart for just over $2 so I snatched it up.

Quick and Easy Kitchen Sign
You will be surprised at just how quick and easy this sign really was to make.
This is my next post for StyleTechCraft Vinyl. I used polished metal black for the text and Craft Glossy for the design elements and I love they way they go together.
Materials Needed:
I have added some affiliate links for your convenience. You can see my full disclosure here.
- Polished Metal StyleTechCraft vinyl – black
- Glossy Craft StyleTechCraft vinyl – olive green and teal
- Transfer tape
- Pre-made, white washed wood sign
- Cricut Maker
- Scissors
- Kitchen Rules SVG File
Step 1: Upload and resize SVG file
I am pretty sure you know by now how to upload a file into Design space but if you don’t you can check out this Disney Popcorn Set post for the instructions.
Once your design is uploaded resize it to fit your sign.
The sign I purchased was 12 x 5.5. So I resized accordingly.
It seemed a little squatty but I decided to move the decorative pieces a little further from the text when I place the design on the sign.
That will help.
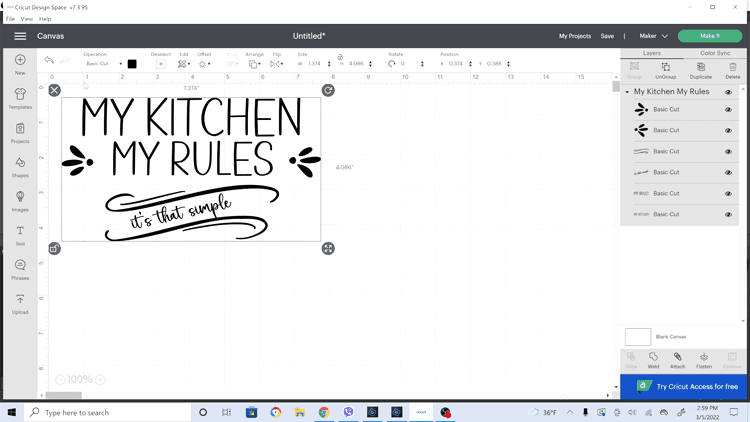
Step 2: Ungroup and add color
Once the design is uploaded, ungroup the design elements but clicking on the “ungroup” at the top right of the screen.

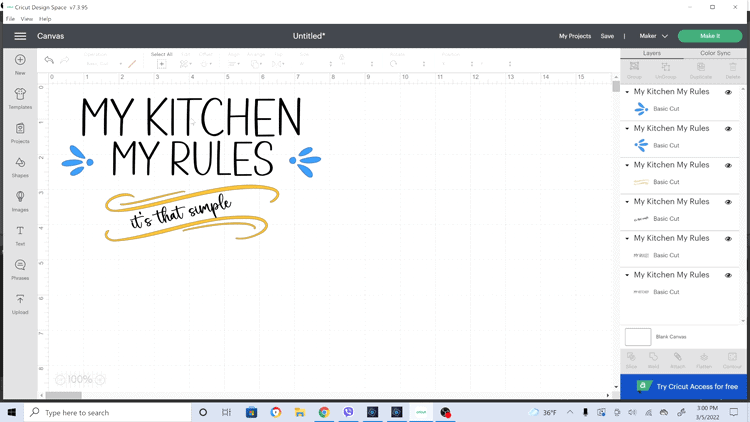
Once the elements are separated you can add color to the pieces.
Adding color is optional of course. I like to do it so I get separated mats and can cut each color by itself. But, you can also place different colors of vinyl on one mat and cut them out all at the same time. It is totally up to you.
For the purposes of this post I am cutting separately.
Click on the design you want to change then click the color box at the top. Choose a new color.
Once the colors are changed you can attach the designs you want to keep together and spaced correctly.
Step 3: Attach the text
I wanted all of the black text to stay together so they would be spaced perfectly.
Choose the first text you want to attach, hold the shift key then choose any others. Once you have all of the text you want click on “attach” at the bottom right of the layers.
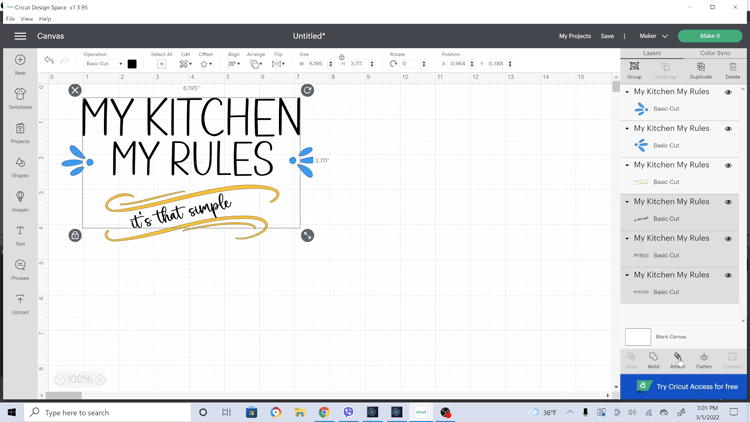
Now that text will remain “as is” when you go to cut. If you don’t attach, design space will assume you want to save vinyl and will place them in the most space saving way on the mat for cutting.
Step 4: Cut and weed the designs
Once you have everything cut go ahead and weed the designs and add the transfer tape to the top.
Step 5: Lay out the design on the sign
Once all the pieces are ready, lay them out onto the sign to get your spacing down.
This is where I added a little bit of length to the overall design. I just pushed the teal pieces away from the text and out toward the edges of the sign to make it fit a little better.

Once everything is to your liking remove the transfer tape and apply your pieces. Use the squeegy tool to help.
Step 6: Change out the rope
I thought I could use the rope piece but the sign was hanging too low in the space I wanted.
So I removed the rope and drilled holes in the wood about 1 inch from the sides and about 1/4 inch from the top.
I added a piece of wire.
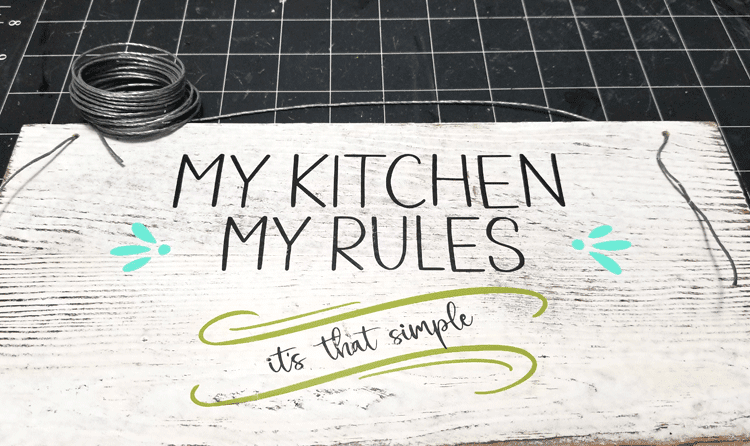
Then used a pencil to wrap the wire and create flat spiral that will hold the wire in place.
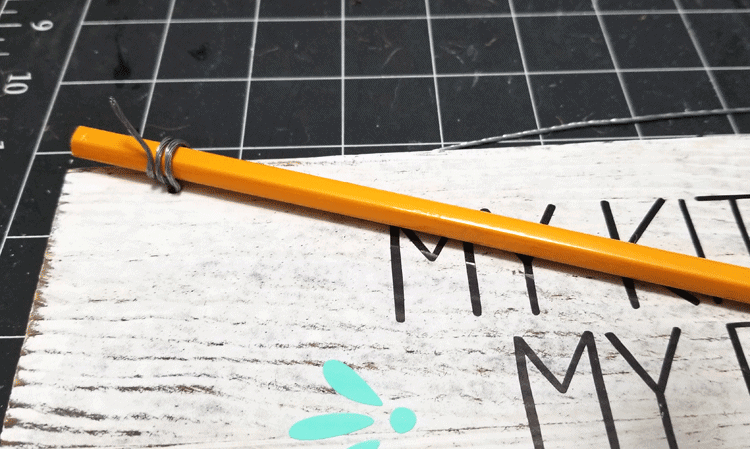
Once the wire is secure…you are done!
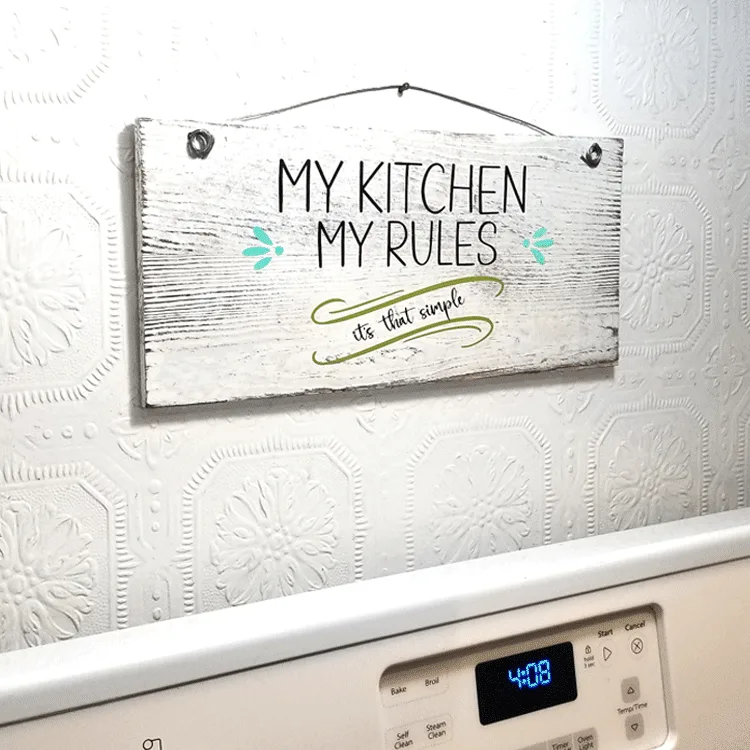
The Finished Easy Kitchen Sign

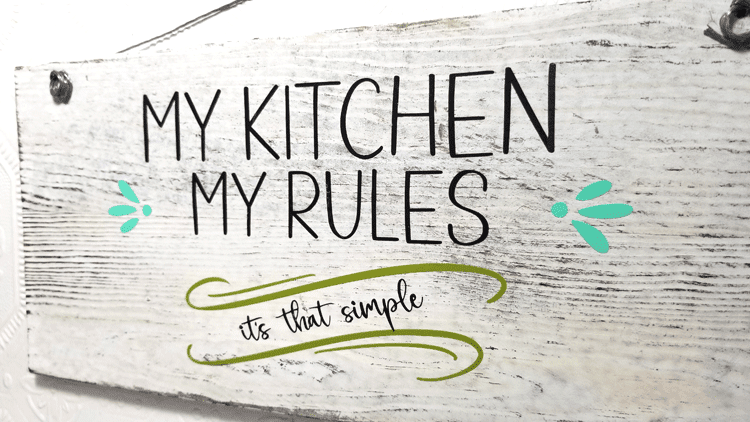
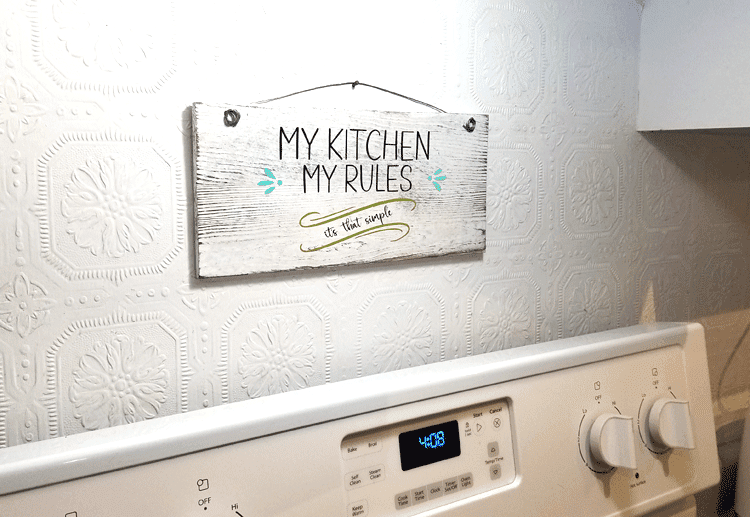

It looks really cute in my kitchen and I love it.
What do you think?
Here are some printable instructions if you want them!
Quick and Easy Kitchen Sign

Create a quick and easy kitchen sign using StyleTechCraft vinyl and a pre-made wood sign. Add any text to customize just for you!
Materials
Tools
Instructions
- Download your SVG file from the Resource Library and upload it into Design space
- Resize the design to fit your sign
- Ungroup the different elements and add color to the non text pieces
- Attach any pieces such as the text that you want to keep together when cutting
- Cut and weed the pieces
- Add transfer tape
- Apply the design to the wood sign
- Remove the rope, drill holes and add wire if needed
- Hang and enjoy!
Recommended Products
As an Amazon Associate and member of other affiliate programs, I earn from qualifying purchases.
-
 Kitchen Rules Sign - Farmhouse Kitchen Decor, Kitchen Wall Decor, Rustic Home Decor, Country Kitchen Decor with Solid Wood Frame 11 x 16 Inches
 -
 SIMPLY ANI Coffee Menu, Know Your Coffee- Coffee Bar Signs Kitchen Decor-Wood Framed Coffee Sign for Coffee Bar- Farmhouse Kitchen Wall Decor-Rustic Kitchen Signs-Gifts for Christmas and Housewarming 12x16 Inch
 -
 Laundry Sign, Kitchen Sign, Bathroom Sign Wall Art Decor, Family Decorative Signs Inspirational Motto Canvas Prints (With Solid Wood Inner Frame) (L-B-K, 6 x 17 inch)
Thanks so much for stopping by today!
Happy crafting,
Michelle


Susie
Tuesday 8th of March 2022
I like it better with the wire. Very ute...and very true!
Michelle
Wednesday 9th of March 2022
Thank you Susie! The wired helped to keep it in place better on the wall too.
Sue Eldred
Monday 7th of March 2022
Cute sign and great directions.
Michelle
Wednesday 9th of March 2022
Thank you Sue. I am glad you like it.