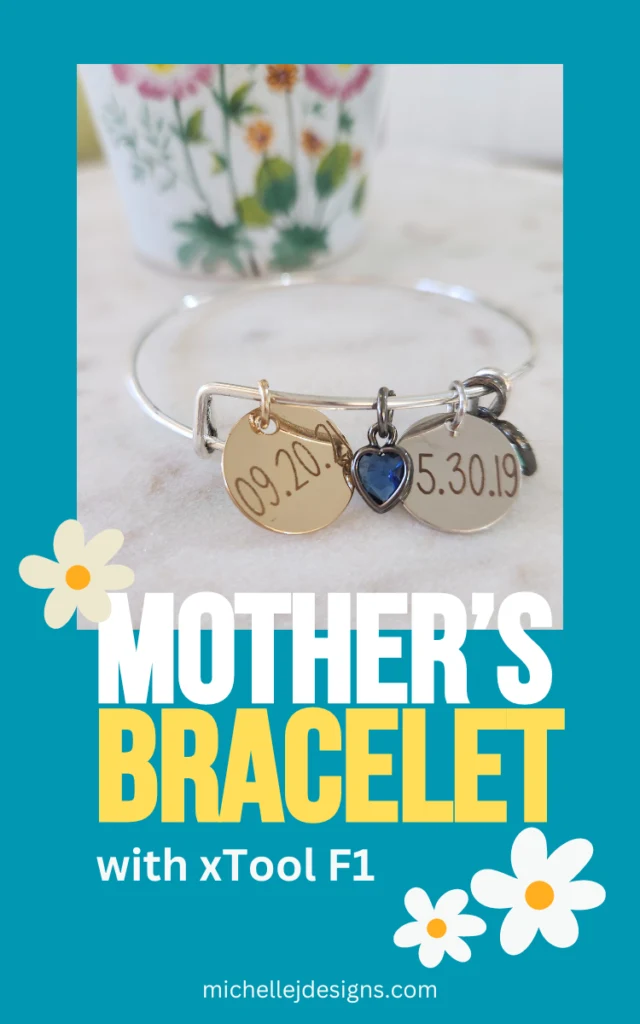
Learn how to make your own engraved mother’s bracelet with the xTool F1 laser/engraver. These are also the perfect gift for Grandma’s!
In the quest for the ultimate Mother’s Day gift, look no further than the charm of a personalized engraved bracelet. Picture this: a chic bangle adorned with delicate charms, each bearing the cherished names and birthdates of her beloved children or grandchildren. With the option to customize with birthstone charms or any other whimsical trinkets, these bracelets are not just accessories, but heartfelt keepsakes.
I am in love with this bracelet. I made it for myself with my Grandkids names and I am thinking about adding some more charms that include things they are interested in right now. Harper loves unicorns and Asher is really into firetrucks. How cute would it be to have an ever-changing bracelet to include their faves at the time.
If you are looking for fun Mother’s Day gifts you are where you need to be. Check out these crafty gifts and printables:
Engraved Mother’s Bracelet
Crafting a mother’s bracelet is easier than ever, thanks to the xTool F1 laser cutter/engraver. With its precision and speed, transforming a simple bracelet into a personalized masterpiece is a breeze. Whether you’re celebrating a first Mother’s Day or honoring a seasoned grandmother, these bracelets are the epitome of thoughtful gifting. Who wouldn’t love a cherished bracelet honoring their children? And if you are not a bracelet person…you can add these charms to a necklace too.
Supplies Needed
I have added some affiliate links for your convenience. You can see my full disclosure here.
- xTool F1 Laser cutter/engraver
- XCS (xTool Creative Space) Software
- Bracelet
- Blank Charms
- Birthstone Charms
- 2 pairs of pliers to assemble the bracelet
Creating Your Name Charms
The xTool F1 is the absolute perfect machine for these charms. It is so fast and easy and the smaller machine is a dream.
First open your XCS.
I used two fonts for these charms. JP Skinny font for the first names and date of birth and Dancing Script font for the middle name. I think they pair well together.
You can create these designs directly in XCS which is so nice.
Type the first name using JP Skinny font.
Then type the middle name, make it smaller and nestle it under the first name. Some of the top of the tall letters are barely touching the bottoms of the others and I like it that way.
Be sure to “weld” your script font so the letters are continuous.
Group the two names together and re-size them to fit on the charm. I like to get out a tape measure or a ruler to get the size of the charm. The either grab a corner with your mouse and drag it to the correct size or use the measurement boxes at the top of the screen. You will have to “unlock” them before changing.
Once you have the size you like, use the framing feature to make sure the design will be centered on the charm. If you have a round charm and a square frame you can click on the design on your screen to show the frame in relation to the text. Then you can move the charm in the machine to make sure all the text will be engraved. With mine, the lower left corner of the frame that was off the charm. It was okay because there was no text in that corner.
I like my design to cover as much of the charm as possible but you may like your design to be a little smaller on the charm.
Choosing Your Settings
This, to me, is the hardest part of using any laser machine. XTool does add some automatic settings for certain materials. I usually try a practice project with those first then change as needed. For this project on these charms I founds the following settings worked best.
Use the IR laser. Set to Engrave. Power: 100, Speed: 50, Pass: 2, LPC: 160
It will be really fast.
Then you can switch names and start the front of the next charm.
Once you are done with the fronts, you can start new text for the birthdates and engrave the back of each charm. You just have to remember to get the right DOB for the right kid. LOL!
If you add an image to your charm your settings are going to be different. They show up differently in the settings than the fonts do. The settings I wrote down are:
IR laser, set to engrave. Dot Duration: 150, Power: 65, DPI: 700
Be sure to test all of these settings on a practice charm because you still may need to make changes.
Finishing Up Your Engraved Mother’s Bracelet
Once all of your charms are engraved you can start adding them to your bracelet. The charms I purchased came with jump rings which was super helpful. I used a jump ring attach the charm. Then I added a birthstone to match each charm.
I have two grandkids so ended up with a total of four charms. Just think how fun it would to fill it up with more children/grandchildren. It would look so cute.
That is it…you are all done! Easy peasy right?
And what a “charming” gift!
I hope you loved this post and if you have questions about the xTool F1 laser cutter please comment below.
Thanks so much for stopping by!
Michelle


