My brother and his wife are moving to our tiny little Northwest Iowa town this week. They live in Virginia and I am afraid their first winter may just do them in. Right now our temperatures are in the mid twenties which isn’t too bad. In this part of the Midwest our temps usually go negative at some point and the wind chills are even worse. I decided to put together a little welcome gift for them. A mason jar winter basic survival kit!
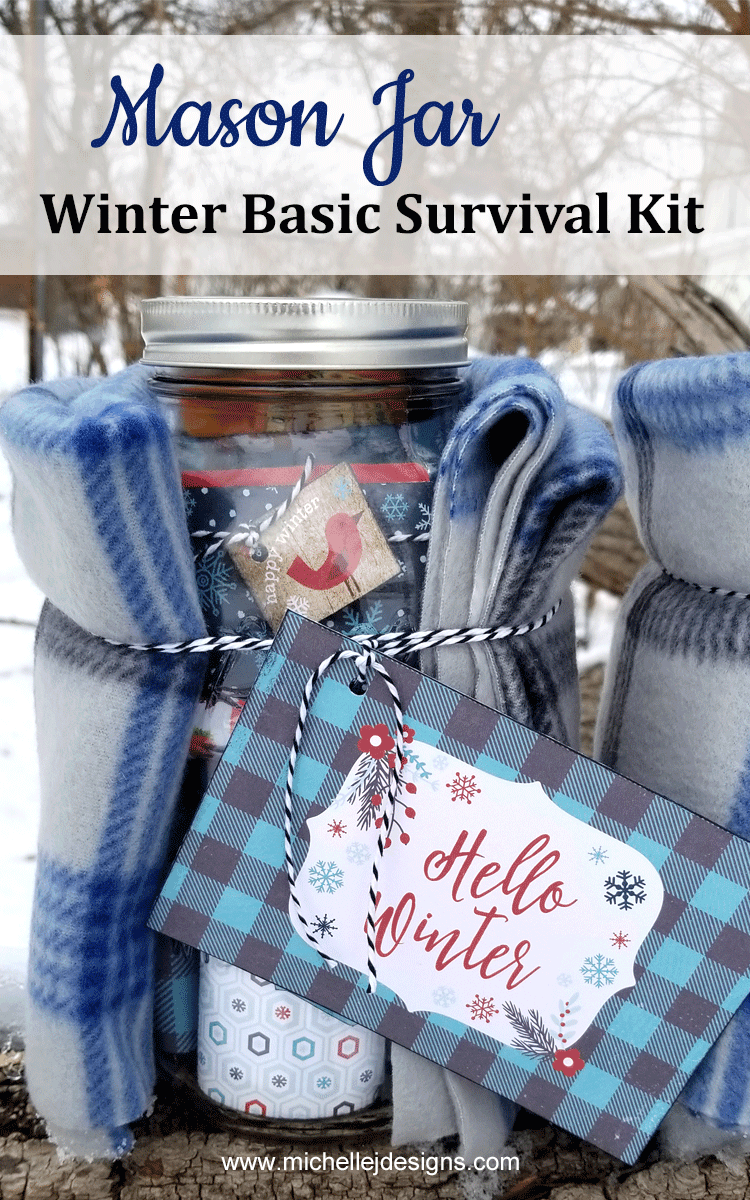

Mason Jar Winter Basic Survival Kit
This winter basic survival kit is packed with all of the things needed to get through a cold, harsh winter.
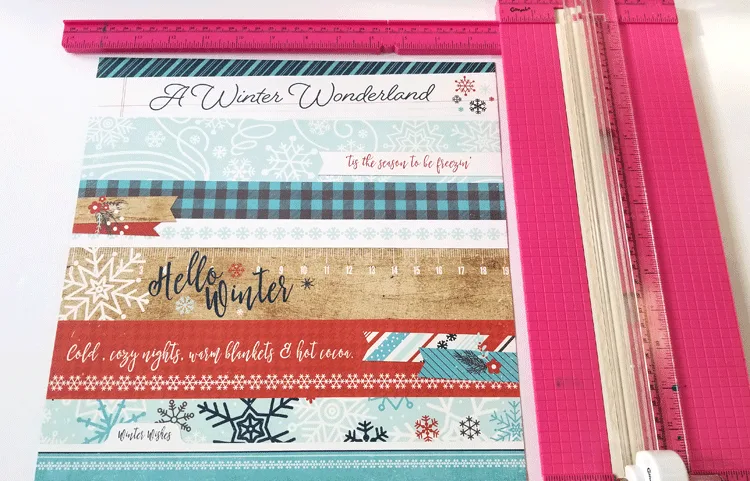
I love to make plain items into cute items by covering them with patterned papers and cute tags. So for this winter survival kit I am using papers from A Perfect Winter by Lori Whitlock sold by Echo Park Paper. Adding these special touches really makes the gift…in my opinion!
Mason Jar Winter Basic Survival Kit

A fun mason jar winter basic survival kit to help get through a cold, long winter.
Materials
- A Perfect Winter Paper
- A Perfect Winter Ephemera Pack
- Large Mason Jars - Gallon Size
- Fleece Blanket or Fleece Scarf
- Hand Sanitizer- Travel Size
- Chap Stick or Lip Balm
- Hand Lotion - Travel Size
- Candy Bar - Regular Size
- Hand Warmers
- Hot Cocoa Mix
- Gloves
- Winter Hat
- Black and White Bakers Twine
Tools
Instructions
- Cut patterned paper to cover each item
- Ink edges of paper with black ink
- Use adhesive and wrap paper around each item
- Add bakers twine and a tag to each item
- Place items into the mason jar
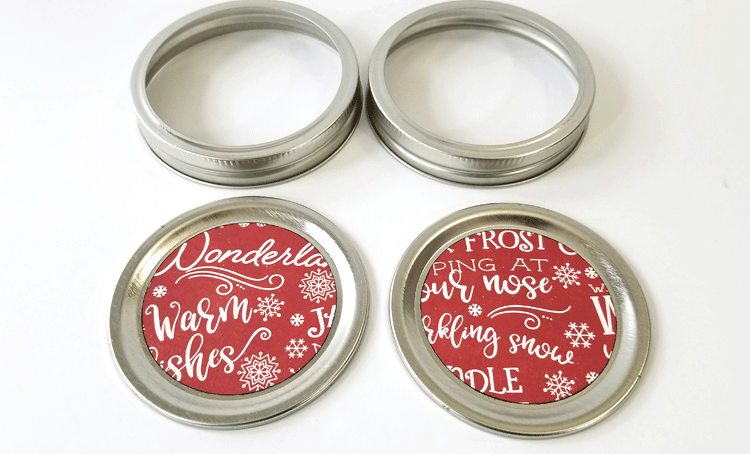
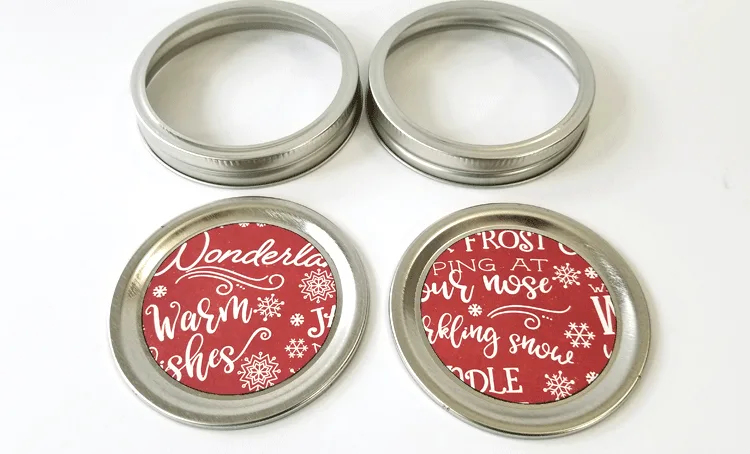
- Cut a 2.5 inch circle, ink the edges and adhere to mason jar lid
- Wrap scarf around the jar and tie with bakers twine
- Add large tag to the front
Notes
Inking the edges of the paper pieces is optional but it gives it a nice look.
If you purchase a fleece blanket instead of a scarf - cut the blanket to create a scarf
Related Content:
If you like mason jar projects check out this page with 10 amazing mason jar projects!
Covering The Items In the Kit
Hand Warmers
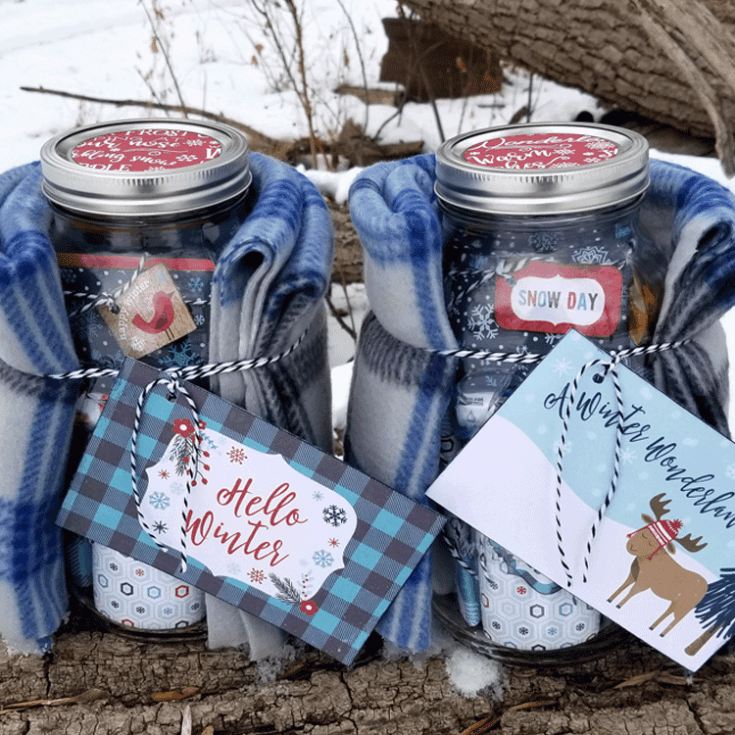
It really makes the gift if the items inside are covered with fun papers and cute tags. Check out the before and after for each of the items. There are two of each item because I made two kits.


I folded these guys and used a 3″ x 8″ piece of patterned paper to cover them. As mentioned above I used black ink around the edges of all of the pieces and added bakers twine and a little tag of some sort.

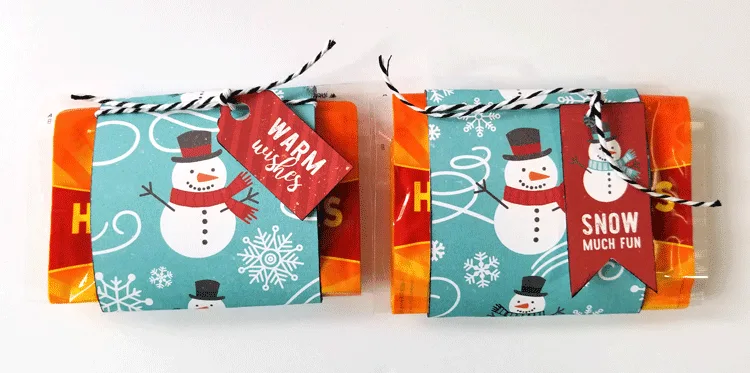
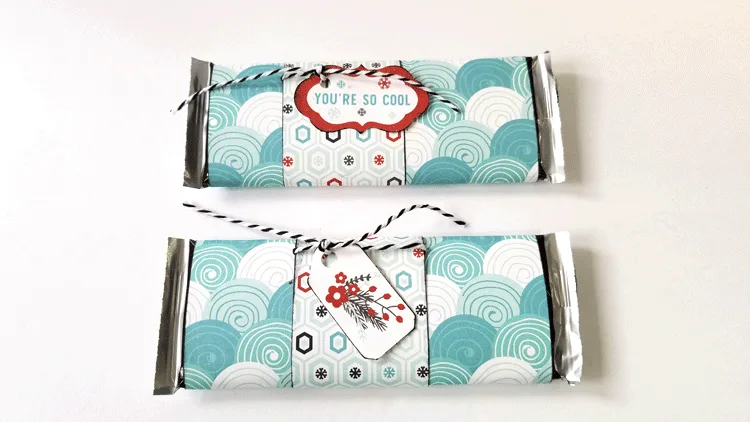
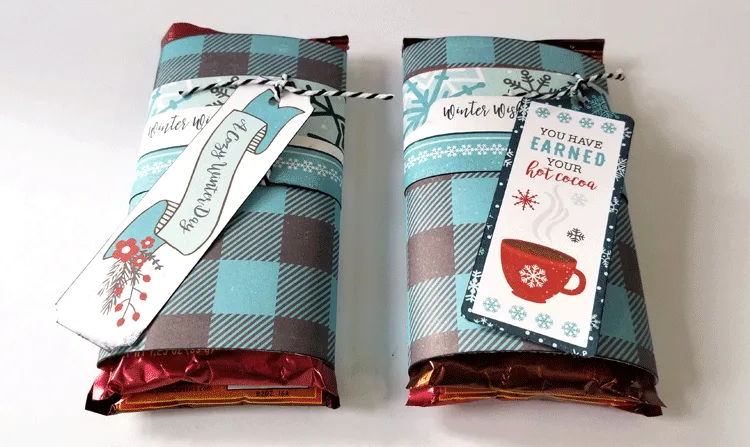
Candy Bars

For these I cute pieces measuring 5.5″ x 6″ to wrap the bar then a smaller piece 2″ x 6″ as a little accent piece.

Hot Cocoa
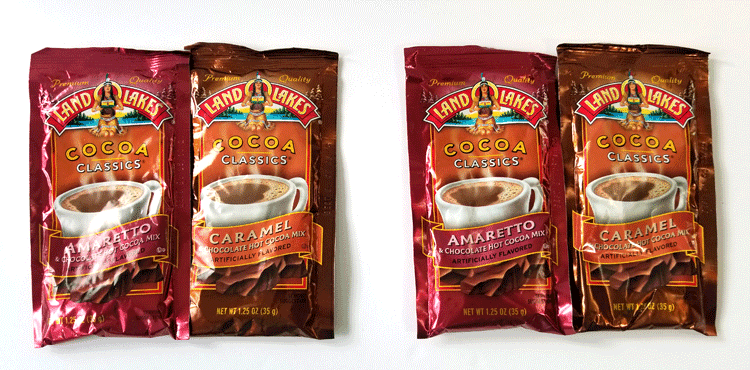
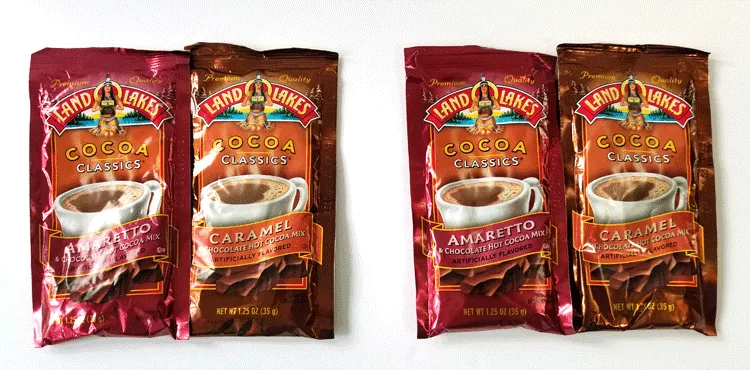
I found these individual packets at my local grocery store and added two flavors to each mason jar kit. They are covered with a paper measuring 5.25″ x 8.5″. The paper comes with a border page and I cut one of these to add as well.


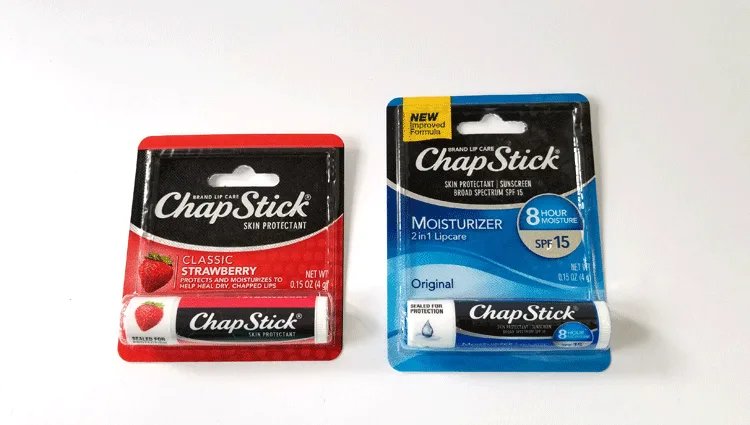
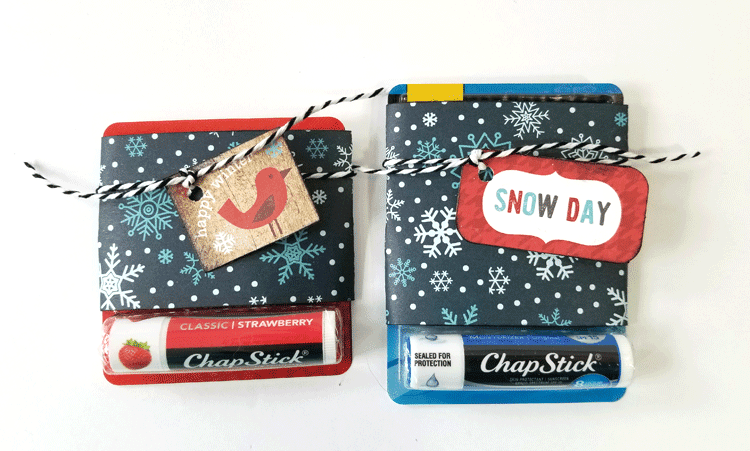
Chap Stick
When I purchased these I wanted a red and blue. They are different sizes so I just varied the cut sizes a little bit for these.

The red chap stick used a 2″ x 7.5″ piece of fun paper and the blue took a 2.75″ x 7.5″ piece.

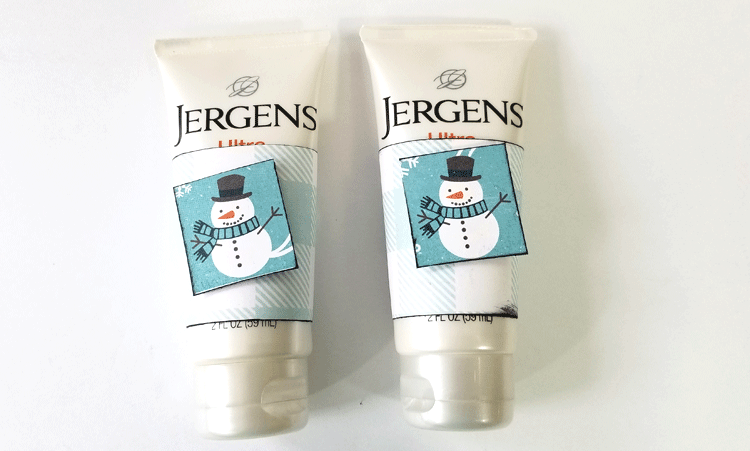
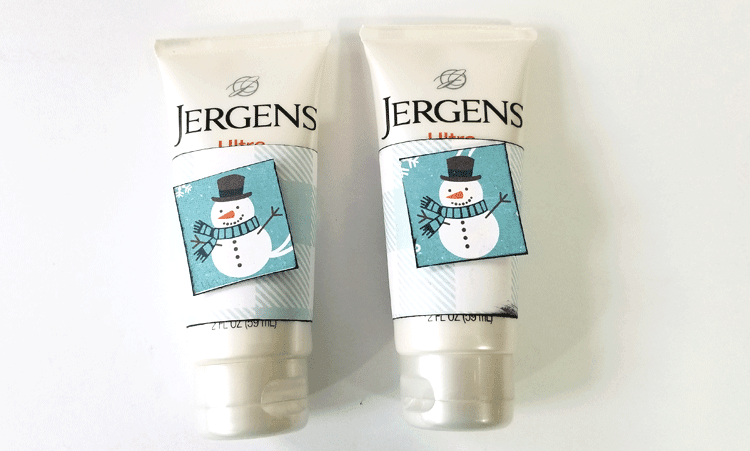
Hand Lotion
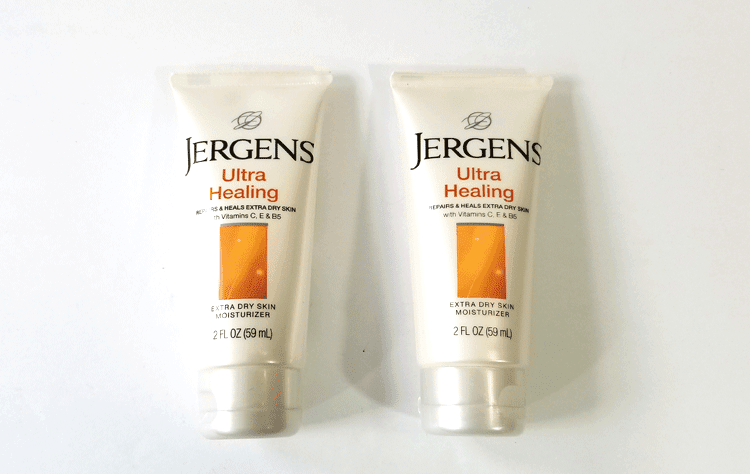
These are a little slanted but it still worked great. The wrapped pieces measured 5.5″ x 2″ and instead of a ribbon and tag I opted to cut out a small snowman from one of the papers and used some mounting tape to stick it on. Cute right?
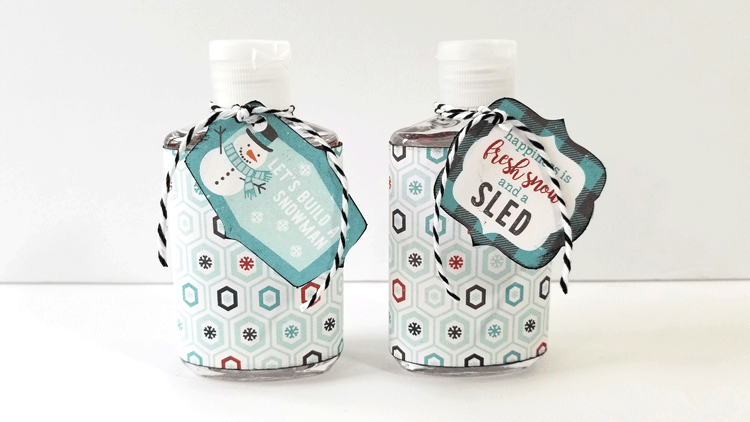
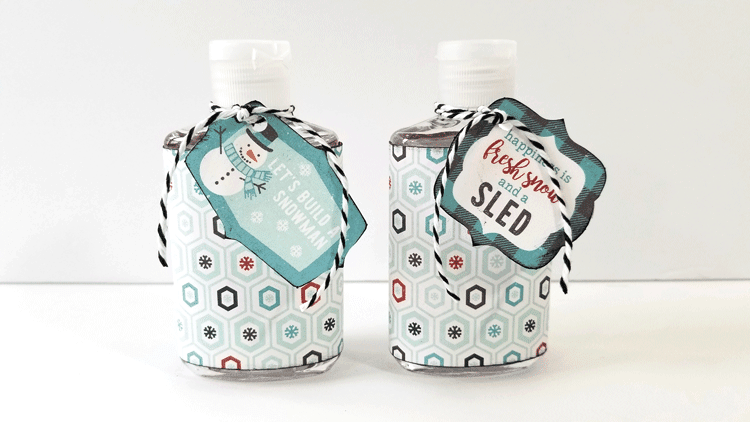
Hand Sanitizer

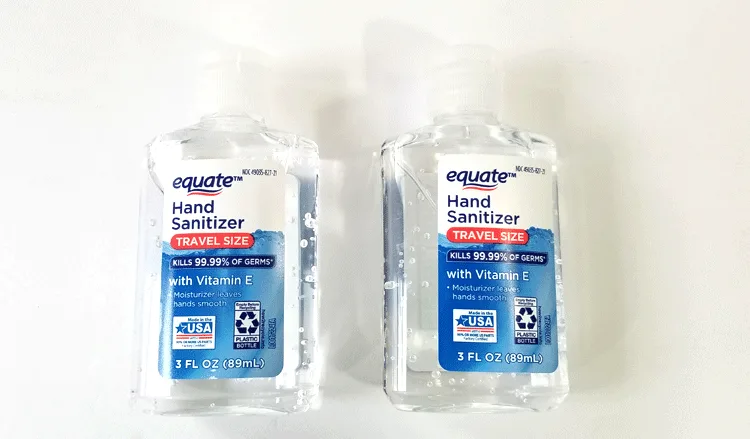
These were cut into 2.75″ x 6.5″ pieces to wrap around the travel size bottle. The tag was wrapped around the neck of the bottle just for something different.
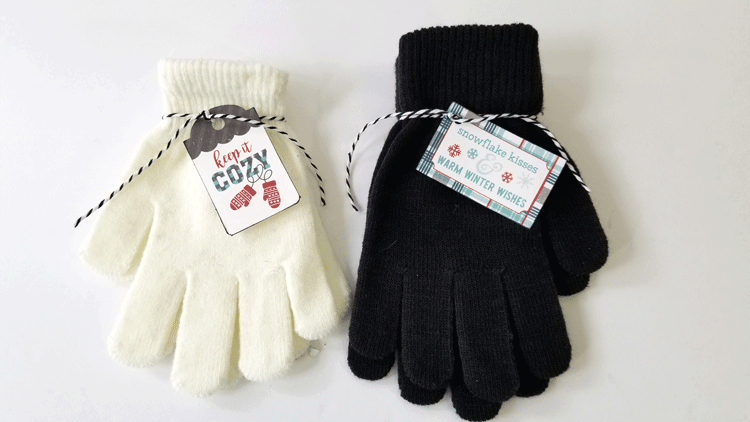
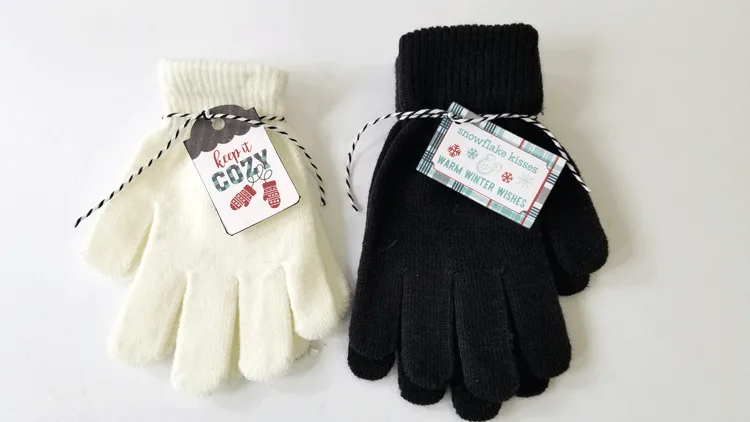
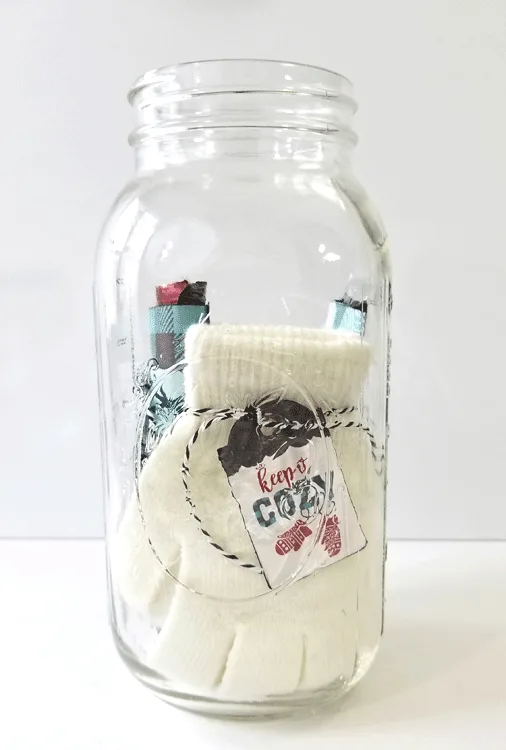
Gloves
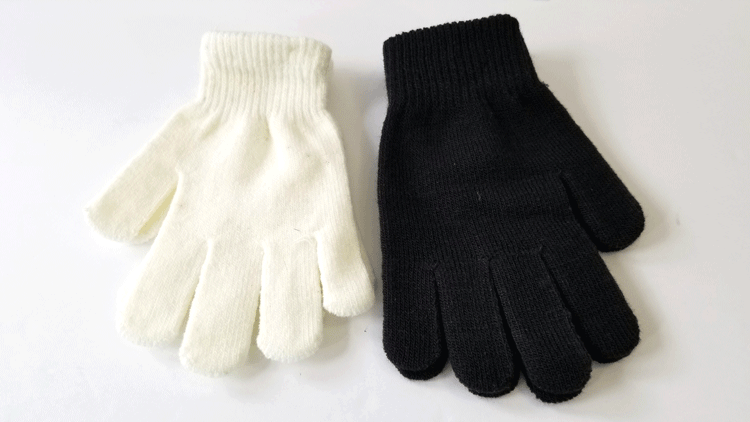
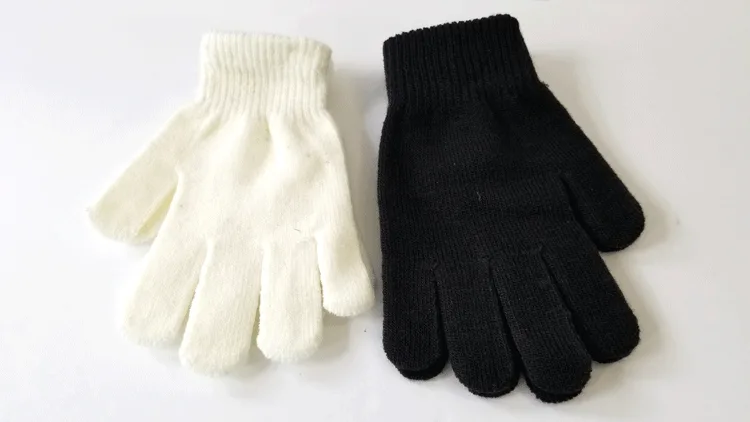
No paper was wrapped around the gloves. I just used the bakers twine and a fun tag.
Finishing Touches
Cut the 2.5″ circle for the top of the lid. I used my Silhouette cutting machine to do this but if you don’t have one you can trace and cut or purchase a 2.5″ circle punch.
Putting It All together
The fun part is trying to get it all to fit in the jar. Here are the steps I took to do that. The scarf would not fit so I wrapped it around and tied it with the bakers twine.
Start with a few items. The gloves, the cocoa and the candy bar were first in the jar.

Then the rest of the items were added and stacked until they were all in.
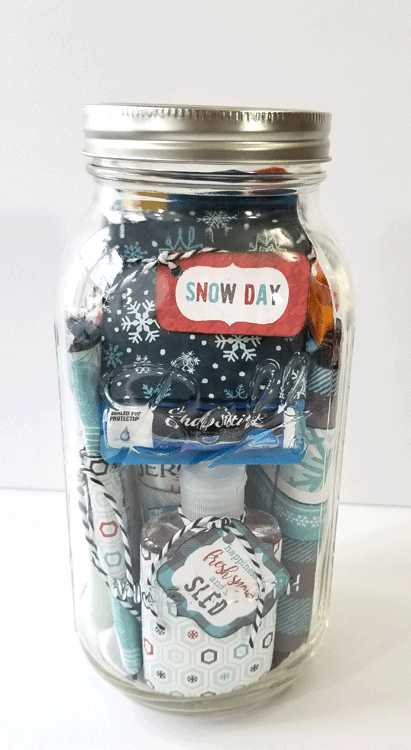
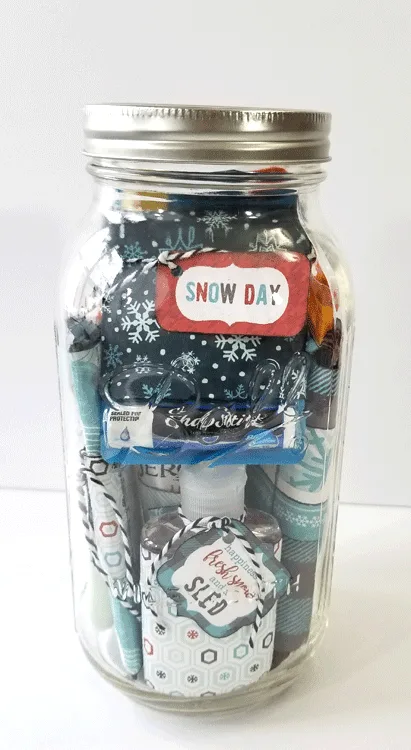
Here is the back side view. It is jam packed!

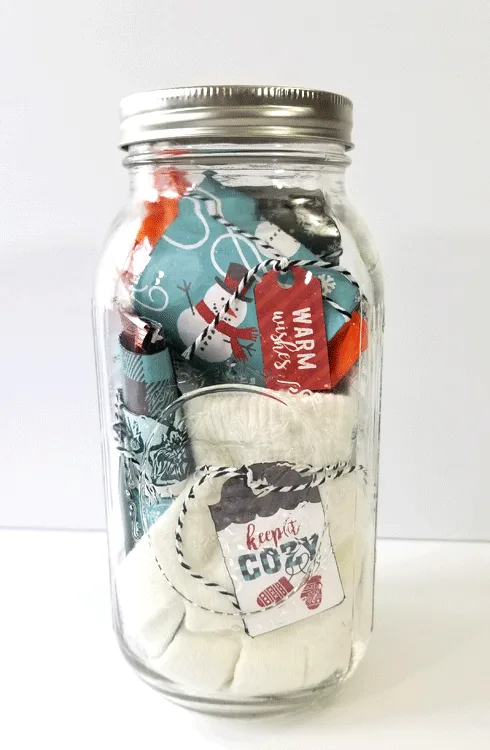
Add the scarf.

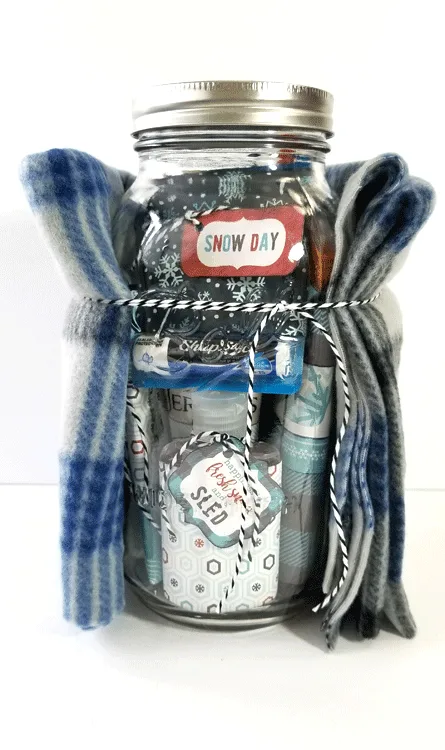
Once you add the final large tag on the front you are good to go! What a cute gift.
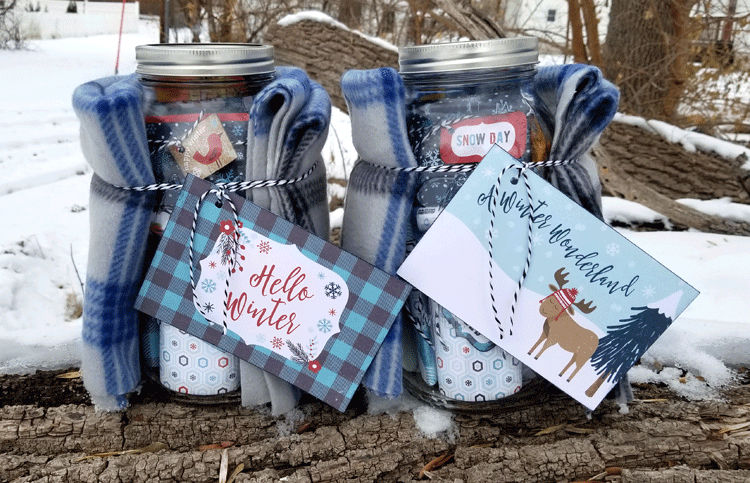

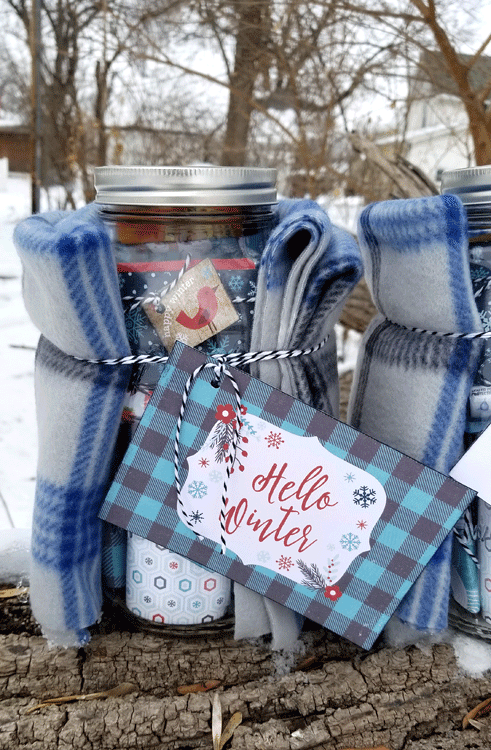


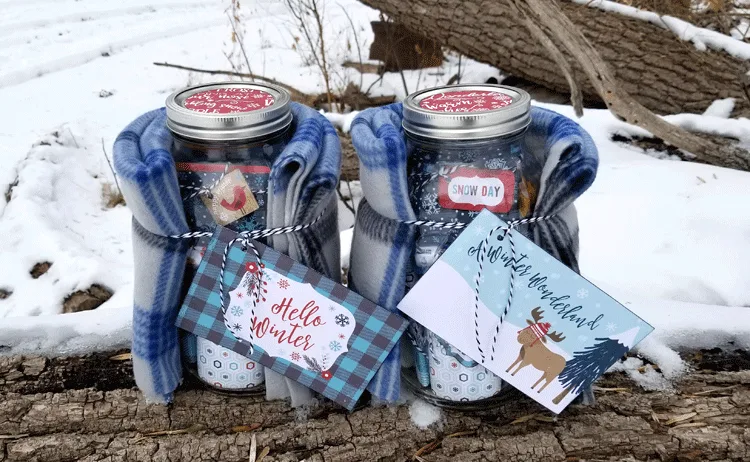
They turned out so cute. This is why I love mason jar gifts!
I have made some fun survival kits before. Check out my Holiday Shopping Survival Kit and the St. Pat’s Survival Kit. They are both awesome!


Thanks so much for stopping by,
Michelle


Alline Rosenwald
Tuesday 26th of November 2019
Thanks for the post!
Mary
Tuesday 18th of December 2018
Michelle this is such a clever idea to put all these essentials together. It would make a great hostess gift.
Michelle
Tuesday 18th of December 2018
Thank you Mary! It is so fun to make these types of gifts. And you are right. This would make a great hostess gift!
Nikki Gwin
Monday 17th of December 2018
I'd love to have this winter jar myself and I live in Alabama! :) gwingal
Michelle
Tuesday 18th of December 2018
Oh that is funny. Maybe you need a different kind of survival kit. LOL! It is pretty cute though.
Julie Briones
Monday 17th of December 2018
Such an adorable idea for a gift for Christmas! Love the color coordinated labels and how cozy the jar looks wrapped in the blanket. Pinned, of course! ;-)
Michelle
Monday 17th of December 2018
Hi Julie! Thank you so much. It does look all warm and cozy!
Patti
Monday 17th of December 2018
Super cute idea Michelle. I definitely need some of those hand warmers.
Michelle
Monday 17th of December 2018
Yes Patti, those hand warmers saved me when we visited Canada. I know they will love them on a really cold day. Thank you!