Create DIY Valentine tiered tray decor using Dollar Tree toy blocks, some wood beads, and your Cricut Maker or cutting machine.
I love tiered trays. This one was made using Dollar Tree items which is one of my favorite things to do.
I have decorated it for Halloween, Thanksgiving, and now Valentine’s Day. But I missed Christmas and the winter decor.
They are so fun to decorate so I regret not taking the time to do it for the holidays. Next year for sure!
Valentine decor is always such a great change after having the Christmas deocrations up for so long. I love the traditional red and pink colors. They are cheery and make me smile.
If you LOVE Dollar Tree crafts and gifts then you are definitely in the right place.

Valentine Tiered Tray Ideas
So what I made for the tiered tray are the little wood blocks with the cute, Rae Dunn like font on them.
They just turned out so darn cute.
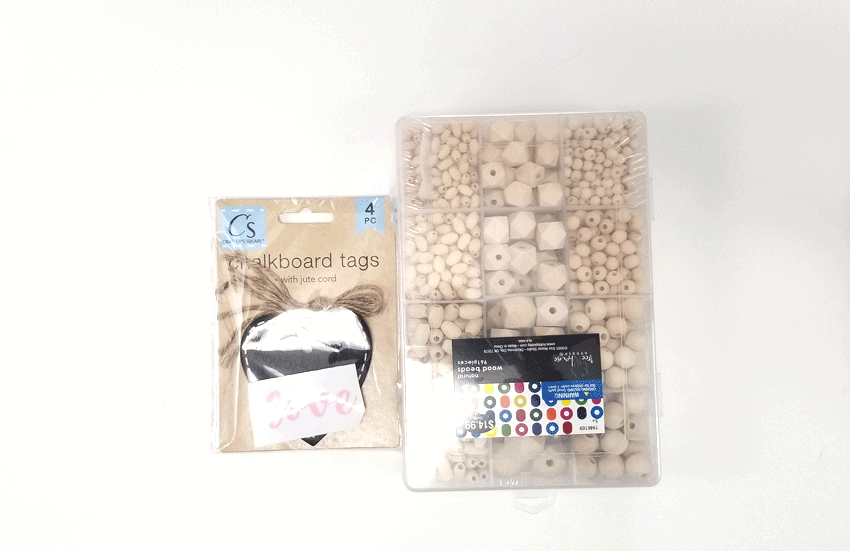
Materials Needed:
I have added some affiliate links for your convenience. You can see my full disclosure here.
- Dollar Tree Toy Wood Blocks
- Wood Glue
- White Spray Paint
- Black, Red, and Pink Vinyl
- Transfer Tape
- SVG Valentine Cut Files
Tools Needed:
Step 1: Create your block shapes
Gather your toy blocks. These are from a game like Jenga so the wood blocks are small and rectangle.

I wanted to make three small square signs and two longer rectangle signs for my Valentine tiered tray.
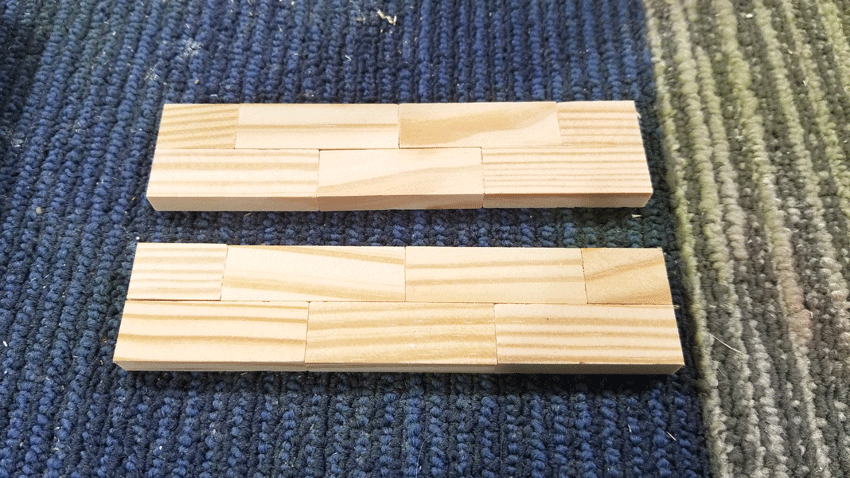
I place three of the blocks together to make a square. Then I put two rows together to form a rectangle. I wanted them off set from each other but you do not have to do this.
I used the wood glue to glue the sides together.
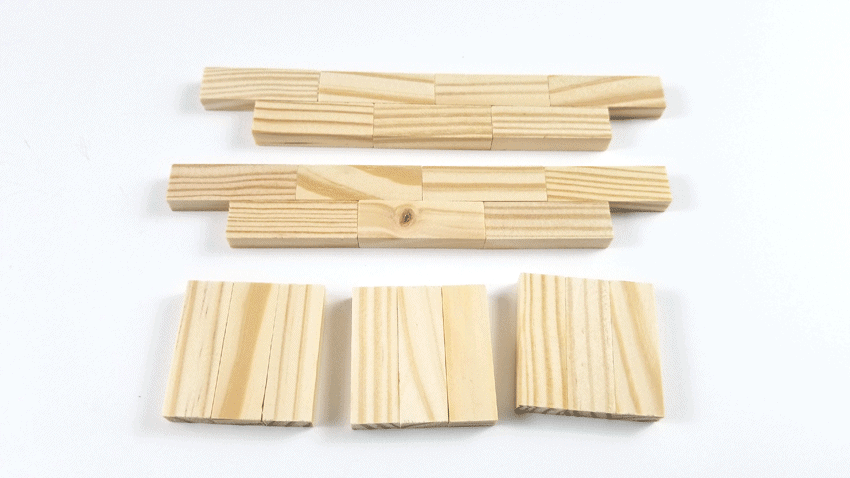
Once the glue was dry I took the two rectangles into the garage and used the saw to cut off he ends that are overhanging.
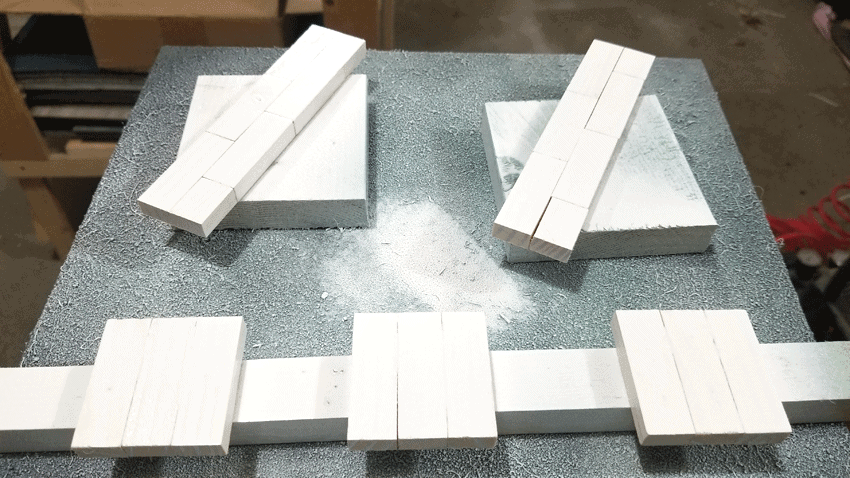
Step 2: Paint the wood blocks
I used Rustoleum White paint and primer for the blocks.
I sprayed on two coats then when the paint was completely dry. Once they were dry I gave them a light sand.
Step 3: Download and cut the vinyl pieces
I designed some cut files for you. You can find them in my Resource Library under Cricut and Silhouette Cut Files.
They are very similar to the files I used for my project. When I went to upload my designs to the Cricut design space it would not let me upload. I don’t know if the program had a glitch at that particular moment or what.
I actually re-created my designs as close as I could by using the text and shapes in the program.
They turned out super cute. Here is a screen shot of design space just before I cut them out.

The grouping at the top left was my red vinyl, the grouping on the right got cut from pink vinyl and the text at the bottom all got cut from black matte vinyl.
Once your designs are the correct measurements and you have them placed just as you want them go ahead and cut them.
Step 4: Weed and apply the vinyl
The font I used, Beanstalk Skinny, is pretty skinny and these are pretty small designs. Be careful when weeding them. Go slow and don’t be impatient like me.
I was so relieved when they were done. LOL!
Then I added transfer to the tops and applied them to the mini wood signs.
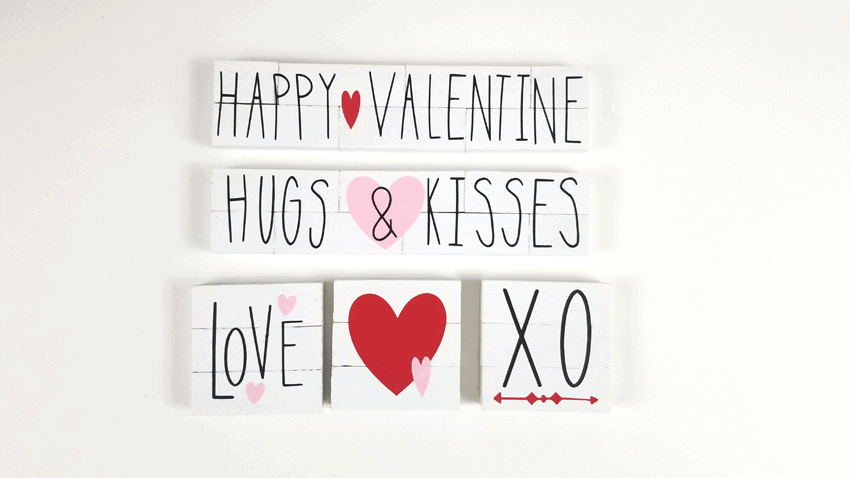
I just love the way they turned out.
Making The Wood Bead Tag
Another part Dollar Tree item on this Valentine tiered tray that I made was the cute heart tag with the wood beads.
Tiered trays aren’t the same without some beaded thingy… right? Well, I decided to make a small one with some wood beads and the cute heart tag from the Dollar Tree.
Materials Needed:
- Wood Beads
- Wood Heart Tag
- Pink, Metallic Purple and Red paint
- Twine
- Pink Vinyl
- Mod Podge – Glossy or Satin
Tools Needed:
- Dollar Tree Paint Brushes
- Paint Brushed For Painting
- A Piece of Foam
- Cricut Maker
Step 1: Figure out your bead design
I got this package of beads from Hobby Lobby. There are a lot of wood beads in it and they are all sizes and a few different shapes.
I wanted to create a pattern of beads instead of using just one size.
Once I figured out my pattern I decided which beads got which color of paint.
Step 2: Paint your beads
I was trying to figure out an easy way to paint these guys because I knew they were going to just roll away each time I tried to paint them.
Jeff came up with a brilliant plan. He has a lot of the Dollar Tree paint brushes. They are super cheap and they have tapered handles that are perfect for the beads.
I added two to each brush and painted the beads.
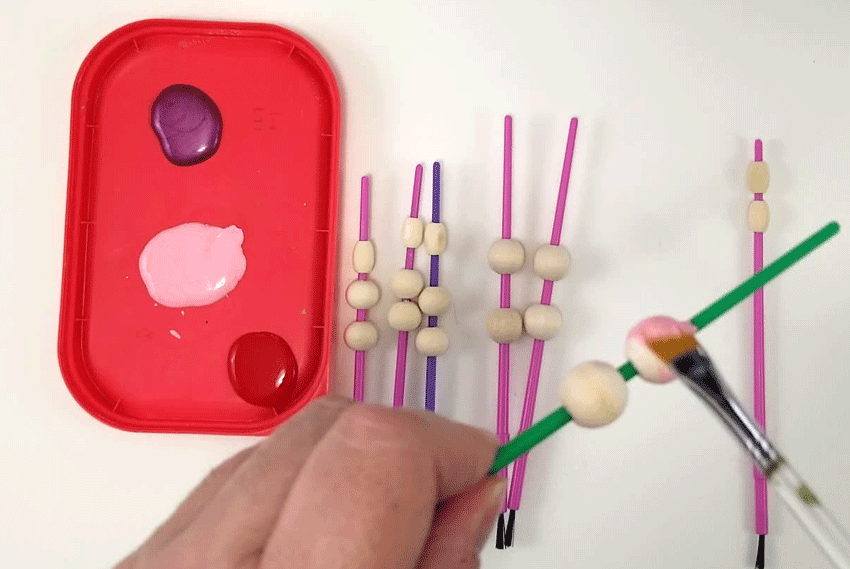
They stayed in place and were easy to paint.
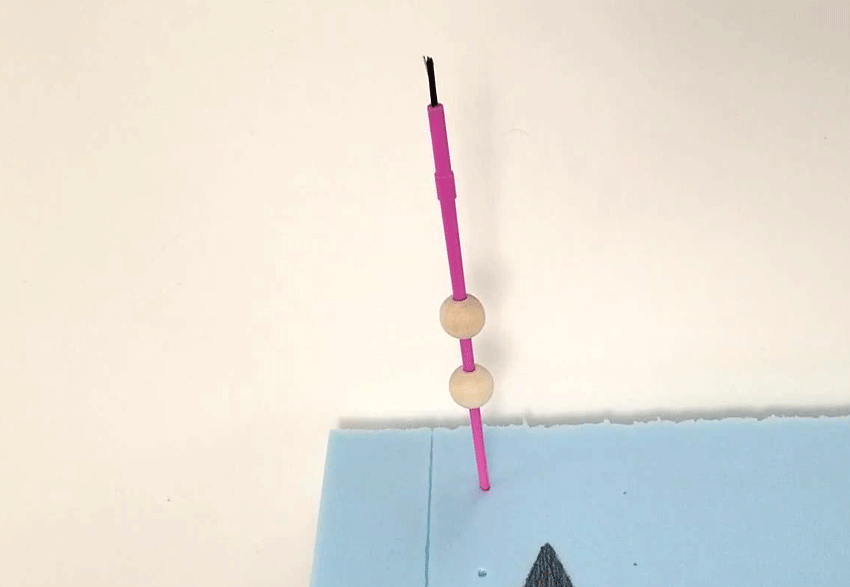
When I was done painting them I pushed the end of the brush into the foam for them to dry. The beads in the photo below have not been painted yet But I wanted to see if the foam would work so I took a pic.
It was such a great idea.
Step 2: Add vinyl to the heart tag
While the paint is drying, create the word LOVE in font you like and cut it out of the Cricut. Pink vinyl was my choice this time.
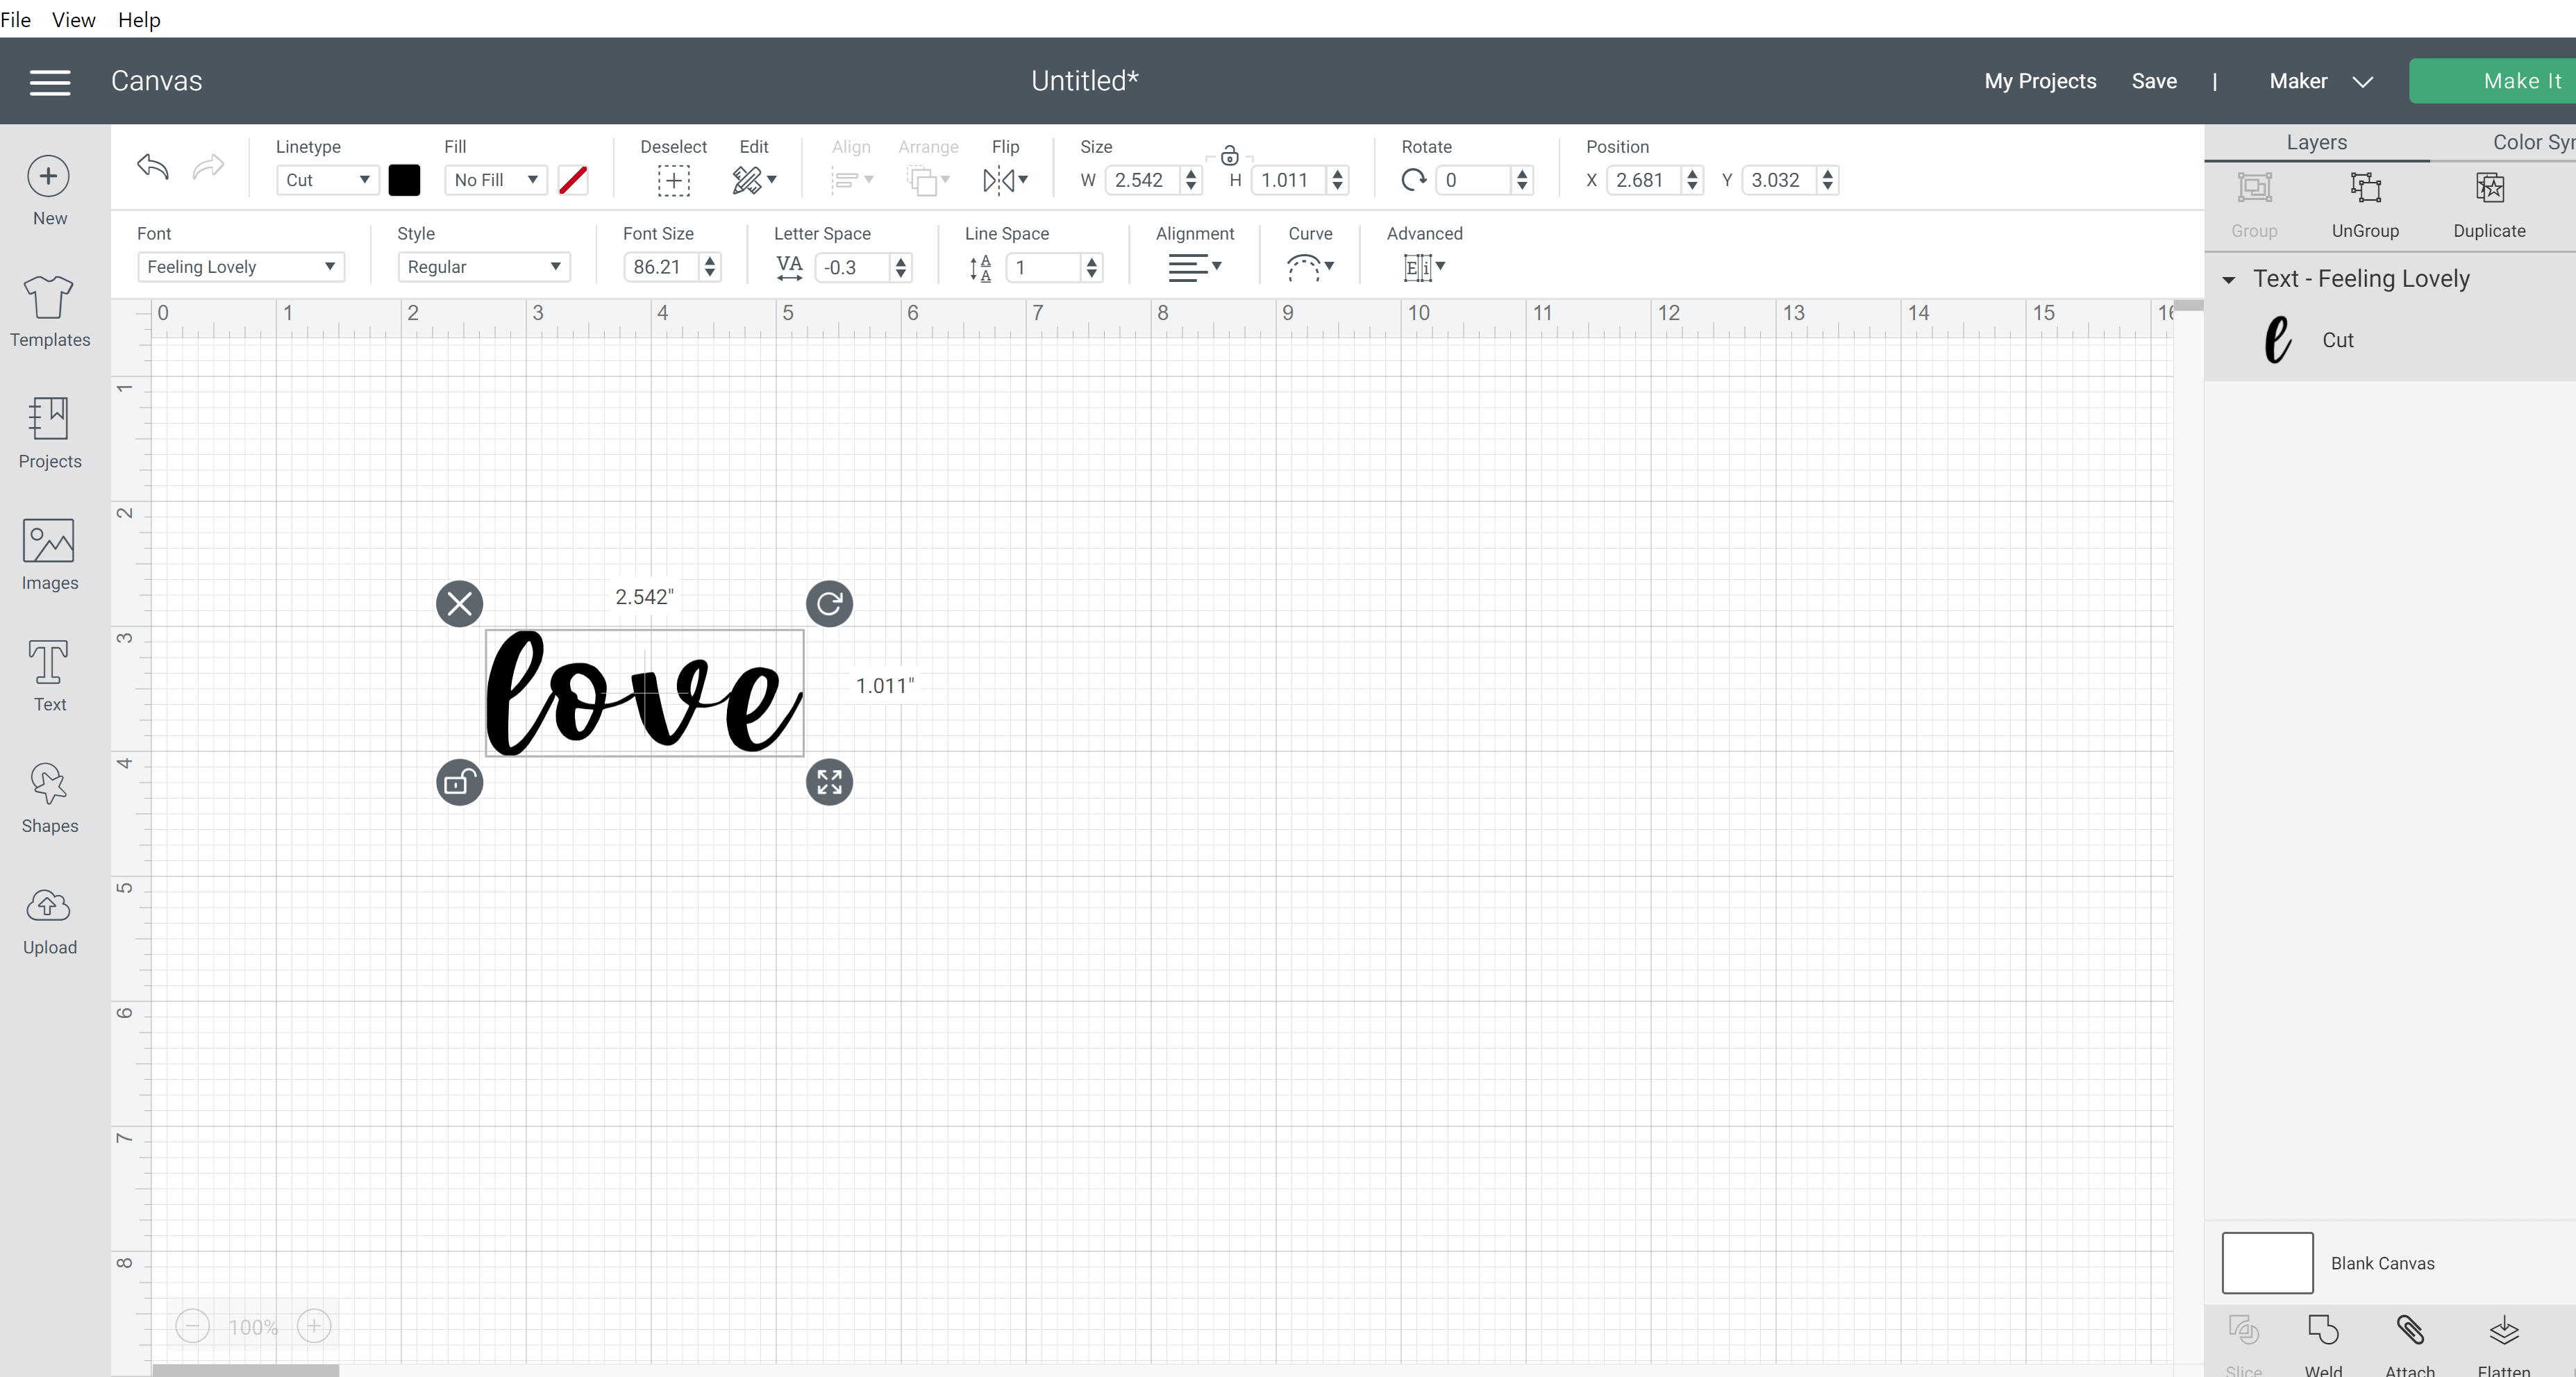
I used the font Feeling Lovely for this from Creative Fabrica. You can become a member and have access to thousands of fonts and designs.
Once it was cut out I added a layer of Mod Podge to the front of the wood, chalkboard heart. I wanted to give it a more glossy finish so the vinyl would stick better.
Step 3: Put the pieces together
Once all the parts were painted, dry, vinyled and ready to go I put it all together. I tied twine to the hear tag then strung the beads.
Once they were all on I tied a couple of knots to keep them from falling off of the twine.
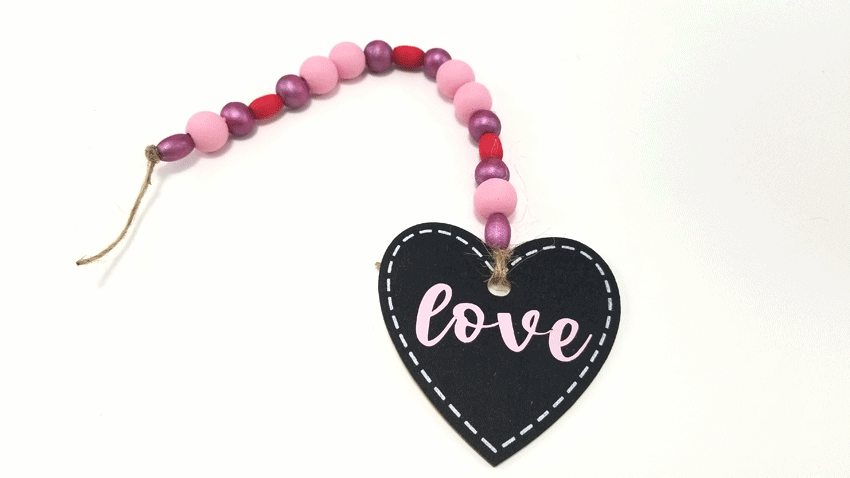
It turned out soooo cute!
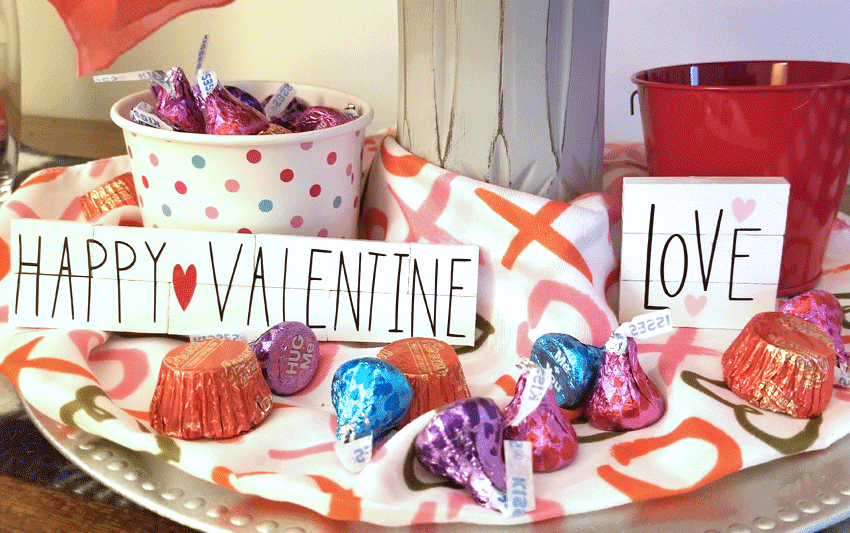
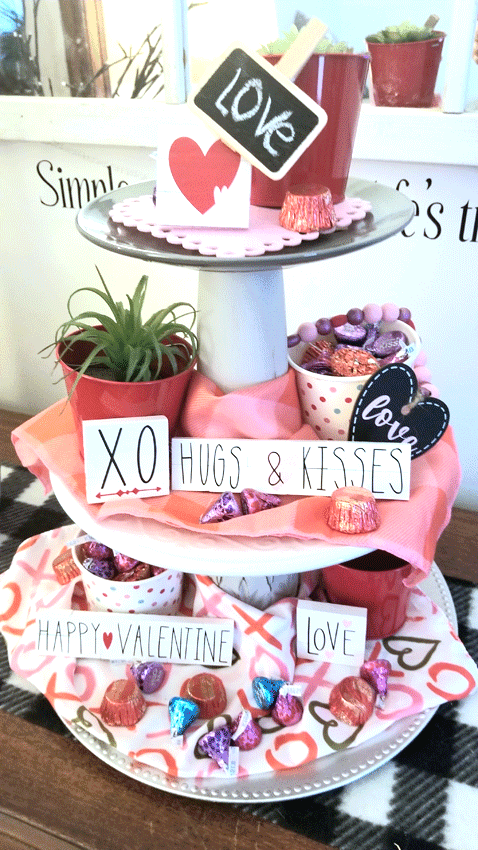
Add Everything to The Tiered Tray
I placed a couple of the wood blocks on the first 2 tiers then added one to the top as well.
The beaded heart tag looks really cute sort of pouring out of the candy bowl.
What do you think?

Other Dollar Tree items from the tiered tray are the bandanas (they both came in the pack together so 50 cents each, the felt heart on the top tier, the succulent plants and the entire tiered tray itself.
The rest of the items came from either Michaels or Hobby Lobby and the little polka dot cups came from a local scrapbook store in Estherville, Iowa called The Outlet.
This was such fun to put together.


I hope you liked this fun Dollar Tree post.
My Dollar Tree blogging buddies have also created Valentine posts so be sure to head over to visit them as well.
Beverly at Across the Blvd – Valentine’s Day Vignette
Heather at DIY Daily Life – Valentine’s Day Ornaments
Michelle at Our Crafty Mom – Love Sign Wall Art
If you would like to see Dollar Tree inspiration everyday from a lot of creative crafters you are welcome to join our Facebook group!
Thanks so much for stopping by today and happy crafting!
Michelle


Niki ~ Life as a LEO Wife
Sunday 23rd of January 2022
I made a set of 6 from Dollar Tree for this Valentine's Day too! This year I went with blush, gold, white, and gray for all of the decor. I love your set! It looks great. Got to love a good Dollar Tree upcycle. If you get a chance, I'd love for you to come share your posts on my link parties at LifeasaLEOWife.com, Crafty Creators, open Thursdays 6am CST thru Mondays 11:59pm, & Happiness is Homemade, Sundays thru Thursdays. I think our readers would love this tutorial. XOXO, Niki ~ Life as a LEO Wife
Niki ~ Life as a LEO Wife
Monday 24th of January 2022
@Michelle, I've included your post in a roundup of great tiered tray set tutorials for Valentine's Day. I hope it drives a lot of people to you!
Michelle
Monday 24th of January 2022
Hi Niki! Thanks so much. Yes. I do love the Dollar Tree. I will check out your link parties. Thank you.