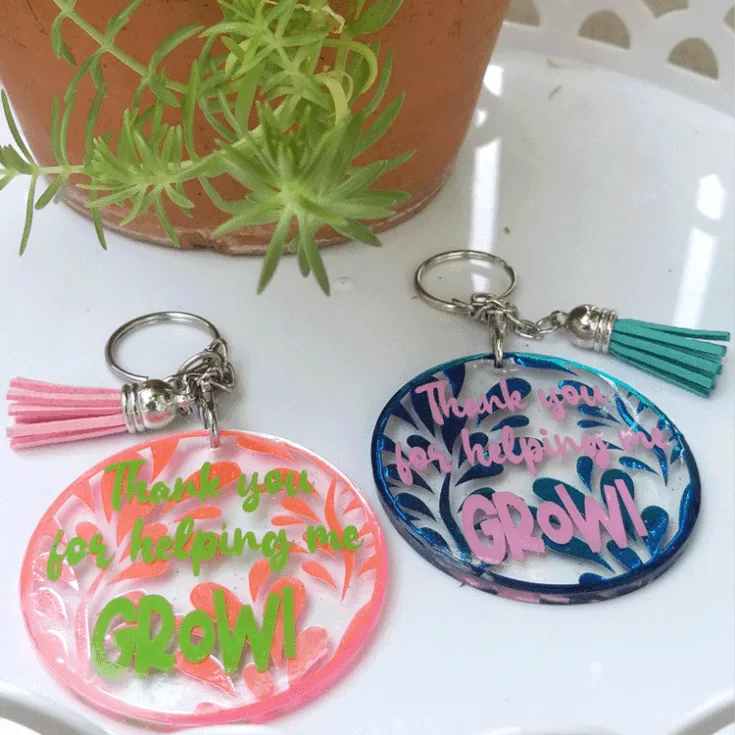
Learn to use UV resin, vinyl and acrylic blanks to make your own DIY keychains. There is no mixing epoxy and it only takes minutes to cure.
I am learning the in’s and out’s of UV resin and I love the results I am getting.
I am not going to lie, it takes a little bit of trial and error but these DIY keychains that I made for teachers and back to school are my best project yet.
This is my 3rd time using this process. The other two turned out pretty good but these are too cute.
When you pair them with vinyl from StyleTechCraft you cannot go wrong.
Cute keychains are the perfect small gift. Everyone has keys, right? My DIY wine cork keychains are fun to make too.
DIY Keychains Using UV Resin
Keychains are a dime a dozen…I know but I love to make them. I recently started using the UV resin and it is perfect for these keychains.
There are so many things you can use the resin with and keychains is just one of them.
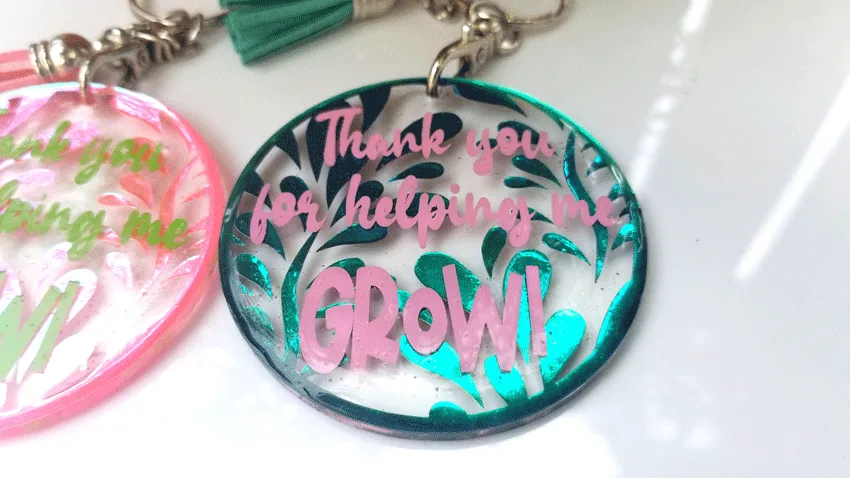
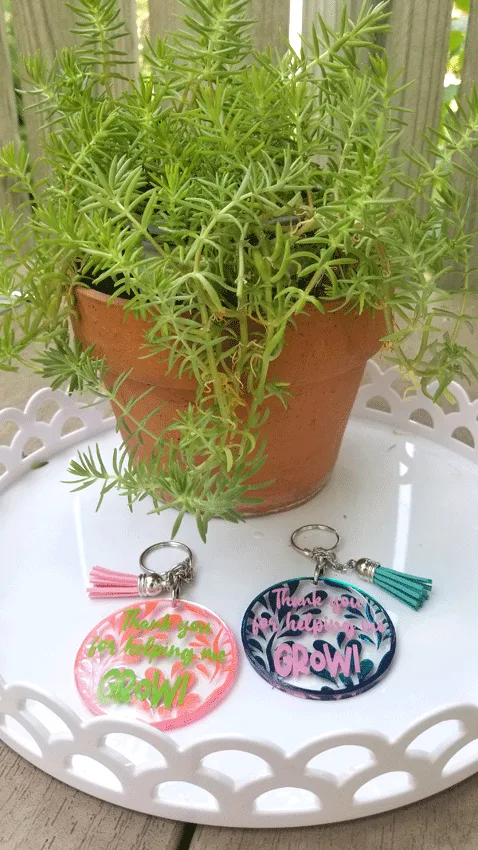
I am going to use StyleTechCraft opal and Gloss Craft vinyl on my keychains. The opal will shimmer in the background and make the text stand out.
I choose some of my favorite colors for these keychains.
You should follow StyleTechCraft on Facebook. They are always showing new products, ideas for vinyl projects and more!
Materials Needed
I have added some affiliate links for your convenience. You can see my full disclosure here.
- StyleTechCraft Opal Vinyl
- StyleTechCraft Crafty Glossy Vinyl
- Transfer tape
- 2.5″ acrylic circle keychain blanks
- SVG cut file for keychains
- Thank you for helping me grow SVG file
- UV Resin
- UV Light
- Toothpicks and/or popsicle sticks
- Cricut Joy
Making A Cute Keychain
Step 1: The cut files
First you need to find your cut files and download them onto your computer. I got my keychain pattern from Creative Fabrica.
This is a membership site but you can also purchase files without a membership. There a lot to choose from on this site so look around if you want something different.
If you love fonts like I do they have some really nice fonts and there are thousands to choose from. It can be a rabbit hole. LOL
I created the cut file “Thank you for helping me grow!” It is perfect to use with flower or plant designs and works great for a teacher. You can find it in my Resource Library. Look in the Cricut and Silhouette cut files section.
After you download the cut file
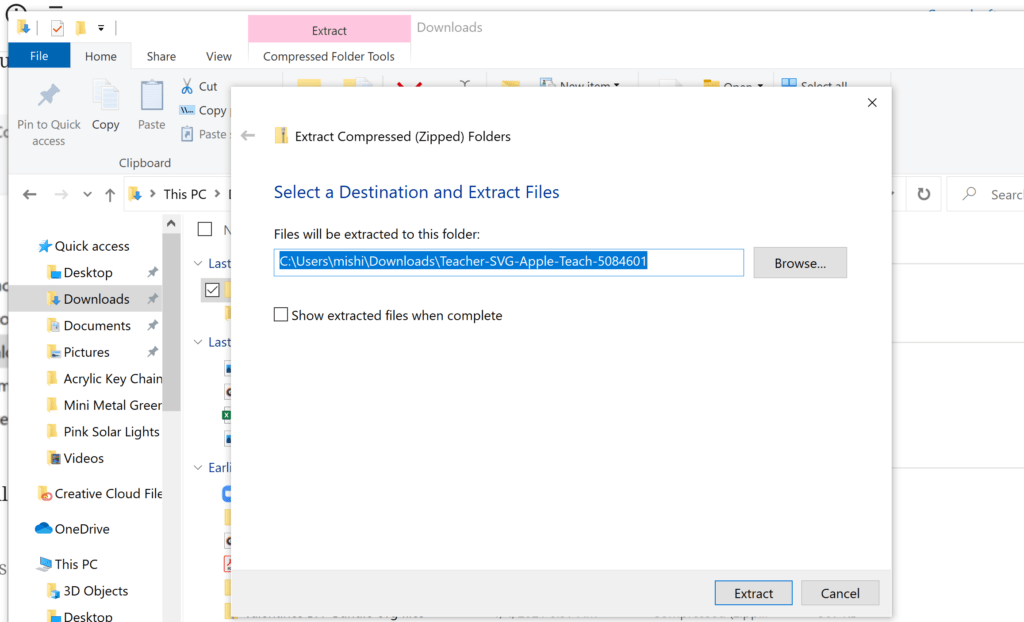
Downloads usually go into your “download” file on your computer. You will want to find it in there and right click on the file.
When you right click on the file choose “Extract All”. Click on “Browse” and find the file where you want to save this file. Then click extract.
Upload to Design Space and cut the design
The next step is to get your file into the Cricut design space software.
Instead of writing and snapping a screen shot of each step. I decided to make a short video.
If you are wondering about settings for the Cricut Joy or how to cut two colors of vinyl at the same time then please watch.
Step 2: Weed and add the transfer tape
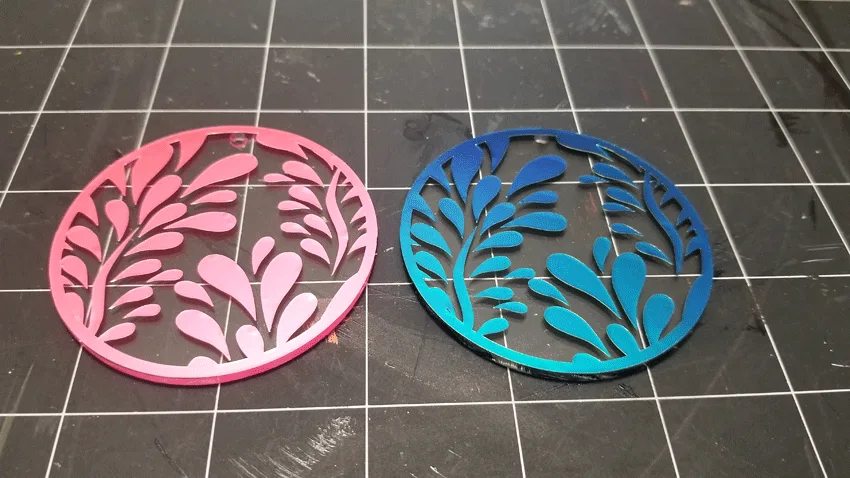
Once the designs are cut, weed them and place a piece of transfer tape on top.
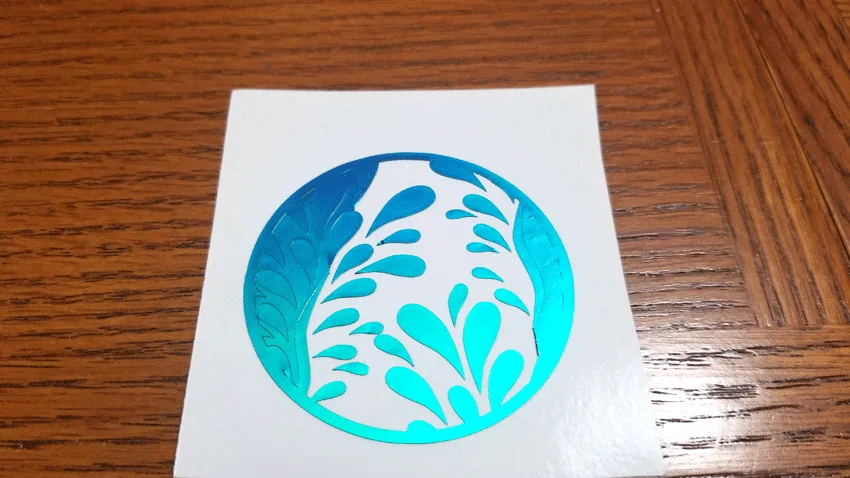
This is the blue opal leaf design partially weeded.
This one is completely weeded and ready for transfer tape.
Step 3: Place design onto keychain
Now you are ready to place the design onto the acrylic keychain.
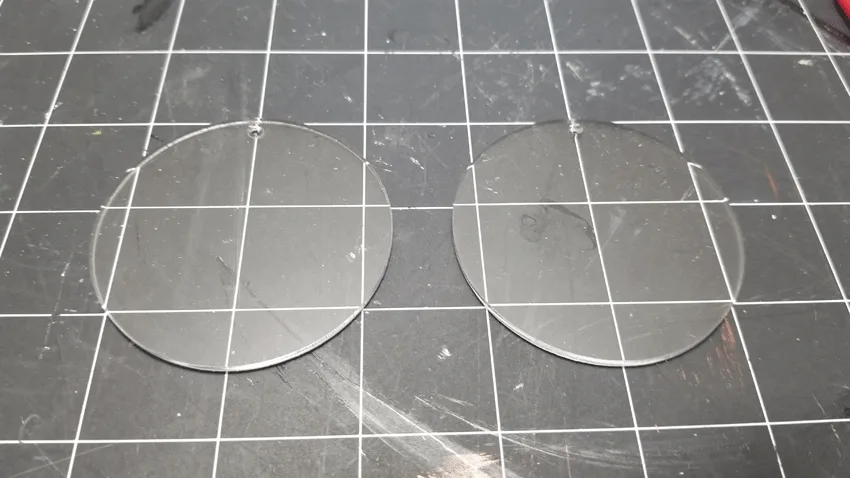
The keychains come with a protective paper on each side so first remove these pieces. I used my weeding tool to get them started.
They are completely clear without the protective paper.
Carefully line up the design and place it down. Then remove the transfer tape.
Step 4: Add the UV resin
Before we add the resin be sure to have your UV light plugged in and ready to go. These are the lights used to dry gel nails. They work great for this.
Ours has three buttons on the top. 99 seconds, 60 seconds and 30 seconds. I always start with 99.
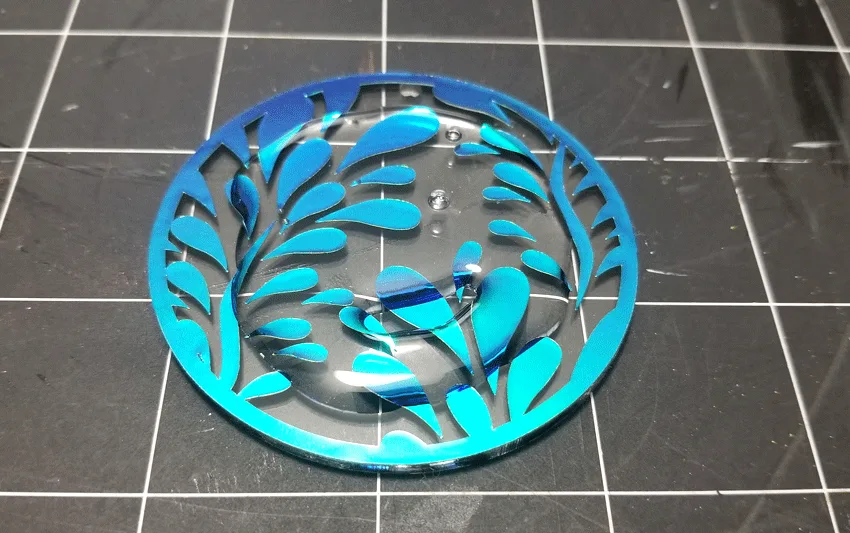
Add a little resin to the top of the vinyl.
Use a toothpick or a popsicle stick to move the resin around to cover the top. Get it all the way to the edges. It will stop and not flow over the edge if you are careful.
This resin is self leveling too so once you move it around it levels and gets smooth.
Be careful around the hole for the keychain. It will top and not go through if you move it slowly.
I made the mistake of going too fast and it went into the hole and got on the back of the blank. If this happens don’t panic.
I got a napkin and wiped it all of the back. You have to do this before you put it under the light. Otherwise it will cure it on the back too.
Take your time!
You don’t have to move fast so take your time. If you need more resin just add a little more and keep spreading it over the top.
I didn’t notice the little bubbles in mine until it was too late. But here is a great tip I learned.
Before curing the resin, use a lighter to go over the resin before curing and it gets rid of the bubbles.
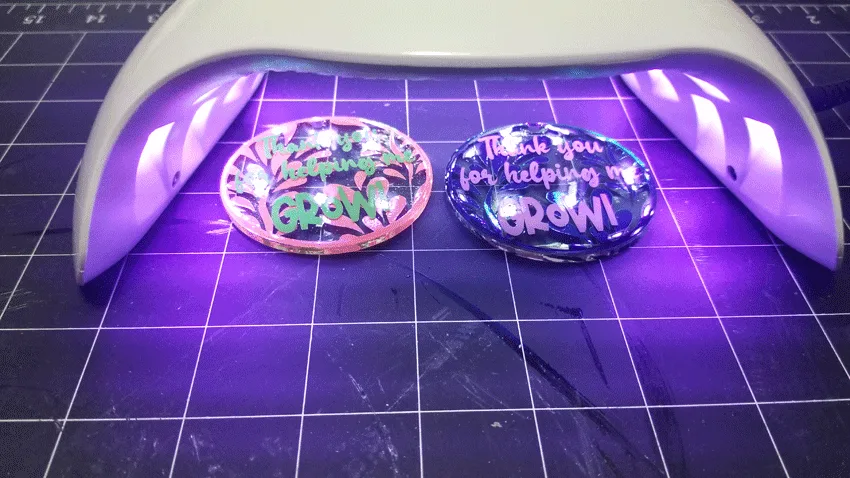
Place it under the light and cure for 99 seconds.
When mine came out is seemed a little tacky but I left it for now.
I did the same with the other pink opal design.
Once this layer is cured add the text layer of vinyl then repeat the resin and the lighter process.
This layers the vinyl between layers of resin and gives the DIY keychain some depth.
They were still tacky so I kept putting them under the light for 30 seconds at a time until they were no longer tacky. I even took them outside and put them in the sunshine for a few minutes. It seemed to take a while but eventually they were no longer tacky.
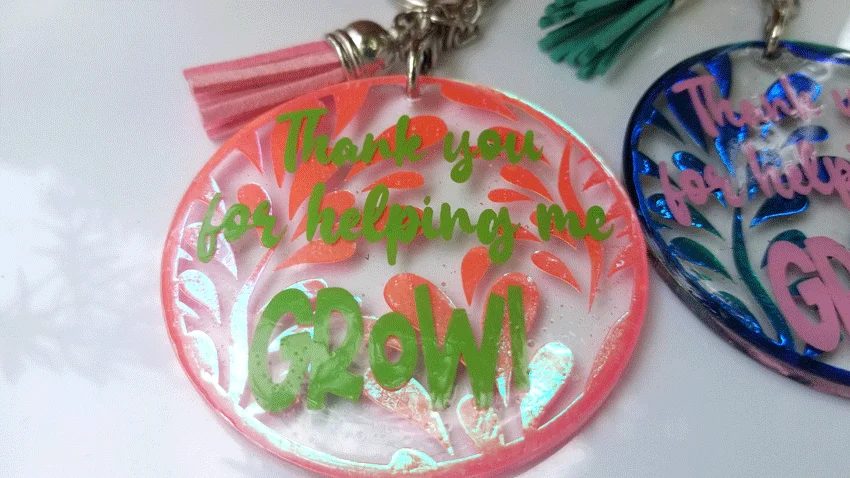
When they are finished add the keychain parts and the fun tassel to the super cool keychain.
The opal vinyl is perfect for the background. It shimmers and changes color with the light. I love it.
Here are some printable instructions for you if you want them!
DIY Keychains Using UV Resin
Learn to use UV resin, vinyl and acrylic blanks to make your own DIY keychains. There is no mixing epoxy and it only takes minutes to cure.
Materials
Tools
- Cricut Joy
- UV Light
- Toothpicks and/or popsicle sticks
Instructions
- Choose round keychain svg files to use and download them to your computer
- Download the Text svg file from the resource library
- Upload and cut from Cricut Joy - see video for detailed instructions
- Weed designs and add transfer tape
- Remove protective paper from acrylic keychain blanks
- Apply the opal background design
- Add UV resin and smooth to the edges and around the hole for the metal keychain
- Use the lighter to get rid of bubbles in resin
- Cure under the UV light for 99 seconds
- Add cut text over the cured UV resin
- Apply more resin and smooth out as before - use the lighter to smooth out bubbles
- Cure under the light for 99 more seconds.
- Keep placing under the light for 30 or 60 seconds at a time or take outside to the sunshine until the resin is no longer tacky
- Add the metal and the tassel
- Give as a gift to a deserving teacher
Recommended Products
As an Amazon Associate and member of other affiliate programs, I earn from qualifying purchases.
-
 Alphabet Silicone Resin Molds, Paxcoo Backward Letter Number Epoxy Molds Keychain Resin Jewelry Molds with Keychains Resin Drill for Resin Casting Making Keychain
 -
 25 Acrylic Keychains PAW Print Clear Blank 1/8" Thick (Optional Key Ring) (2.5")
 -
 60 Pieces Colorful Blank Dog Tags Hand Personalized Blank ID Tags Aluminum Round Dog Tag Bone Shape Pet ID Tags Stamping Blanks Discs with Hole for Dogs Cats Pets Name Craft Tag
I hope you enjoyed this project. The resin and all of the things I can make with it is really starting to grow on me.
Click on the links below for more beautiful resin ideas:
How to Create A Custom Letter Keychain
Thanks so much for stopping by!
Michelle










Marcy
Wednesday 26th of October 2022
I love this tutorial! I want to make them and sell them but I worry about the resin popping off. What is your experience with this?
Michelle
Wednesday 26th of October 2022
Hi Marcy, I have given some to friends so I will ask them if they are holding up. I have never heard of this happening but I will see what they say.
Libbie
Tuesday 6th of July 2021
What a great gift idea!!
Michelle
Wednesday 7th of July 2021
Thank you Libbie!
Sue Eldred
Tuesday 6th of July 2021
I really like the way they turned out.
Michelle
Tuesday 6th of July 2021
Thank you Sue! They were fun and the opal is always a show stopper!
Sara
Tuesday 6th of July 2021
These are beautiful; I've never used resin but this project seems like a great beginner project to start :)
Michelle
Tuesday 6th of July 2021
I Sara. I am definitely a beginner to the UV Resin crafts. It was fun and pretty easy.
Michelle Leslie
Tuesday 6th of July 2021
How lovely, Michelle, and the opal vinyl is soooooo gorgeous. Love those colors
Michelle
Tuesday 6th of July 2021
Thank you Michelle. It is really pretty.