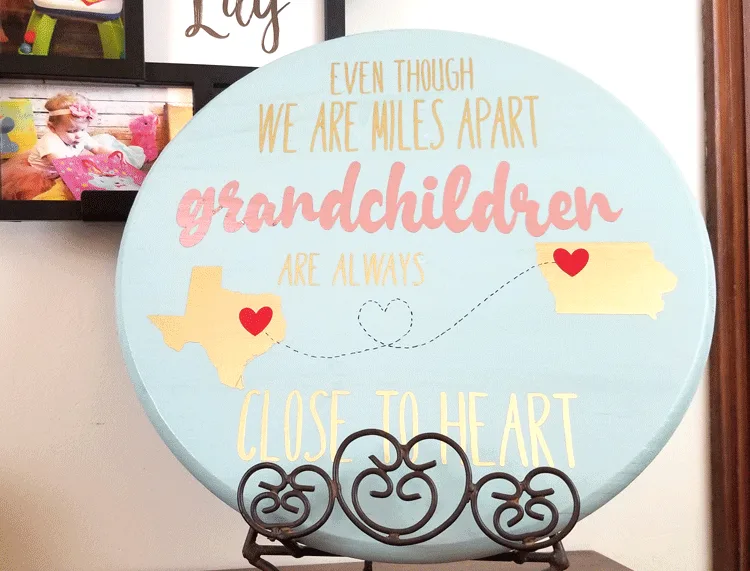
Wood, paint and StyleTechCraft vinyl are the perfect combination to create a DIY wood project for Grandparent’s Day. An easy wood craft!
I have been a grandparent for over two years now and I can’t believe I am just now making a cute DIY wood project for myself for Grandparent’s Day. Well, I guess I am finally catching up and getting it done.
Have you seen all of the wood round projects? They seem to be everywhere and they are an easy small wood project, which I love. People make wreaths, kitchen signs and more with them and now I am giving it a try.
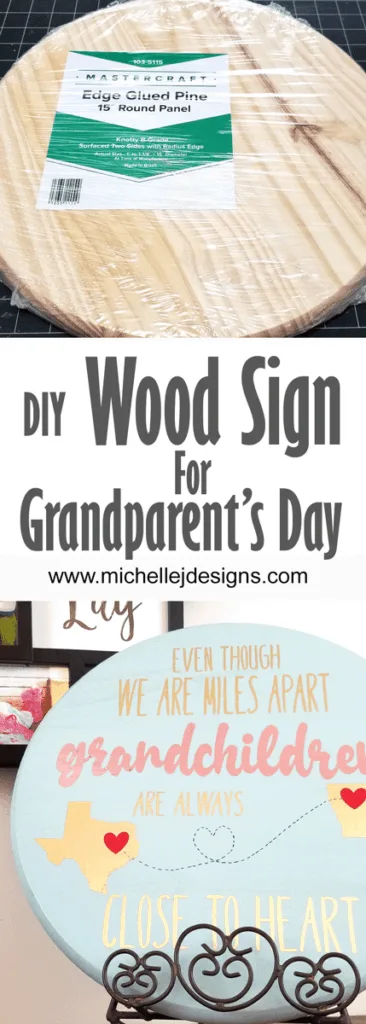
I got this wood round on sale at Menard’s for $5.99 so I thought it was a good deal.
And, you probably already know that I get my vinyl from StyleTechCraft. I am on their design team and they are nice enough to send the team members vinyl for these projects.
Last month I made some fun DIY Keychains for teacher gifts from UV Resin.
Table of Contents
- DIY Wood Project for Grandparent’s Day
- Materials Needed:
- Step 1: Preparing and painting the DIY wood project
- Step 2: Upload cut files to design space
- Step 3: Applying the vinyl
- Step 4: Add more Mod Podge (optional)
- Step 5: Finishing up
- FAQ’s
- What is the best paint for wood projects?
- What can you do with wood?
- Where can I buy wood for DIY projects?
DIY Wood Project for Grandparent’s Day
The wood round is perfect for many things including a great sign that you can hang or place on an easel like I did. They are great for stenciling a sign but I love to use my Cricut and my vinyl.
Materials Needed:
I have added some affiliate links for your convenience. You can see my full disclosure here.
- 15″ Wood Round
- Rustoleum Chalked Paint – Serenity Blue
- Mod Podge
- Vinyl – Brushed Gold, Rose Chrome, Red Chrome
- Transfer Tape
- Cricut Maker
- Paint Brush
- Foam Brush
- Grandchildren Text SVG
- State Silhouette SVG
- Sharpie Marker
Step 1: Preparing and painting the DIY wood project
Open up the wood round and make sure it doesn’t need any sanding. Mine was pretty smooth so I went straight for my go to Rustoleum Chalked paint. I love the Serentity Blue so that is what I used. It is the perfect farmhouse blue/teal/gray.
Grab a paint brush and paint the entire board. Mine only needed one coat which is always nice.
Then add a nice coat of Mod Podge. I like using a sponge brush for the Mod Podge.
Maybe I should explain why I am using the Mod Podge for this. I started out trying to add my vinyl directly to the painted wood but it would not stick. I was getting really frustrated and decided to give the Mod Podge a try. It worked so much better. So…I recommend using it even though I had some issues later in the process.
Let the Mod Podge dry completely before moving on.
Step 2: Upload cut files to design space
First you need a cut file for the cutting machine. I used a couple of different types for my wood project. The text part I created myself in Adobe Illustrator and made an SVG file. You can find it in my resource library if you would like to use it.
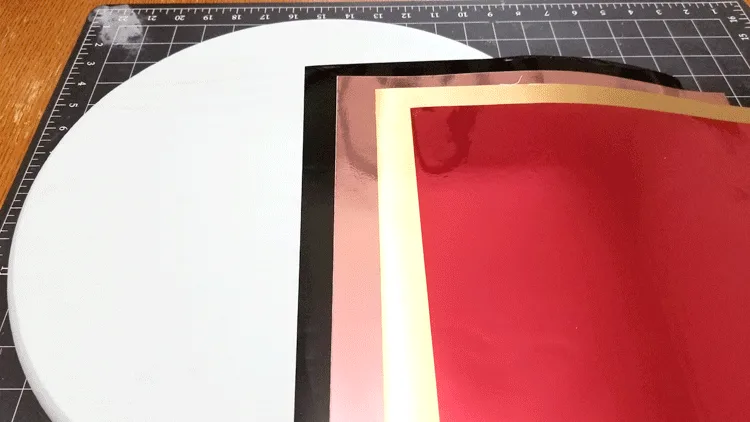
I used these colors of vinyl (except the black) and you can see the painted wood round. The colors are brushed gold, rose and red chrome. They are so pretty and shimmery. I just love them.
The next designs were the states. I had these already and I got them from designbundles.net. This is a great site for finding cut files and clip art for personal use.
I created the two hearts right in Design Space. You can do this with your text too if you want your wood project to say something different mine. It is easy to create text in Design Space.
Be sure to size your items to match the size of the wood round and be sure to group and attach sections that you want to cut all at once.
My sign has three different colors so I cut three different times.
This vinly is really easy to weed but I did have to place my blade setting to more from default. A new blade may be what my Cricut needs.
Once everything is cut, weed the designs and use transfer tape to get them ready to apply to the painted wood project.
Step 3: Applying the vinyl
Place the vinyl designs onto your painted wood project and lay them out so you can get a feel for spacing. Once they are positioned right where you like them, start removing the backing and placing them down.
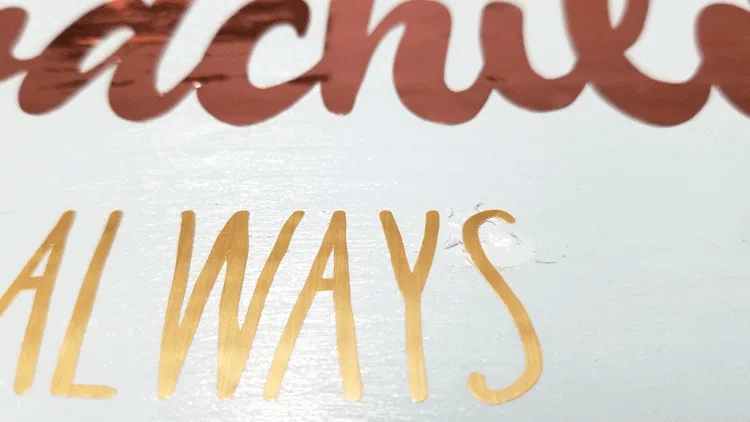
Be careful. Some of my Mod Podge peeled up as I was removing the transfer tape.
You can see it in the photos below.
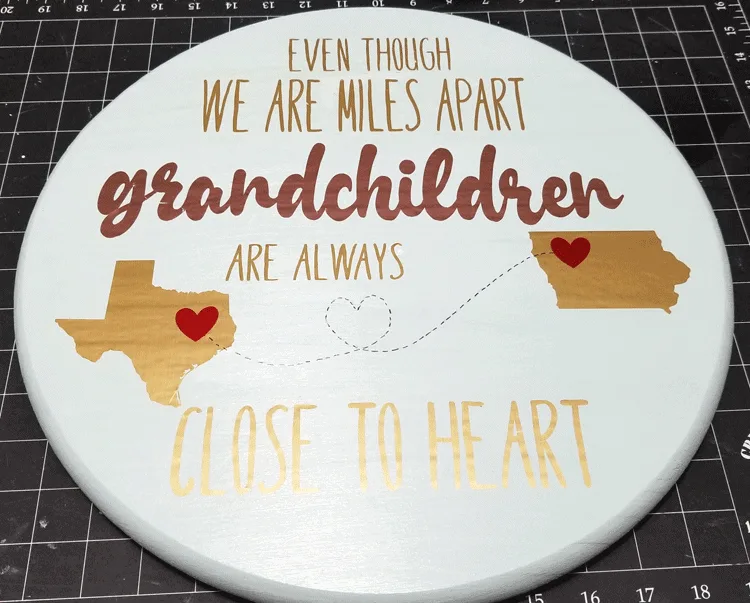
I didn’t place the red hearts until I made my dashed line with the Sharpie marker.
Use a black Sharpie marker to created a dashed line with a heart from one state to the other.
I started with a pencil so I could get the line exactly where I wanted to be then went over it with the Sharpie.
The final pieces were the hearts to represent Austin, TX and Emmetsburg, IA.
Step 4: Add more Mod Podge (optional)
Since some of the Mod Podge I had painted peeled off when I removed my transfer tape, I decided I would give my project another couple of coats to try to smooth it out a little bit.
It worked wonders and I am so glad I did but if yours does not peel up at all you may not need the final coat or coats of Mod Podge. You decide how it looks.
Step 5: Finishing up
I am not a filly bow person and I loved mine just as is. But you could add some ribbon or greenery or whatever you like to finish it up.
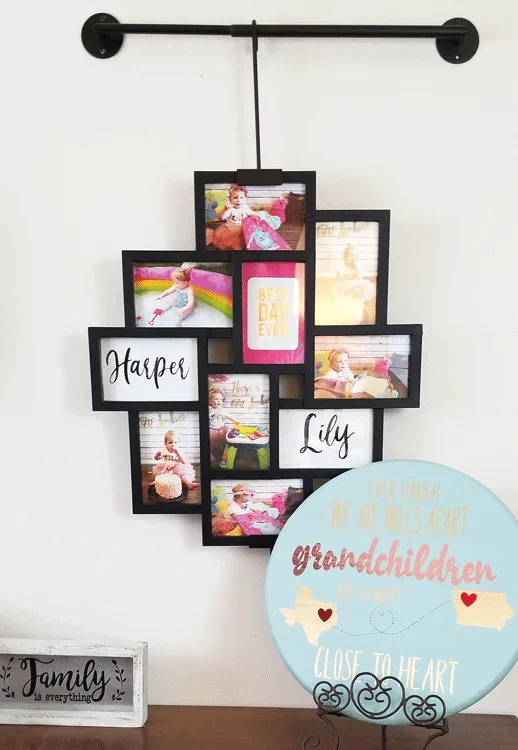
In order to hang it you could add a picture hanger to the back but I wanted to display mine on the side table by Harper’s pictures so I used a metal stand.
FAQ’s
What is the best paint for wood projects?
There are three types of paint that I would consider for a small DIY wood project. They are acrylic paint, latex paint and chalk paint.
Acrylic Paint – These are mostly craft paints for small projects. They have a flat finish and come in small bottles. But there are a gazillion colors. If you are looking for something quick and you want to choose fun colors this is the perfect paint. Acrylic paint works great on wood.
Latex Paint – These days you can purchase latex paint in smaller quantities. They have a little sample size that would probably be just the right amount for a small wood project. It is usually used on walls in houses but is great for furniture projects and craft projects. If you have some and you want to use it for a DIY wood project…it would be a good choice.
Another great thing about the latex paint is that it is available in a variety of finishes. From flat to glossy. You have some great choices and if you like a semi gloss or glossy finish you do not have to add a clear coat. Major plus!
Chalk Paint – Chalk paint is known for it’s ability to be painted on a variety of surfaces from glass to wood. It also comes in a variety of colors and multiple companies are making it. My two favorites are Rustoleum and Dixie Belle.
There are a variety of colors but not as many choices and the acrylic paint. And there is only the flat finish. Plus it is best to add a wax or sealer over the top of the paint to keep it looking nice for many years.
What can you do with wood?
This is a very large topic but I narrow it down to projects that are easy and don’t require tons of cutting with power tools. Here is a list of DIY wood projects with easy to find wood pieces.
- Wood signs
- Picture frames
- Door Hangers (like a wreath but with wood)
- Porch signs
- Storage crates
- Mini signs for tiered trays
- Chalkboards or Dry Erase boards
- Wood trays
- Table Runner
- Planter boxes
These are just a few ideas for easy small wooden projects. Look around at garage sales and thrift stores for wood pieces that you can transform with a little paint and imagination.
Where can I buy wood for DIY projects?
As I mentioned above look around at garage sales and thrift stores for some fun wood things that can be easily transformed. But other places to find wood are:
- Home Depot or Menards – wood rounds, 2×4’s, pine boards to make porch signs, etc.
- Hobby Lobby or Michaels – premade wood pieces for signs, candle sticks, dowels, etc.
- Dollar Tree – small wood crates, small crafting pieces, Jenga type blocks, bamboo cutting boards and more
These are just to name a few.
I hope I have been helpful in answering some questions you may have about DIY wood projects. If you have more questions please leave me a comment!
Now…if you would like, I have added some printable instructions below for this cute sign for Grandparent’s Day.
DIY Wood Project for Grandparent's Day

Wood, paint and StyleTechCraft vinyl are the perfect combination to create a DIY wood project for Grandparent's Day. An easy wood craft!
Materials
Tools
- Cricut Maker
- Paint Brush
- Foam Brush
- Pencil
Instructions
- Start by sanding the wood round, if needed and giving it one coat of the Rustoleum Chalked paint using the paint brush.
- When the paint is completely dry give it a nice coat of Mod Podge using the foam brush.
- While the Mod Podge is drying download your SVG files and upload them into Design Space.
- Make your own hearts in Design Space to add to the state sillhouettes.
- Use the Cricut Maker to cut out the designs.
- Weed the designs and add transfer tape to the top of each one.
- Lay the cut pieces out on the wood round to get the spaced the way you like them.
- Apply all of the cut pieces except the hearts.
- Use a pencil to create a dashed line with a heart from one state to the other.
- Go over the penciled line with the Sharpie marker.
- Add the hearts over the states and covering the ends of the Sharpie lines.
- Add two more coats of Mod Podge letting the first coat dry completely before adding the second.
- Add ribbons, bows or whatever you like to the sign. (optional)
- Add a hanger on the back if you want to hang it or place it in a metal stand like I did.
- Enjoy!
Recommended Products
As an Amazon Associate and member of other affiliate programs, I earn from qualifying purchases.
-
 Styletech SO Opal Vinyl, Blue, Pink, White, and Yellow 4 Piece
 -
 Cricut Joy Machine - Portable DIY Decal and Tshirt Designs Maker Bundle
 -
 4 Pieces Wooden Circle Sign Unfinished Round Welcome Wood Hanging Sign Blank Wood Front Door Cutout Slice with Twine, Ribbons, Artificial Leaves for DIY Crafts Decor (Wood Color)
Check our StyleTechCraft on Facebook. Like and follow their page to see new products and fun inspiration.
If you would like to see some other really fun StyleTech Craft vinyl projects check out these posts from my friends.
- Cow Print Fall Door Hanger – Daily DIY Life
- DIY Travel Luggage Stickers – My Time 2 Play
- Raven Nevermore Sign – Morena’s Corner
Thanks so much for stopping by and happy crafting!
Michelle







Sue Eldred
Friday 6th of August 2021
Super cute project.
Michelle
Wednesday 11th of August 2021
Thank you Sue!