Have you ever wondered how to personalize glass mugs? Learn how to etch glass with custom text and make personalized gifts.
One of my favorite things is to make custom or personalized gifts for people that I know they will LOVE. This is the perfect example. But these custom glass mugs were made for a friend to give. He was super excited about it and it was contagious.
He really wanted some glass beer mugs to give as a gift to someone who loves Larry Bird from the Boston Celtics. This guy is apparently a huge basketball fan and considers Larry Bird to be one of the greatest. (But who doesn’t)
I told him to visit Dollar Tree and pick up some beer mugs. He brought them to me and told me exactly what he wanted on them. I was happy to make them.
Keep reading to find out how to personalize glass mugs of your own!
If you love painting and making glass crafts and gifts you will love it here.
AND…
If you LOVE Dollar Tree crafts and gifts then you are definitely in the right place.
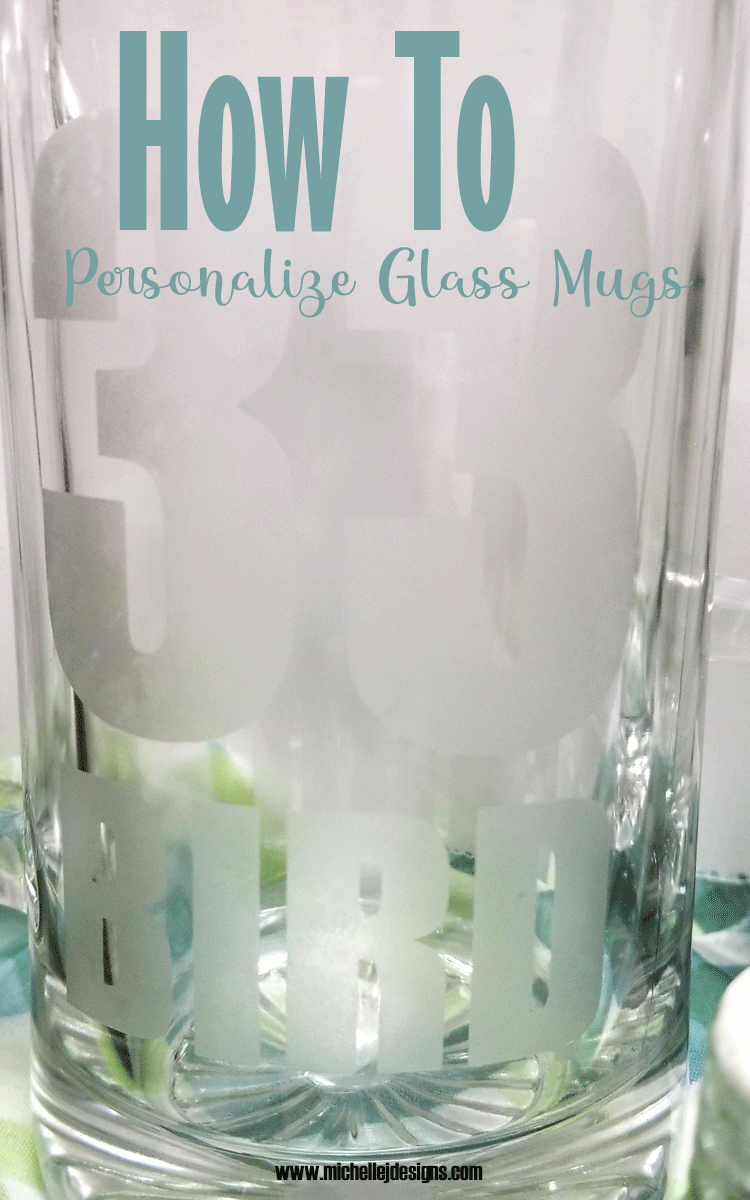
Table of Contents
- How to Personalize Glass Mugs
- Materials Needed:
- Step 1: Download or Create Your Design
- Step 2: Cut and Weed the Stencils
- Step 3: Apply the Stencil
- Step 4: Apply the Etching Cream
- Step 5: Remove the Etching Cream and the Stencils
- FAQ’s
- How does etching cream work?
- How do you decorate glass mugs?
- How do you make a custom glass mug?
- The finished how to personalize glass mugs
- More Dollar Tree Inspiration
How to Personalize Glass Mugs
This is really an easy projects. I used my Cricut Maker to cut my stencil but if you don’t have one you can print out a design and cut it out to make your own. My husband is great with an exacto knife and that would be a great tool for cutting into vinyl. I am terrible with an exacto knife so I will stick to my Cricut.
This design is so easy. You can create it right in Design space if you want. I like to make an actual SVG file then upload it so that is what I did.
Materials Needed:
I have added some affiliate links for your convenience. You can see my full disclosure here.
You can find all of these supplies in the DIY and Crafting section of my Amazon store. Click the link below:
Michelle James Designs Amazon Store
- Dollar Tree Glass Beer Mugs
- Vinyl
- Etching Cream
- Small Brush (a popsicle stick would work too)
- Gloves (optional)
- Cricut Maker
- SVG file or have a design in mind
Step 1: Download or Create Your Design
Sports numbers and names are easily created in design space. For this design my “client” wanted a chunky print font. I love the chunky print fonts. They are easy to cut and weed. And since these beer mugs are quite large he wanted a larger design. LOVED it!
Here is my original design copied and pasted three more times to cut four at one time.
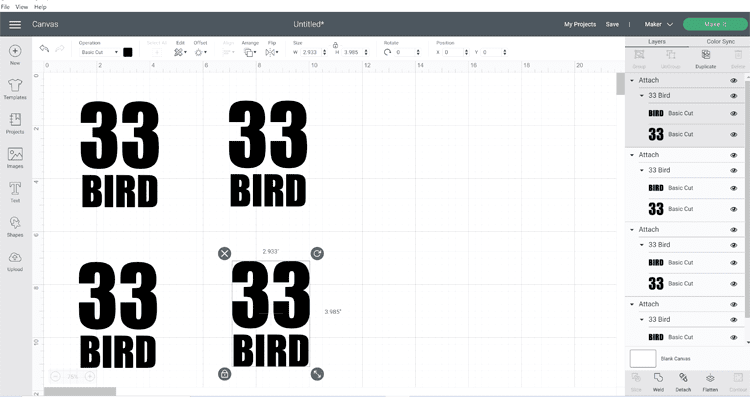
You will also need to click on each design and then click the “attach” button at the lower right of the screen. What you see in the photo above says “detach” but that is because I already attached mine. You can tell by looking in the layers panel on the right. Each design grouping says “attach” above it.
The settings I used on my Cricut Maker were:
- Premium Vinyl setting
- Default blade setting
Then just press cut and let it do its thing. I cut two sheets of four since he wanted the design to be etched on both sides of each mug.
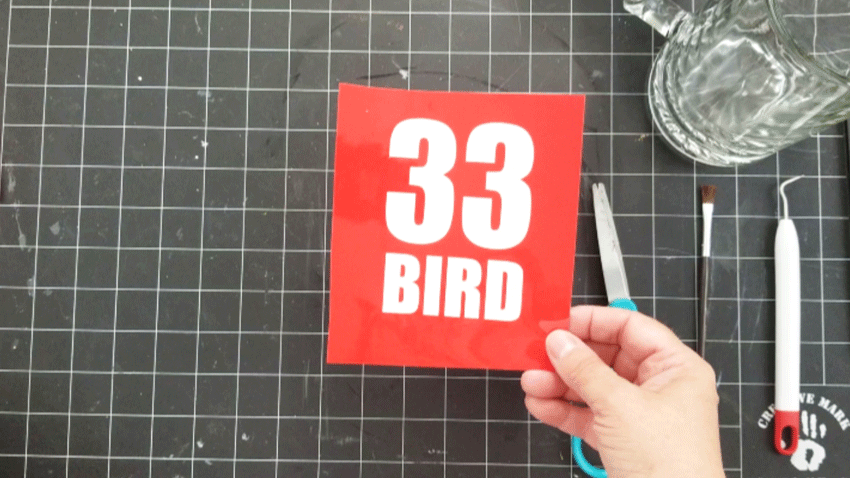
Step 2: Cut and Weed the Stencils
Once the designs are cut there will be four on the sheet. Cut them apart from each other. I just cut down the center vertically and horizontally of the 12 x 12 vinyl sheet.


Once they are all four cut start weeding out the designs. This time we will be using it as a stencil so you want to remove the parts we usually keep.

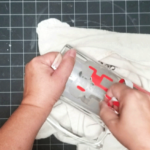
Step 3: Apply the Stencil
Next add transfer tape to the top of the stencil and apply it to the mug.
I have to admit I was pretty terrible at this. I would suggest cutting them all of the same measurements and measuring the space from the top of the letters to the top of the stencil and the bottom of the letters to the bottom of the stencil.
Then choose how far up or down on the glass mug you want the stencil to be. That way when you place them they will be all be in the same spot and look uniform to each other.
Remove the vinyl backing.

And place it onto the mug.
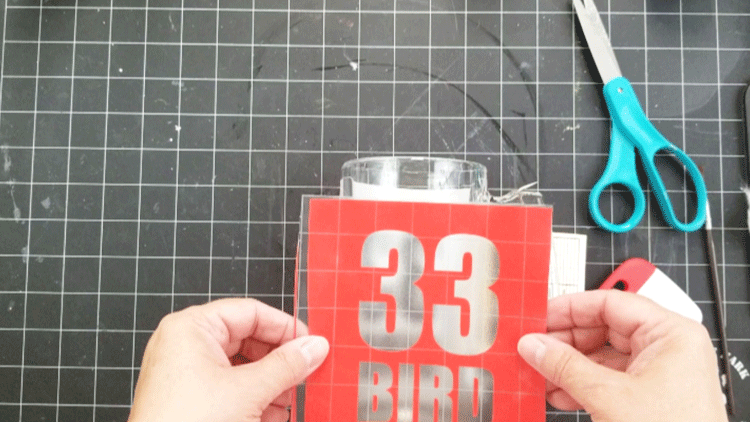
Repeat this process until you have all of the stencils applied.
Make sure to check them carefully for bubbles. You don’t want the etching cream to seep under the vinyl and etch in a place it is not supposed to.
Press the vinyl down really well along each of the numbers and letters.
Step 4: Apply the Etching Cream
This may be the most important step for this project.
Follow the instructions for shaking the product on the directions on the bottle. I shook mine up a little but it didn’t need a lot.
I used a brush but if you don’t have one just use a popsicle stick or something.
Scoop some out of the bottle and place it over the open numbers and letters in the stencil.
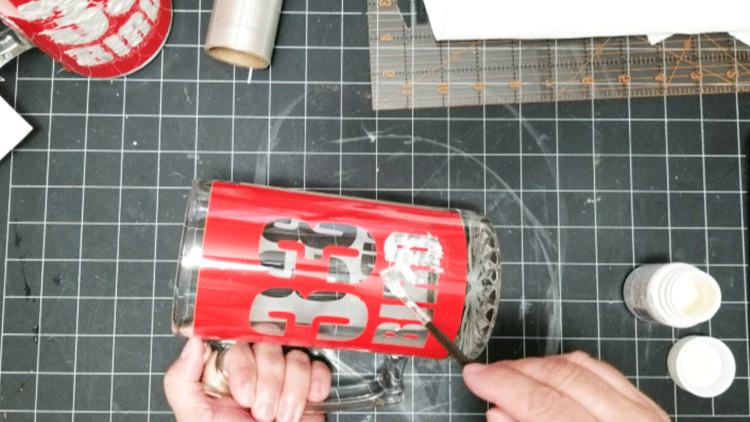
Keep going until it is completely covered on both sides.

What I learned from this is to really apply a nice thick layer of the etching cream. I thought I was doing a good job but I ended up with some spots that weren’t covered as nicely and I had to re-apply to get it right.
Once all of the etching cream is applied, let it sit for about 10 minutes.
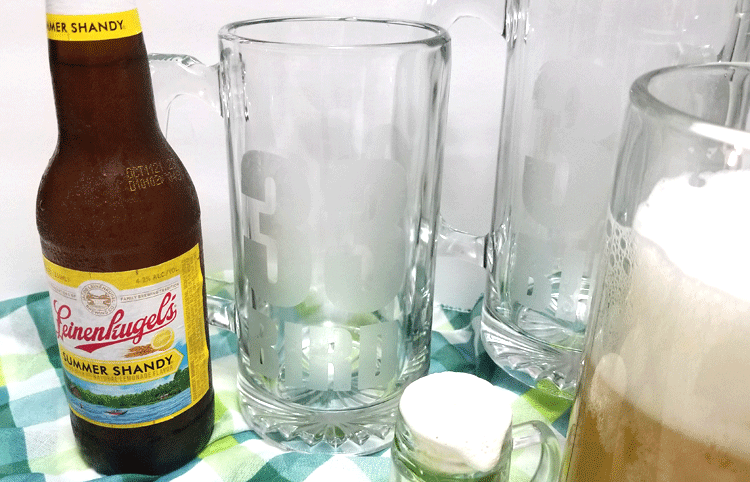
Step 5: Remove the Etching Cream and the Stencils
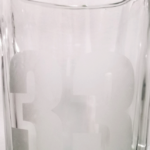
Once you have waited the appropriate time you can remove the etching cream to reveal your custom dollar tree glass mugs. It is exciting to see how they turned out.
In order to not waste all of that etching cream, use a popsicle stick and carefully scoop off the extra and place it back in the bottle. Then rinse the rest off with warm water over the sink.
Remove the stencil.

Once the stencil is gone rinse, or wipe it down and check out your work. Yay!
Even though I had to repeat some of the etching cream steps I think they turned out pretty nice.
And the important thing was that he LOVED them and is so excited to give them to his basketball loving buddy! That makes me smile and it also makes me want to create more personalized glass mugs.
FAQ’s
In this short section I am going to answer some questions that come up quite often. Let’s get started.
How does etching cream work?
The etching cream contains a chemical called hydrofluoric acid. This chemical, when placed on glass, breaks away the glass pieces leaving a frosted look.
I love that we can take this cream and easily and safely create our own etched/frosted designs.
There is also a frosted spray paint you can use. It covers the glass in a frosted coating. I have used it to frost glass lights and I even used a yellow colored frost paint to make a cute bird feeder.
How do you decorate glass mugs?
There are several ways to decorate glass mugs, glasses or jars
Paint –
Painting is the most common way to decorate glass mugs, glasses or jars. Chalk paint, spray paint and even oil based Sharpie markers all work well on glass.
Some of these products need to be baked to become permanent but reading the directions on the bottle or can will tell you this. Here are some examples you can see of all of these types of paint.
- Chalk painted glass – Tiered Tray, Mini Vases
- Spray painted glass – Tinted Mason Jars, Mini Mason Jar Party Favors
- Oil Based Sharpie Markers – Solar Lights, Holiday Wine Glasses
Nail Polish –
Another way to decorate glass is to use nail polish.
If you add different colors of nail polish to water then dip in the glass, the nail polish sticks to the glass and creates a beautiful design. I love that each one is different yet they all match. It is a fun idea for decorating glass.
Here are two examples of the nail polish technique
Nail Polish Wine Glasses, Nail Polish Glasses
How do you make a custom glass mug?
To me, custom means personalized for a specific person or group of people. For example these Dollar Tree glass mugs are custom made just for this person who loves basketball and more specifically, Larry Bird.
It makes a gift special to one person.
Or you can stencil a generic word such as Wine or Coffee to appeal to more people but still be custom.
Stencils and/or vinyl are a great way to personalize or customize anything. That is what is so great about a cutting machine. You can cut anything to add to a glass mug, jar, wine glass, vase or even a ceramic coffee cup.
Permanent vinyl, etching or oil based markers will do this.
Here are a couple of examples of custom glass mugs or cups.
Grinch Inspired Gifts, Dollar Tree Travel Mugs
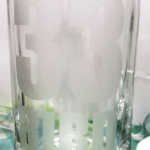
The finished how to personalize glass mugs
Here are the final photos of the glass mugs. They are pretty fun.
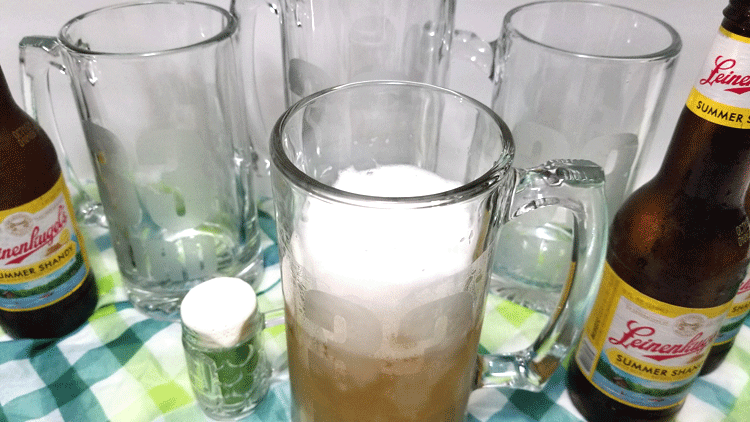

What do you think? Are you inspired to personalize glass mugs?
More Dollar Tree Inspiration
- Dollar Tree Farmhouse Frame – Across The Blvd
I am including some printable instructions just in case you want/need them.
How to Personalize Glass Mugs


Have you ever wondered how to personalize glass mugs? Learn how to etch glass with custom text and make personalized gifts.
Materials
Tools
Instructions
- Download or create a design is Design Space
- Upload to Design Space
- Cut and weed the stencil from the vinyl
- Add the transfer tape to the top of the stencil
- Remove the vinyl backing and apply to the glass beer mug
- Add a thick amount of etching cream to the glass
- Let it sit for about 10 minutes
- Remove the extra etching cream and put it back in the bottle to re-use later
- Rinse the etching cream from the mug under warm water
- Remove the stencil to reveal your etched design
Recommended Products
As an Amazon Associate and member of other affiliate programs, I earn from qualifying purchases.
-
 Keep Calm and Use The Force Darth Vader Star Wars Inspired 16 oz Hand-made Etched Beer Mug Glass Stein …
 -
 Armour Etch 2.8 Oz Etch Cream
 -
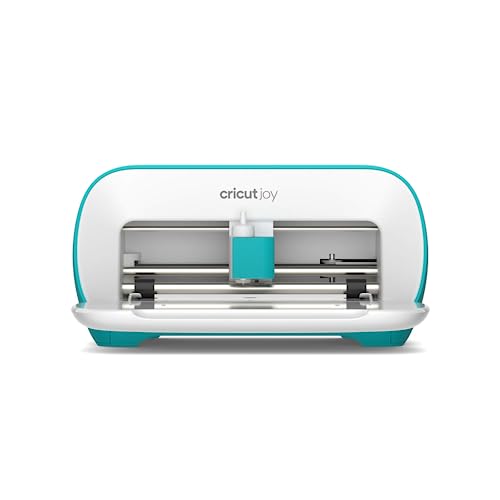 Cricut Joy Machine - Compact and Portable DIY Machine For Quick Vinyl, HTV Iron On and Paper Projects | Makes Custom Decals, Custom T Shirt Designs, Personalized Greeting Cards, and Label Maker
Thanks so much for stopping by!
Michelle


Sharon
Monday 9th of August 2021
Those look great! Larry Bird was a great basketball player but I'm afraid my youngest son would have to have Michael Jordan!!
Michelle
Wednesday 11th of August 2021
I think Larry Bird and Michael Jordan are pretty dang good. Both history makers for sure!