Learn how to create a fun, family friendly Dollar Tree popcorn gift idea using Dollar Tree popcorn buckets and StyleTechCraft vinyl!
You know how much I love to use Dollar Tree items to make AWESOME gifts. This post is no exception.
I am in love with this Dollar Tree popcorn gift idea that includes some cut vinyl pieces to look like the Disney castles.
If you have friends and family members who love to watch Disney movies this is the perfect gift for them.
AND…
If you LOVE Dollar Tree crafts and gifts then you are definitely in the right place.

Table of Contents
- Dollar Tree Popcorn Gift Idea
- Materials Needed
- Step 1: Download the files and upload into Design Space
- Step 2: Weed and add transfer paper
- Step 3: Add the vinyl
- Step 4: Finish up the Dollar Tree popcorn gift idea
Dollar Tree Popcorn Gift Idea
This easy gift idea starts with some basic supplies including StyleTechCraft Luster vinyl and some Dollar Tree products.
This is a sponsored post. The nice folks at StyleTechCraft have provided me the vinyl materials to create this project! All of the opinions are 100% my own.
Materials Needed
I have added some affiliate links for your convenience. You can see my full disclosure here.
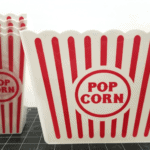
- Dollar Tree large popcorn bucket
- Dollar Tree individual popcorn buckets
- SVG files for cutting – Disney Castles from Etsy
- StyleTechCraft Luster Vinyl – Purple, Teal, Red and Yellow
- Transfer Paper
- Weeding & Scraper Tools
- Cricut Maker – check the price! At the time I wrote this post you could save $120!!!!
- Dollar Tree Gift filler
- Assorted candies and popcorn
Step 1: Download the files and upload into Design Space
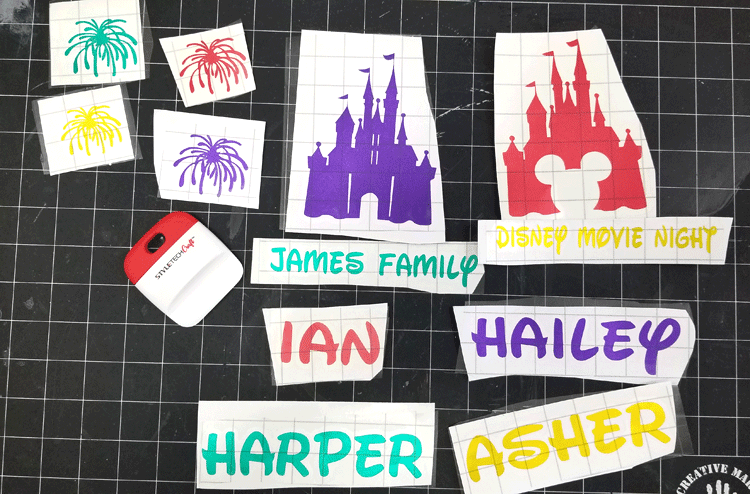
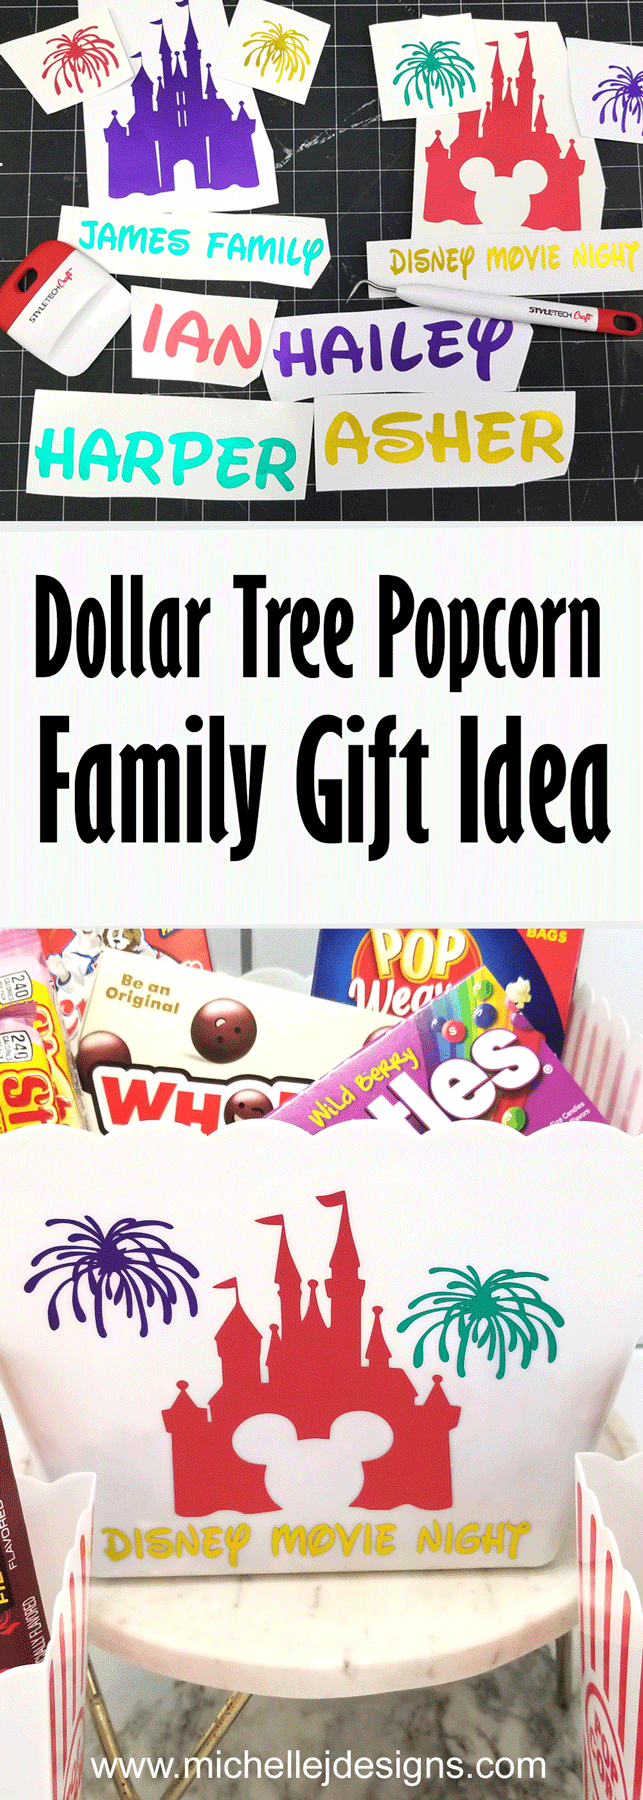
First you need to grab the SVG files you want to add to the popcorn buckets. My son Ian and his family LOVE Disney movies so I chose an assortment of Disney castles.
Purchase them from Etsy and get them downloaded onto your computer.
I also wanted to add some fireworks to my design. The fireworks SVG came right from Cricut and it is a free file. I will show you how to get to that in a minute.
When you have your designs ready, open Cricut Design Space.
Click on “new project”.

Then click on “upload”
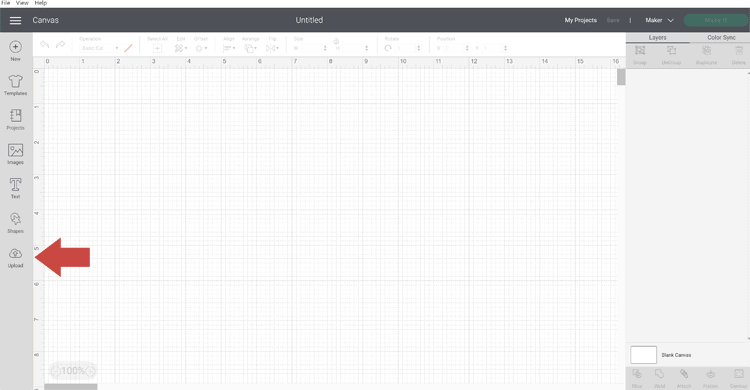
Choose “upload image” and click on it.
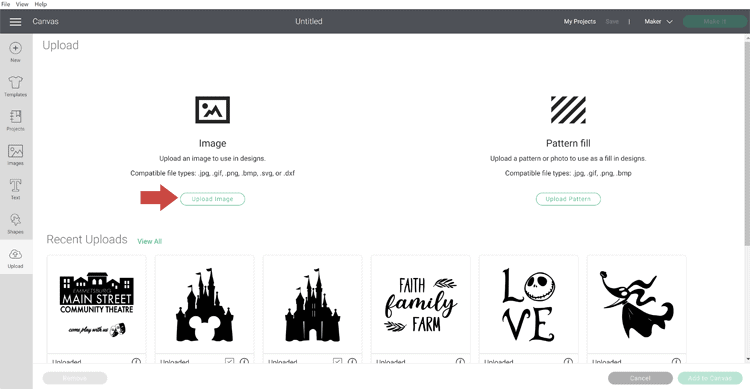
Choose “browse”.
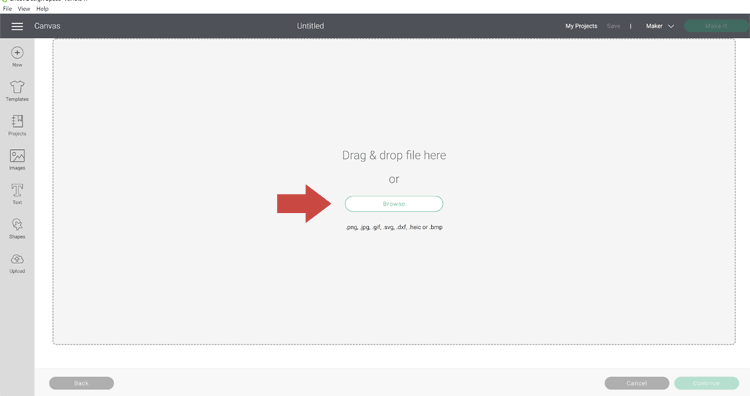
Find your downloaded file on your computer and click open.
Then, click the green upload button in the lower right corner.
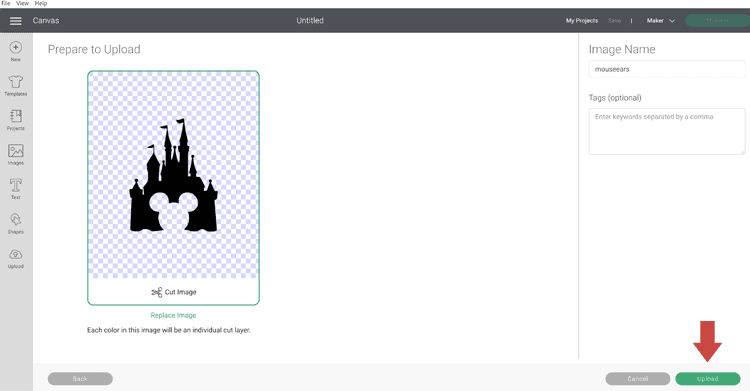
This will bring your image into Design space.
Then you need to re-size your images to fit your project.
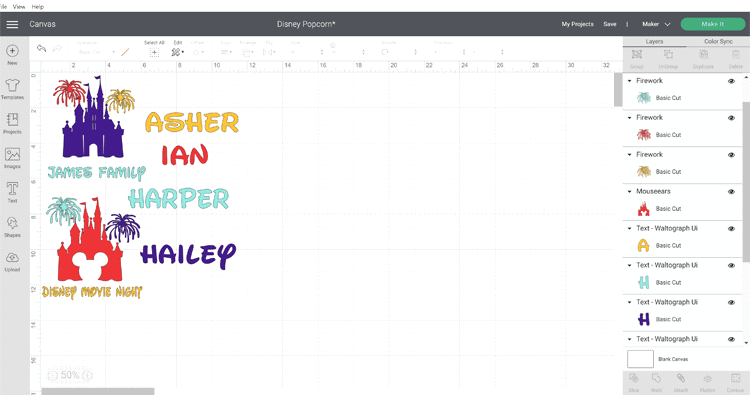
When I had all of my images and text done my project looked like this.
But to get to this point there were a few more steps.
Grab a Cricut image
Within Design space there are all of the Cricut Designs to choose from. Some are free and some are paid.
I like the free designs but I have paid for a couple as well.
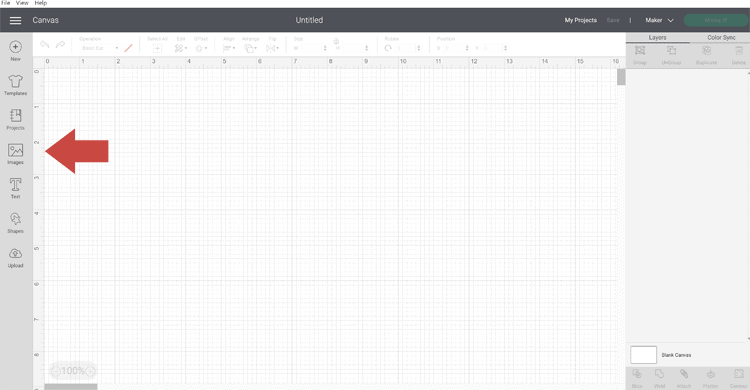
To grab a Cricut image click on “images” on the left side of the screen.
Then search for the type of images your are looking for. For example I typed in “fireworks”.
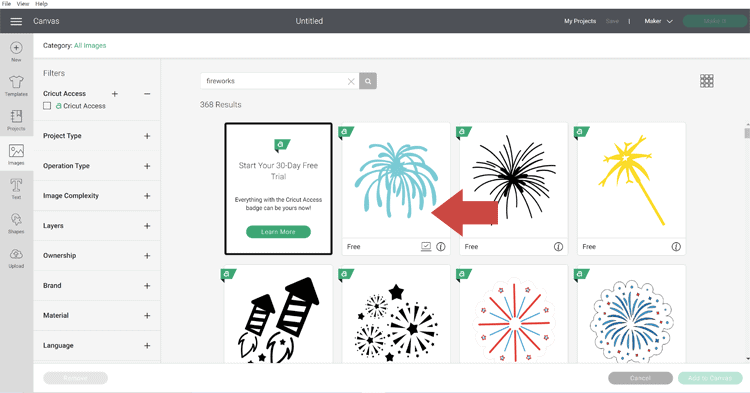
I chose the first one. Click on it and then click “add to canvas” in the lower right corner of the screen.
Adding text to your design
If you want to add some text click on the text icon on the left side of the screen.
A text box will appear but before you type you want to choose your font. I like to choose “system” at the top of the screen. This will bring up all of the fonts I have on my computer.
Some of the Cricut fonts are really nice but they can be $4 or more to purchase.
I downloaded the “Waltograph” font from Dafont.com. I am only using this for personal use so it is ok to use.

Once you have chosen your font you can start typing your text.
Your font choice will remain chosen until you change it again so type all of the words or phrases
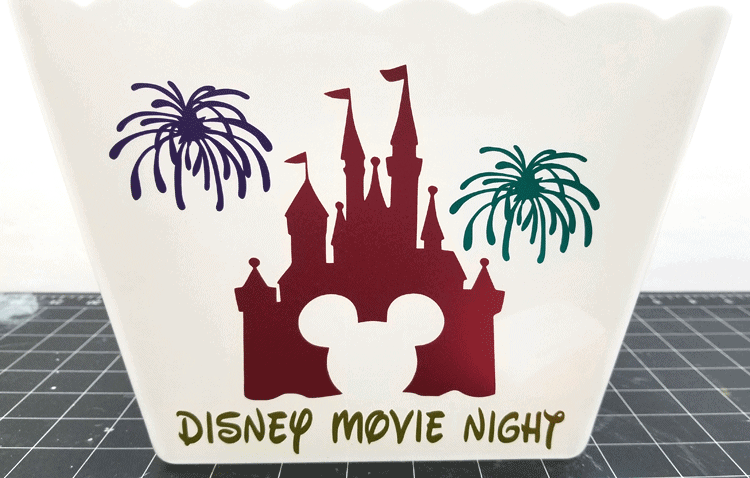
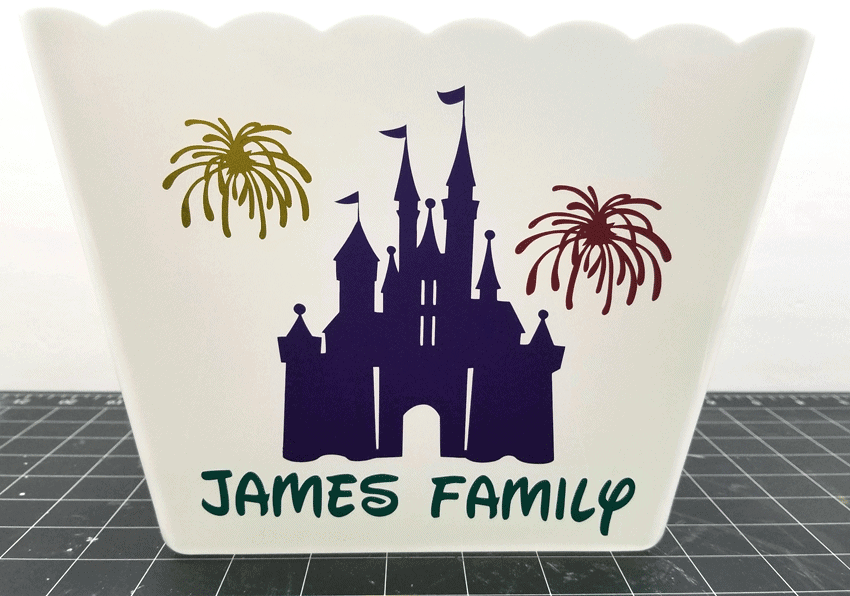
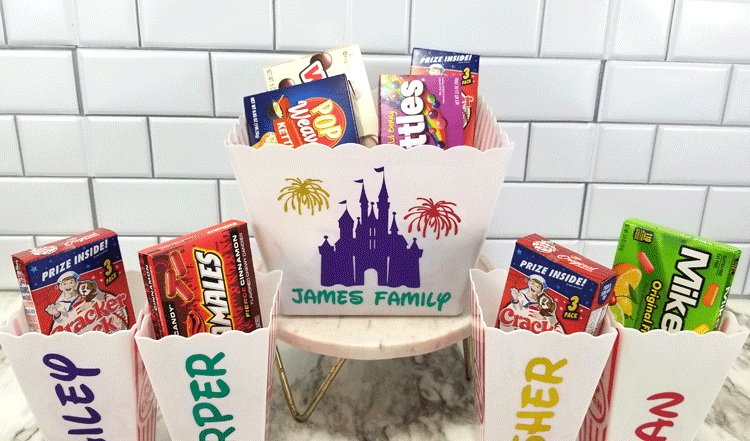
I added all of the names of Ian’s family and then I wanted some text to add to the large popcorn bucket under the castle.
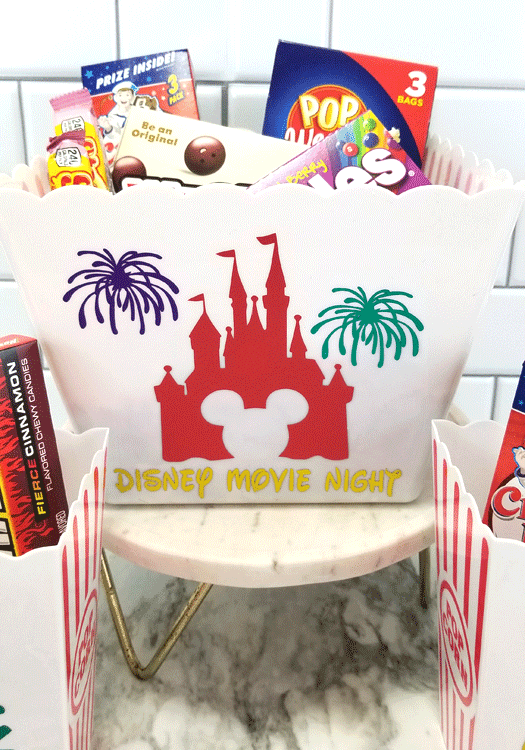
I chose “James Family” and “Disney Movie Night”.
Color Choices
I knew I wanted to use four different colors for this project. The Luster vinyl is so pretty and I really loved the red, teal, purple and yellow.
You can change the colors of your designs in order to see how it will “sort of ” look on your project.
Then the Cricut Maker will sort your colors into different mats when you are ready to cut.
Once you have everything sized and ready to cut, click on “make it” in the upper right corner.
Add each color to your mat and cut until you have cut all of the colors.
Step 2: Weed and add transfer paper
Once the designs are all cut weed them using the weeding tool.
Here they are all weeded and pretty. I just love the colors of this vinyl. It not glossy but just has the perfect sheen.
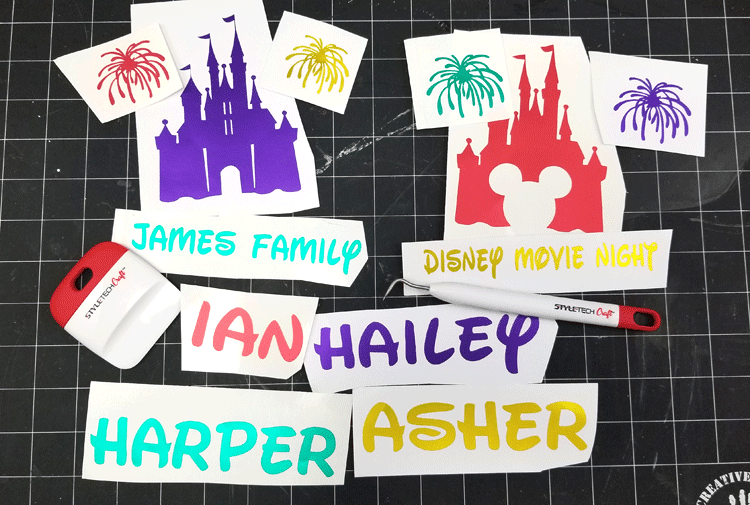
Here they are with the transfer tape added to the top.
Now they are ready to add to the popcorn buckets.
Step 3: Add the vinyl
Here is what the popcorn buckets looked like before I added any vinyl.
They have the red and white striped sides.
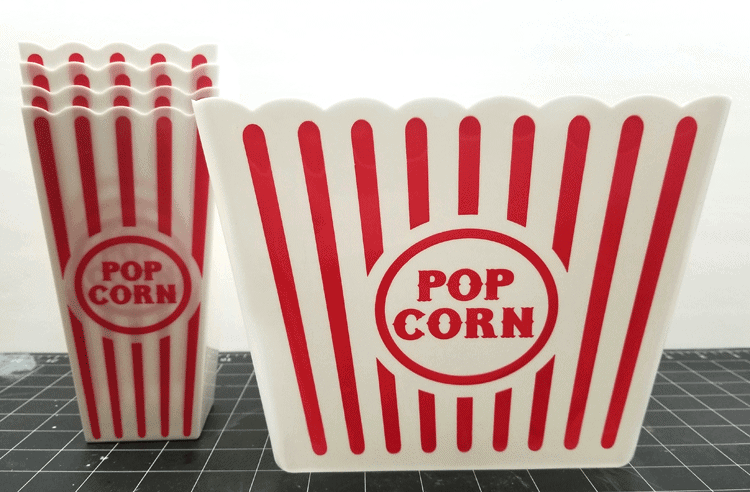
And the white sides.
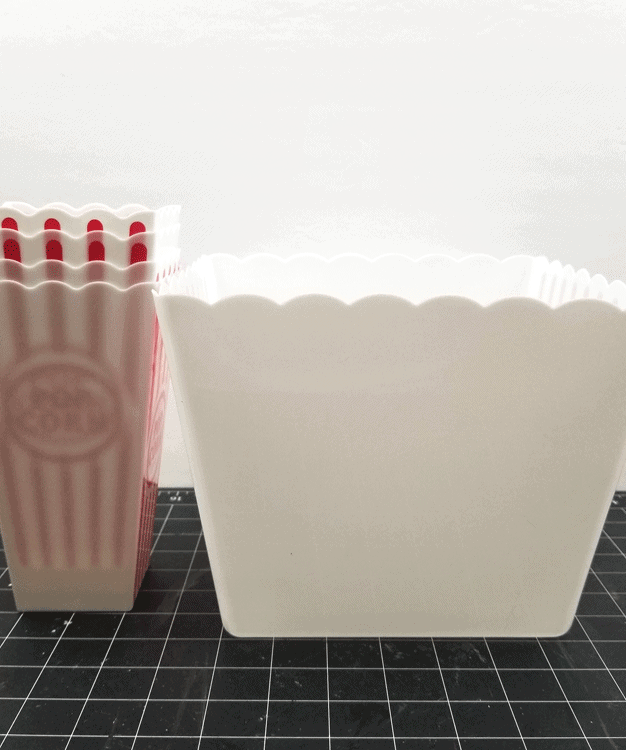
Of course I used the white sides to add the vinyl.
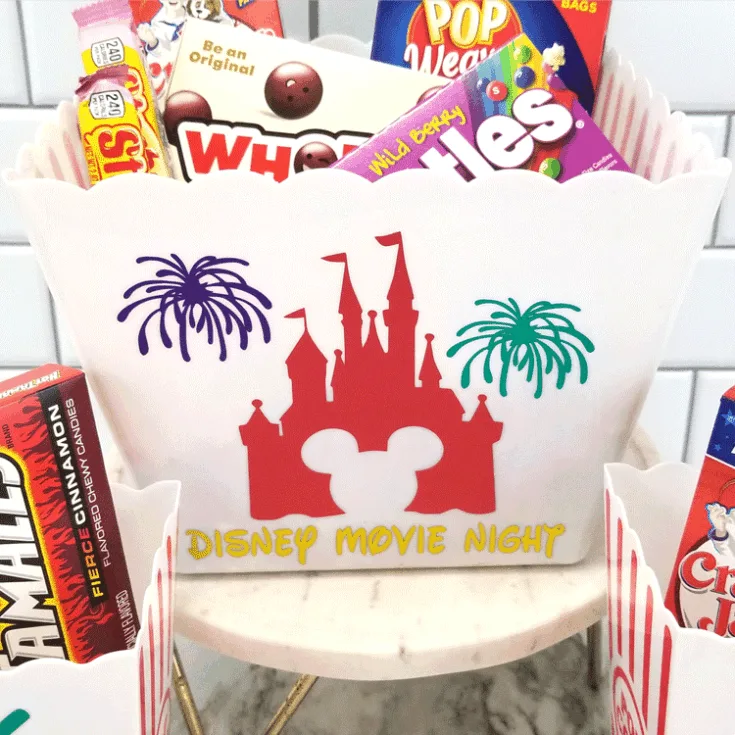
Peel off the backing then carefully place the design down. I started with my text at the bottom. Then added the castle and the fireworks were last.
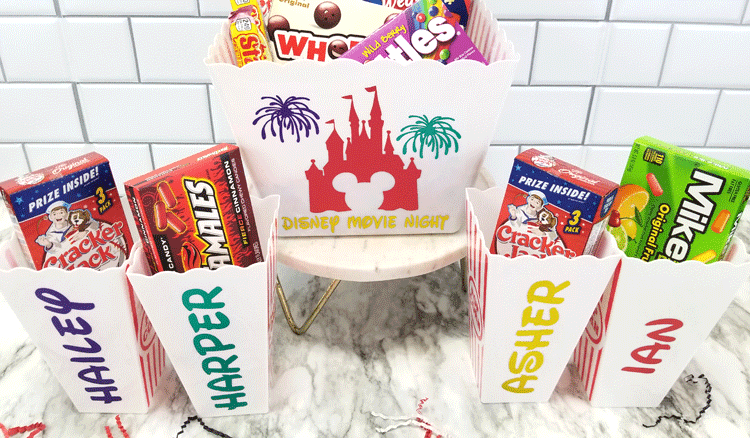
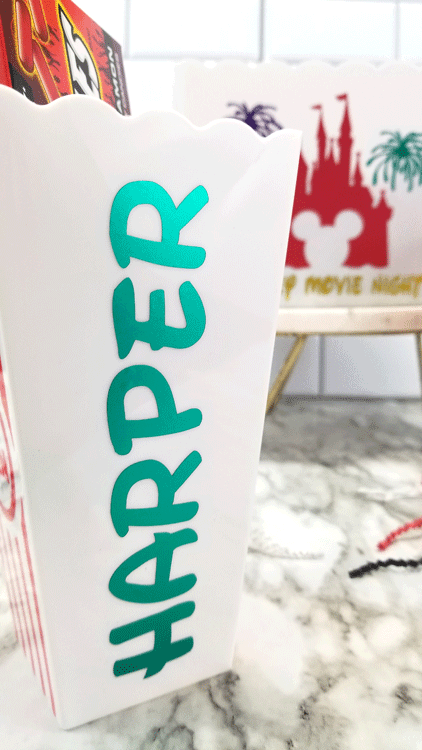
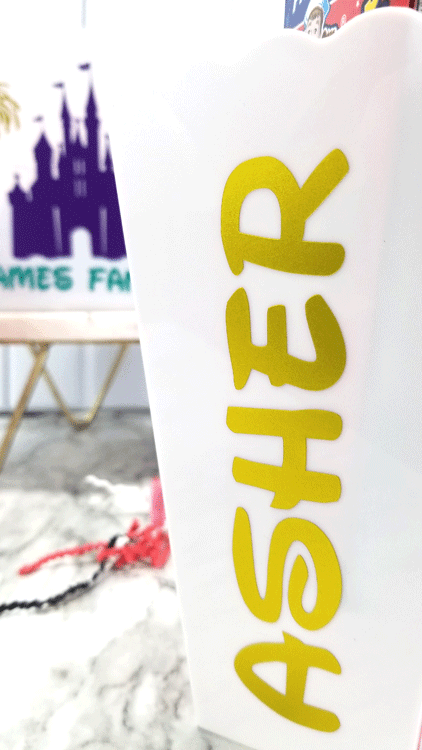
Then I added the names to each of the individual popcorn buckets.
They turned out super cute. I was thinking about adding some fireworks on these too but decided against it.

Step 4: Finish up the Dollar Tree popcorn gift idea
This is such a fun project and purchasing and adding all of these fun candies and snacks just added to the fun.
I choose skittles, Mike n Ike, Whoppers, Starburst (pink only), Cracker Jack, Popcorn and Hot Tamales. All from the Dollar Tree.
Before I added the candy I added two bags of the shredded paper filling. This just helps to lift the candy and snacks up so they stick out of the top.
What do you think?
And the reverse side!

I just love the entire popcorn gift and I hope they love it too.
I am adding some printable instructions for you just in case you want them.
Dollar Tree Popcorn Gift Idea

Learn how to create a fun, family friendly Dollar Tree popcorn gift idea using Dollar Tree popcorn buckets and StyleTechCraft vinyl!
Materials
Instructions
- Download your SVG files onto your computer.
- Downlowad the Waltograph font from Dafont.com (personal use only)
- Upload the designs into Cricut Design space.
- Resize designs to fit your popcorn projects.
- Type out the text for the sides of the large popcorn buck and for each of the individual name buckets.
- Change the colors to represent the colors of your vinyl.
- Cut the designs.
- Weed the cute designs using the weeding tool.
- Add transfer tape to the weeded desgins.
- Apply the designs to the popcorn buckets.
- Add the shredded paper filler to the large bucket.
- Add candy and snacks to complete the Dollar Tree popcorn gift!
- Give and watch their faces light up!
Recommended Products
As an Amazon Associate and member of other affiliate programs, I earn from qualifying purchases.
-
 Nostalgia HDS248COKE Large Coca-Cola Diner-Style Steamer, 24 Hot Dogs and 12 Bun Capacity, Perfect For Breakfast Sausages, Brats, Vegetables, Fish, Red
 -
 Urban Accents MOVIE NIGHT™ Popcorn Kernels and Popcorn Seasoning Variety Pack (set of 8) - 3 Non-GMO Popcorn Kernel Packs and 5 Gourmet Popcorn Snack Seasoning- Perfect Gift for any Occasion
 -
 Cocktail Napkins for Movie Night Party (Black, 5 x 5 In, 50 Pack)
 -
 West Bend Hot Oil Theater Style Popcorn Popper Machine with Nonstick Kettle Includes Measuring Tool and Serving Scoop, 4-Ounce, Red, 1 Count
 -
 Movie Night Decorations Chalkboard Kit for Movie Theme Parties, 1 Chalkboard + 1 Wood Stand, Date Night, Girls Night, Birthday, Family Activities, Movie Lover Gifts (with Chalk Markers)
 -
 Delightful Bliss Popcorn Bowl, Movie & Theater Night. Lightweight Enamel Reusable Popcorn Bowl. Perfect Sharing Bowl at any Party with Family and Friends. 5"H x 9.5"W
Thanks so much for stopping by! If you would like to see more from the StyleTechCraft design team check these posts out!
- Veteran’s Day Patriotic Sign – My Time 2 Play
- Thankful & Blessed Inspiration – Sue’s Creative Workshop
- Easy DIY Wooden Serving Tray – A Princess and her Pirates
Check out the Facebook page for StyleTechCraft. They show new products and you get to see even more from the other Design Team members.
Happy crafting!
Michelle


Morena
Wednesday 6th of October 2021
Such an adorable gift idea!
Michelle
Thursday 7th of October 2021
Thank you Morena!