These metal gift tags are so versatile. In this post learn how to decorate these tags for Christmas and Holiday gifts.
I love creating DIY for gift giving and this includes the tags for all types of gifts. These metal gift tags were so fun to make and turned out so cute.
These would also be great decor on a tiered tray if you make too many for the gifts you give.
If you love DIY metal projects you can click here to find more metal crafts inspiration!

Metal Gift Tags
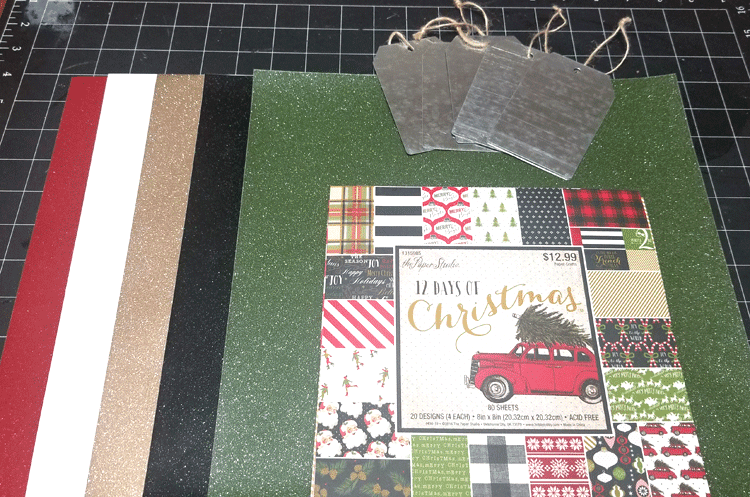
I love to make gift jars with a fun tag but I had some of these Hobby Lobby metal gift tags left over from my Rustic Painted Metal Tags and I knew they would be perfect for Holiday gift tags.
The vinyl is perfect for these tags. They are big enough to cut out a good size word or saying and I think it looks better than trying to stencil.
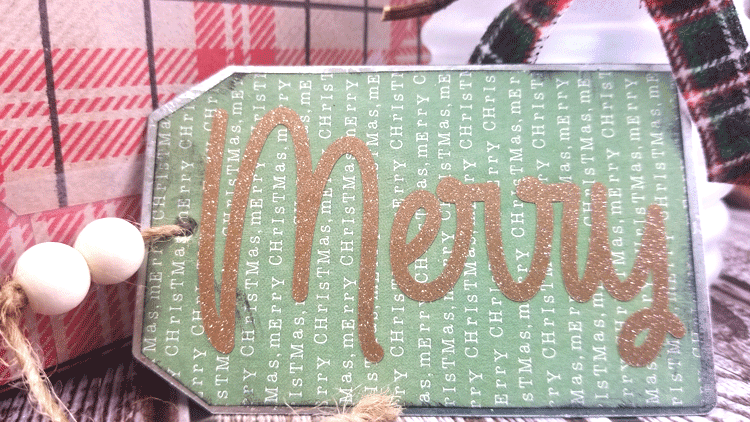
I am using my glitter vinyl from StyleTechCraft. It comes in beautiful colors that matched perfectly with some Christmas scrapbook paper I had left over from a couple of years ago.
I am on the design team for StyleTechCraft. They were very kind to send me the glitter vinyl for this project.
Materials Needed
I have added some affiliate links for your convenience. You can see my full disclosure here.
- Metal Gift Tag SVG/PNG files – Use the opt-in box above to get 4 of the files for free! Then you will see a great deal for the other 8 files for a total of 12!
- Metal Gift Tags
- Holiday Scrapbook Paper
- Mod Podge
- Glitter vinyl to match paper
- Transfer Tape (for paper)
- Black Ink
- Twine
- Wood Beads
- Scissors
- Foam Brush
- Pencil
- Cricut Maker (such a great price at the time of writing this post) Savings of $140!! Wow.
Now that we have everything ready! Let’s get started!
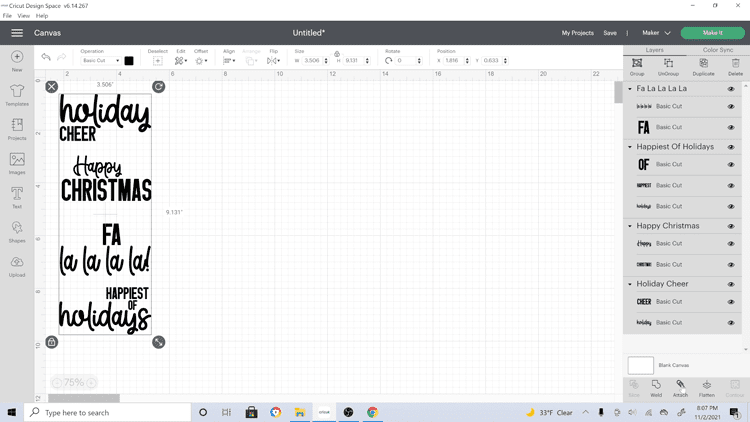
Step 1: Grab the files and upload to design space
If you have some files you can use them or you can type right into design space and make your own. But if you want the same ones that I used, use the opt in form above to grab the first four files for free.
You get SVG and PNG files. After you opt in for the email/newsletter you will be taken to an offer to get the other eight files! That is a half price offer just for my email/newsletter people.
If you still want these files but don’t want to sign up for the email/newsletter just head over to my Etsy store and grab them.
Once you have downloaded the files let’s bring them into design space. We will be using the SVG files for this part.
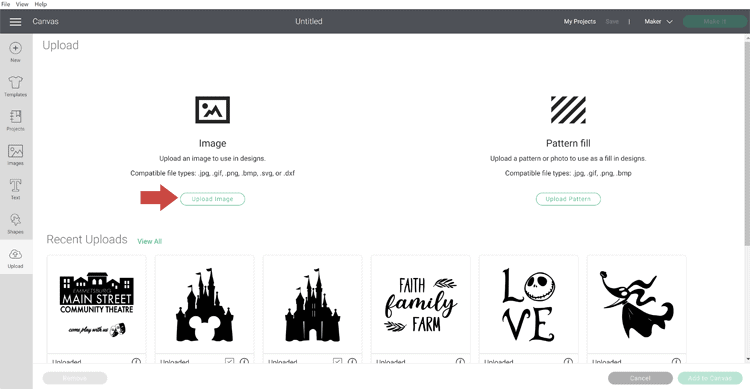
Open up design space and click on the “new project” button in the upper right corner.
This will bring you to the canvas. There are some tools on the left side, choose the “upload” button at the bottom.
Once you are there you should see a screen sort of like this. Click the “upload image” button.
Click “browse” to find the files you want to use.

Find the file, choose it then click “open”

This is will bring it into your space.
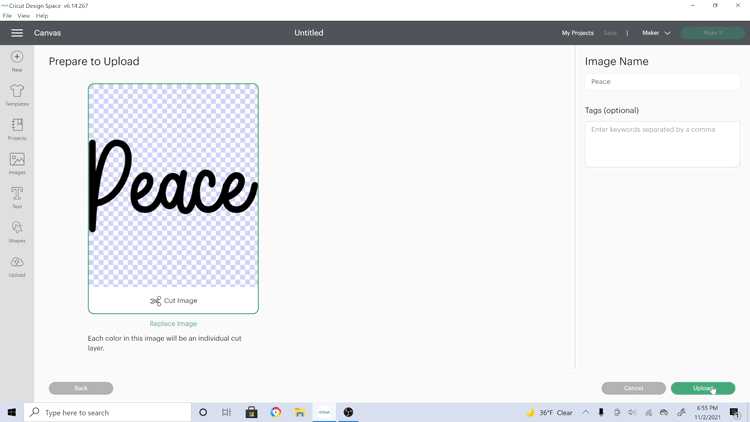
Then click the green “upload” button in the lower right corner.
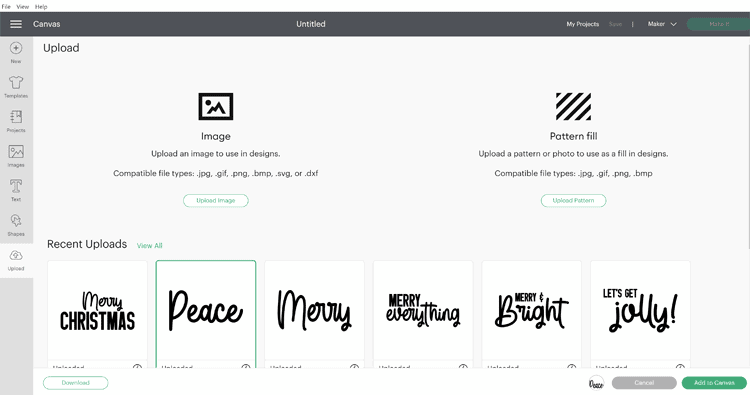
It will be added to all of the other images at the bottom of your screen. Then choose the files you are going to work with and click the “add to canvas” button.
Step 2: Resize and cut the designs
Once all of the files you want have been added to the canvas, resize them and line them up to be cut all at once.

Once they are just the way you like them, grab all of them at once and click “attach” in the lower right corner.
This will “glue” them together in the places they are in for cutting.
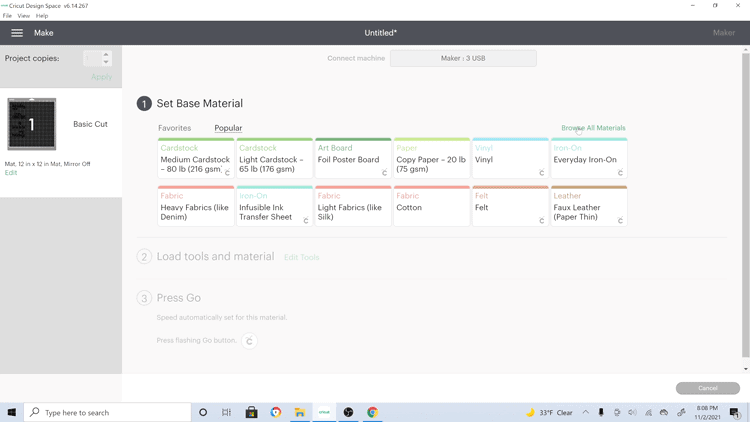
When that is done, click “make it” in the upper right corner.
You will be taken to the mat settings. This is where you can move things around a little bit to make sure the cuts will line up with where you place the vinyl.

Hit the green “continue” button when you are ready to proceed. It is in the lower right corner.
Next is the setting screen.
Click “browse all materials” in the right corner above the last materials setting. In my case it is above “Everyday Iron-on”.
You will type in “premium vinyl” and hit search.
If my exact vinyl is not listed, I like to choose one from the settings that is similar to the one I am using in weight.
Frosted Glitter is a great choice for any glitter vinyl you are using.
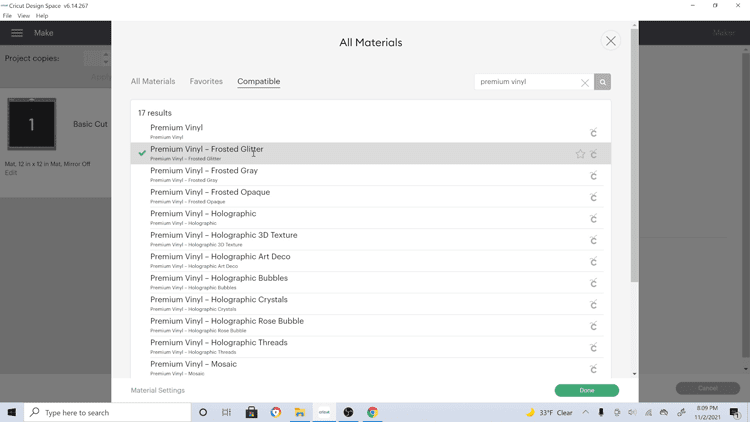
Click “done” in the lower right corner.
Leave you blade setting at “default” and you are ready to go!
Just click “make it” in the upper right corner.
You will load the paper, then click the flashing button on the machine to start the cutting.

Step 3: Weed designs and add transfer tape
After all of the text for the metal gift tags have been cut from the glitter vinyl, weed out the designs and add your transfer tape to the top of each one.
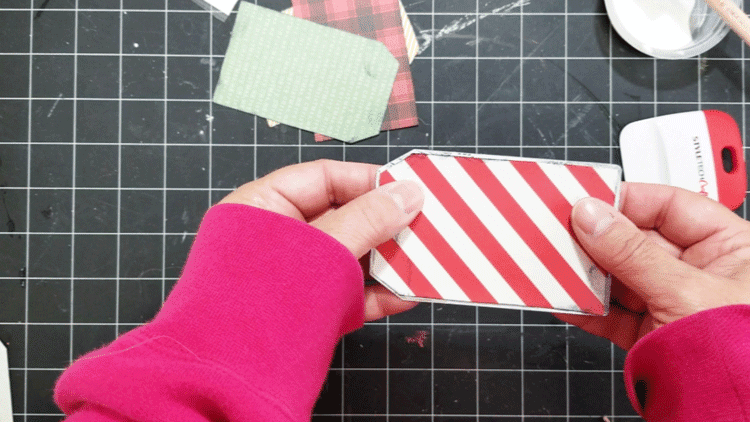
Step 4: Cut out the tag shapes from the Christmas paper
Choose the designs you like from the scrapbook paper. The lighter color vinyl will look better on the darker papers and vice versa.
I choose about 6 different papers and cut just a couple tags from each one.
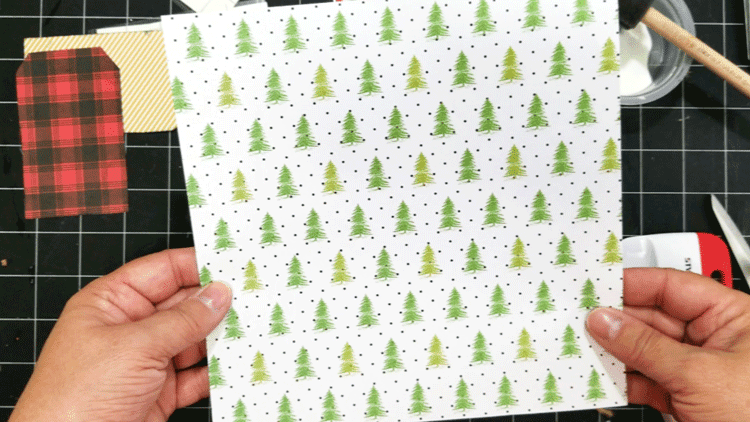
I was being lazy and just placed the metal tag onto the paper and cut around it. You can use a pencil and trace the design if you want to me a little more precise.
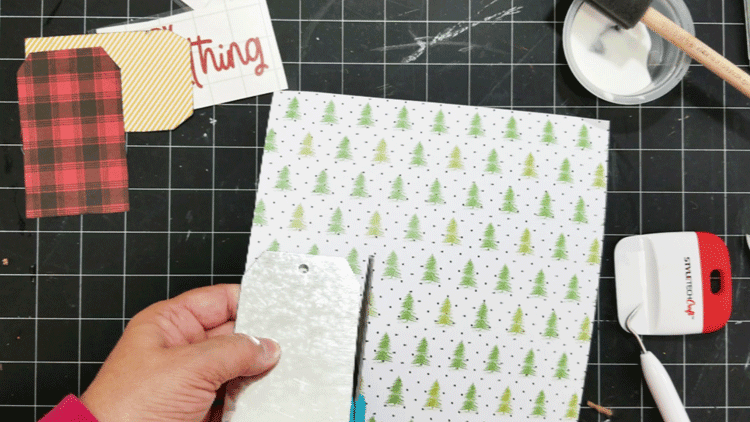
I like my paper to be slightly smaller than the metal tag so after the first one was cut, I trimmed the edges a bit more.
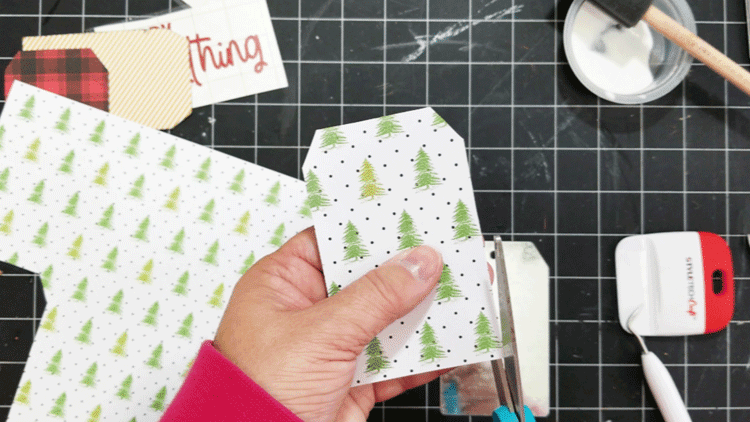
Once this one is the size and shape you like, you can cut out all of the other paper tag shapes using the other Christmas patterns of paper.
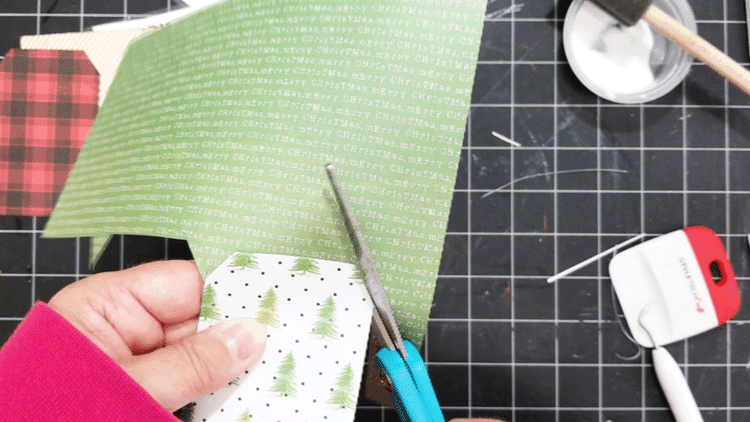
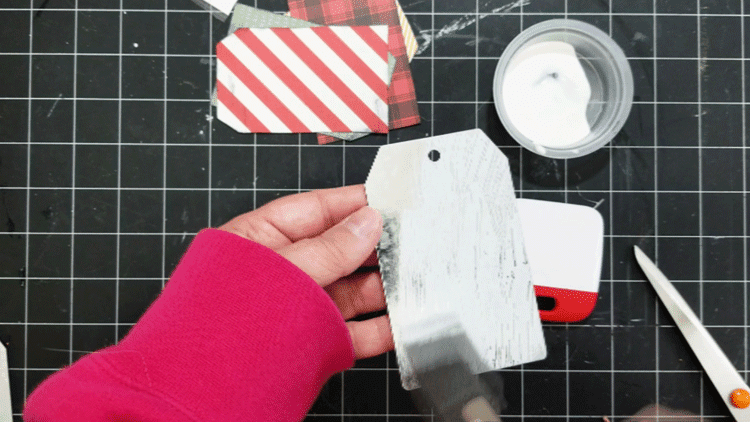
Step 5: Add black ink (optional)
I love a nice grunge look and a great way to achieve this look is to use a black ink pad and drag the ink around the edges.
You can add as much or as little of the ink to get the look you like. And…if you hate the grunge then just omit this step all together.

Below is a finished tag but you can see the black ink around the edges.
Step 6: Mod Podge and add paper
Once the paper pieces are cut and “grunged” they are ready to be applied to the metal gift tag.
Use a sponge brush and add a layer of Mod Podge to the top of the metal tag.
Place the cut paper tag onto the Mod Podge and move it around until it is in just the right spot.\
Smooth it down with your fingers and it stays nice and flat. I did not get any bubbles.
Use the sharpened tip of a pencil and push it through the paper into the hole of the metal tag.
Step 7: Add the vinyl
Now we get to add the vinyl text pieces to the top of the patterned paper. I think this is my favorite part. It just brings them to life.
Remove the backing from the vinyl piece and place it onto the patterned paper. I tried to keep from blocking the hole and tried to center it from the top and the bottom of the tag.
I also like mine to be straight but if you are an angle type of person..do that!
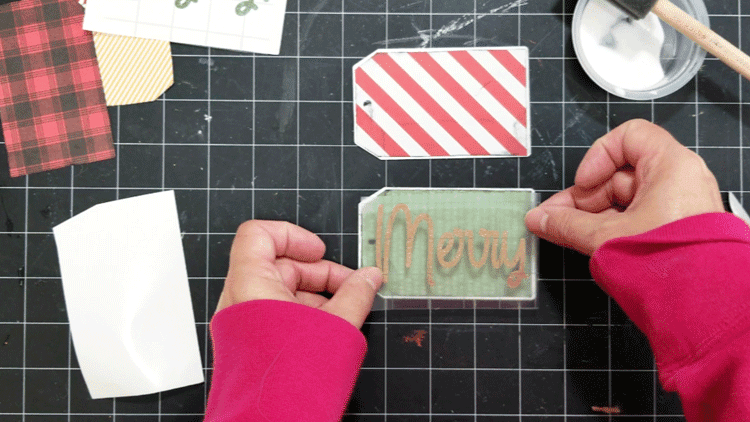
Then remove the transfer tape. I actually used the wrong transfer tape. And I was lucky that it didn’t rip the paper but it worked out fine.
There are different kinds. The link in the materials list is the correct transfer tape.
This one is less tacky and works perfectly for adding vinyl to paper.
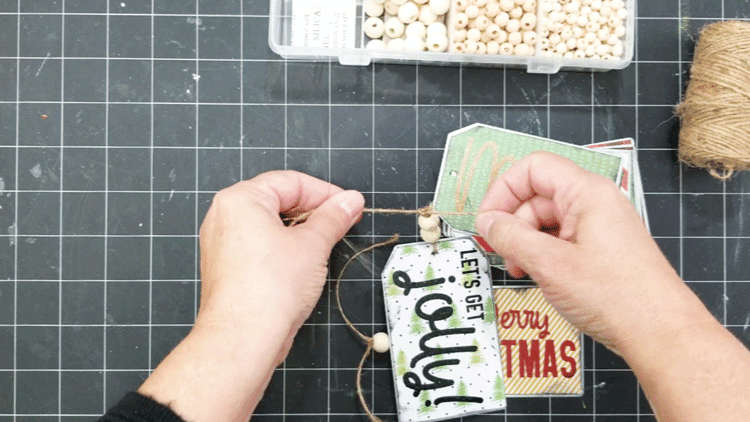
Now all we have to do is add the cute twine and beads.
Step 8: Add the twine and the beads
Cut a piece of twine about 8-10 inches long.
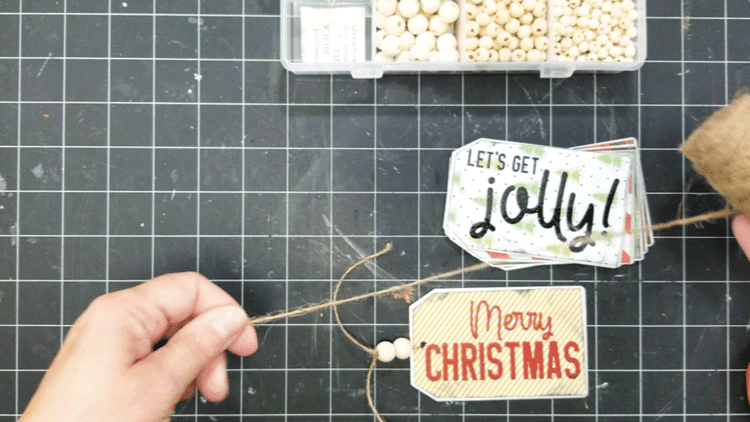
Thread it into the hole in the tag. Then choose two wood beads to add to the twine. You will need to thread both ends of the twine through beads.
Take your time so they don’t ravel up.

Push the beads all the way down to the tag.
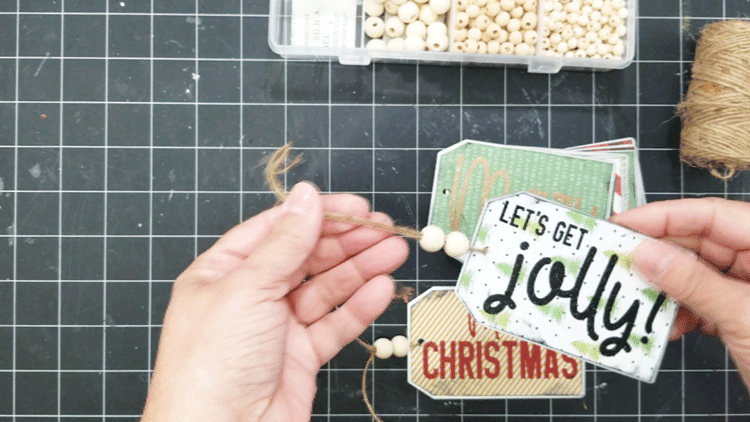
Then tie a knot so the beads stay in place.
And that is all there is to it!
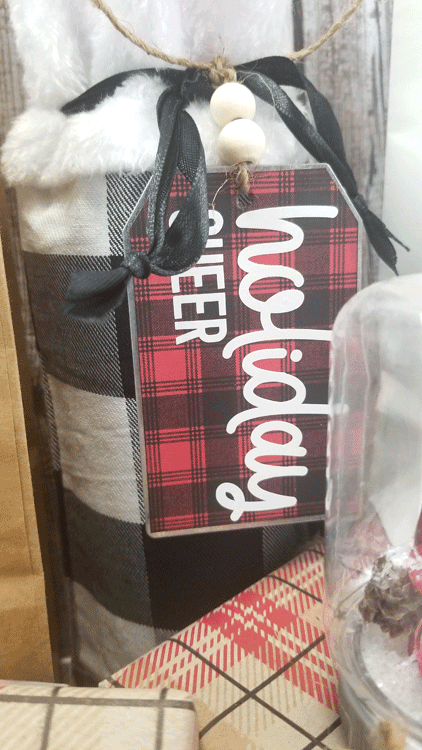
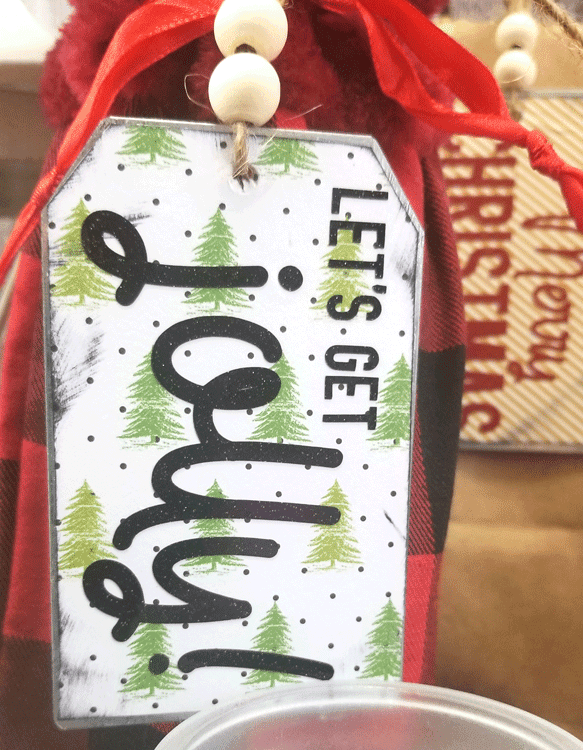
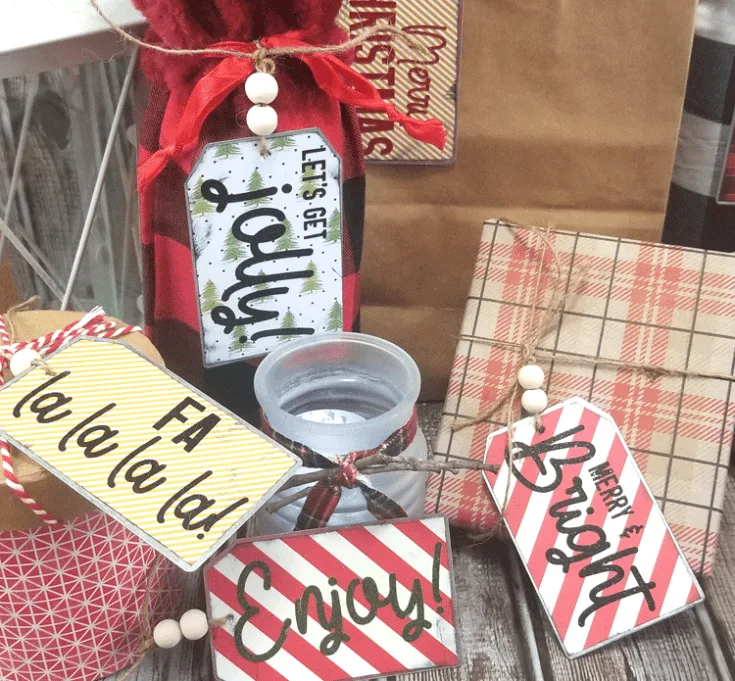
Here are my tags hanging on different types of gifts. Wine bags, gift bags, gift boxes, etc!
They are super cute.
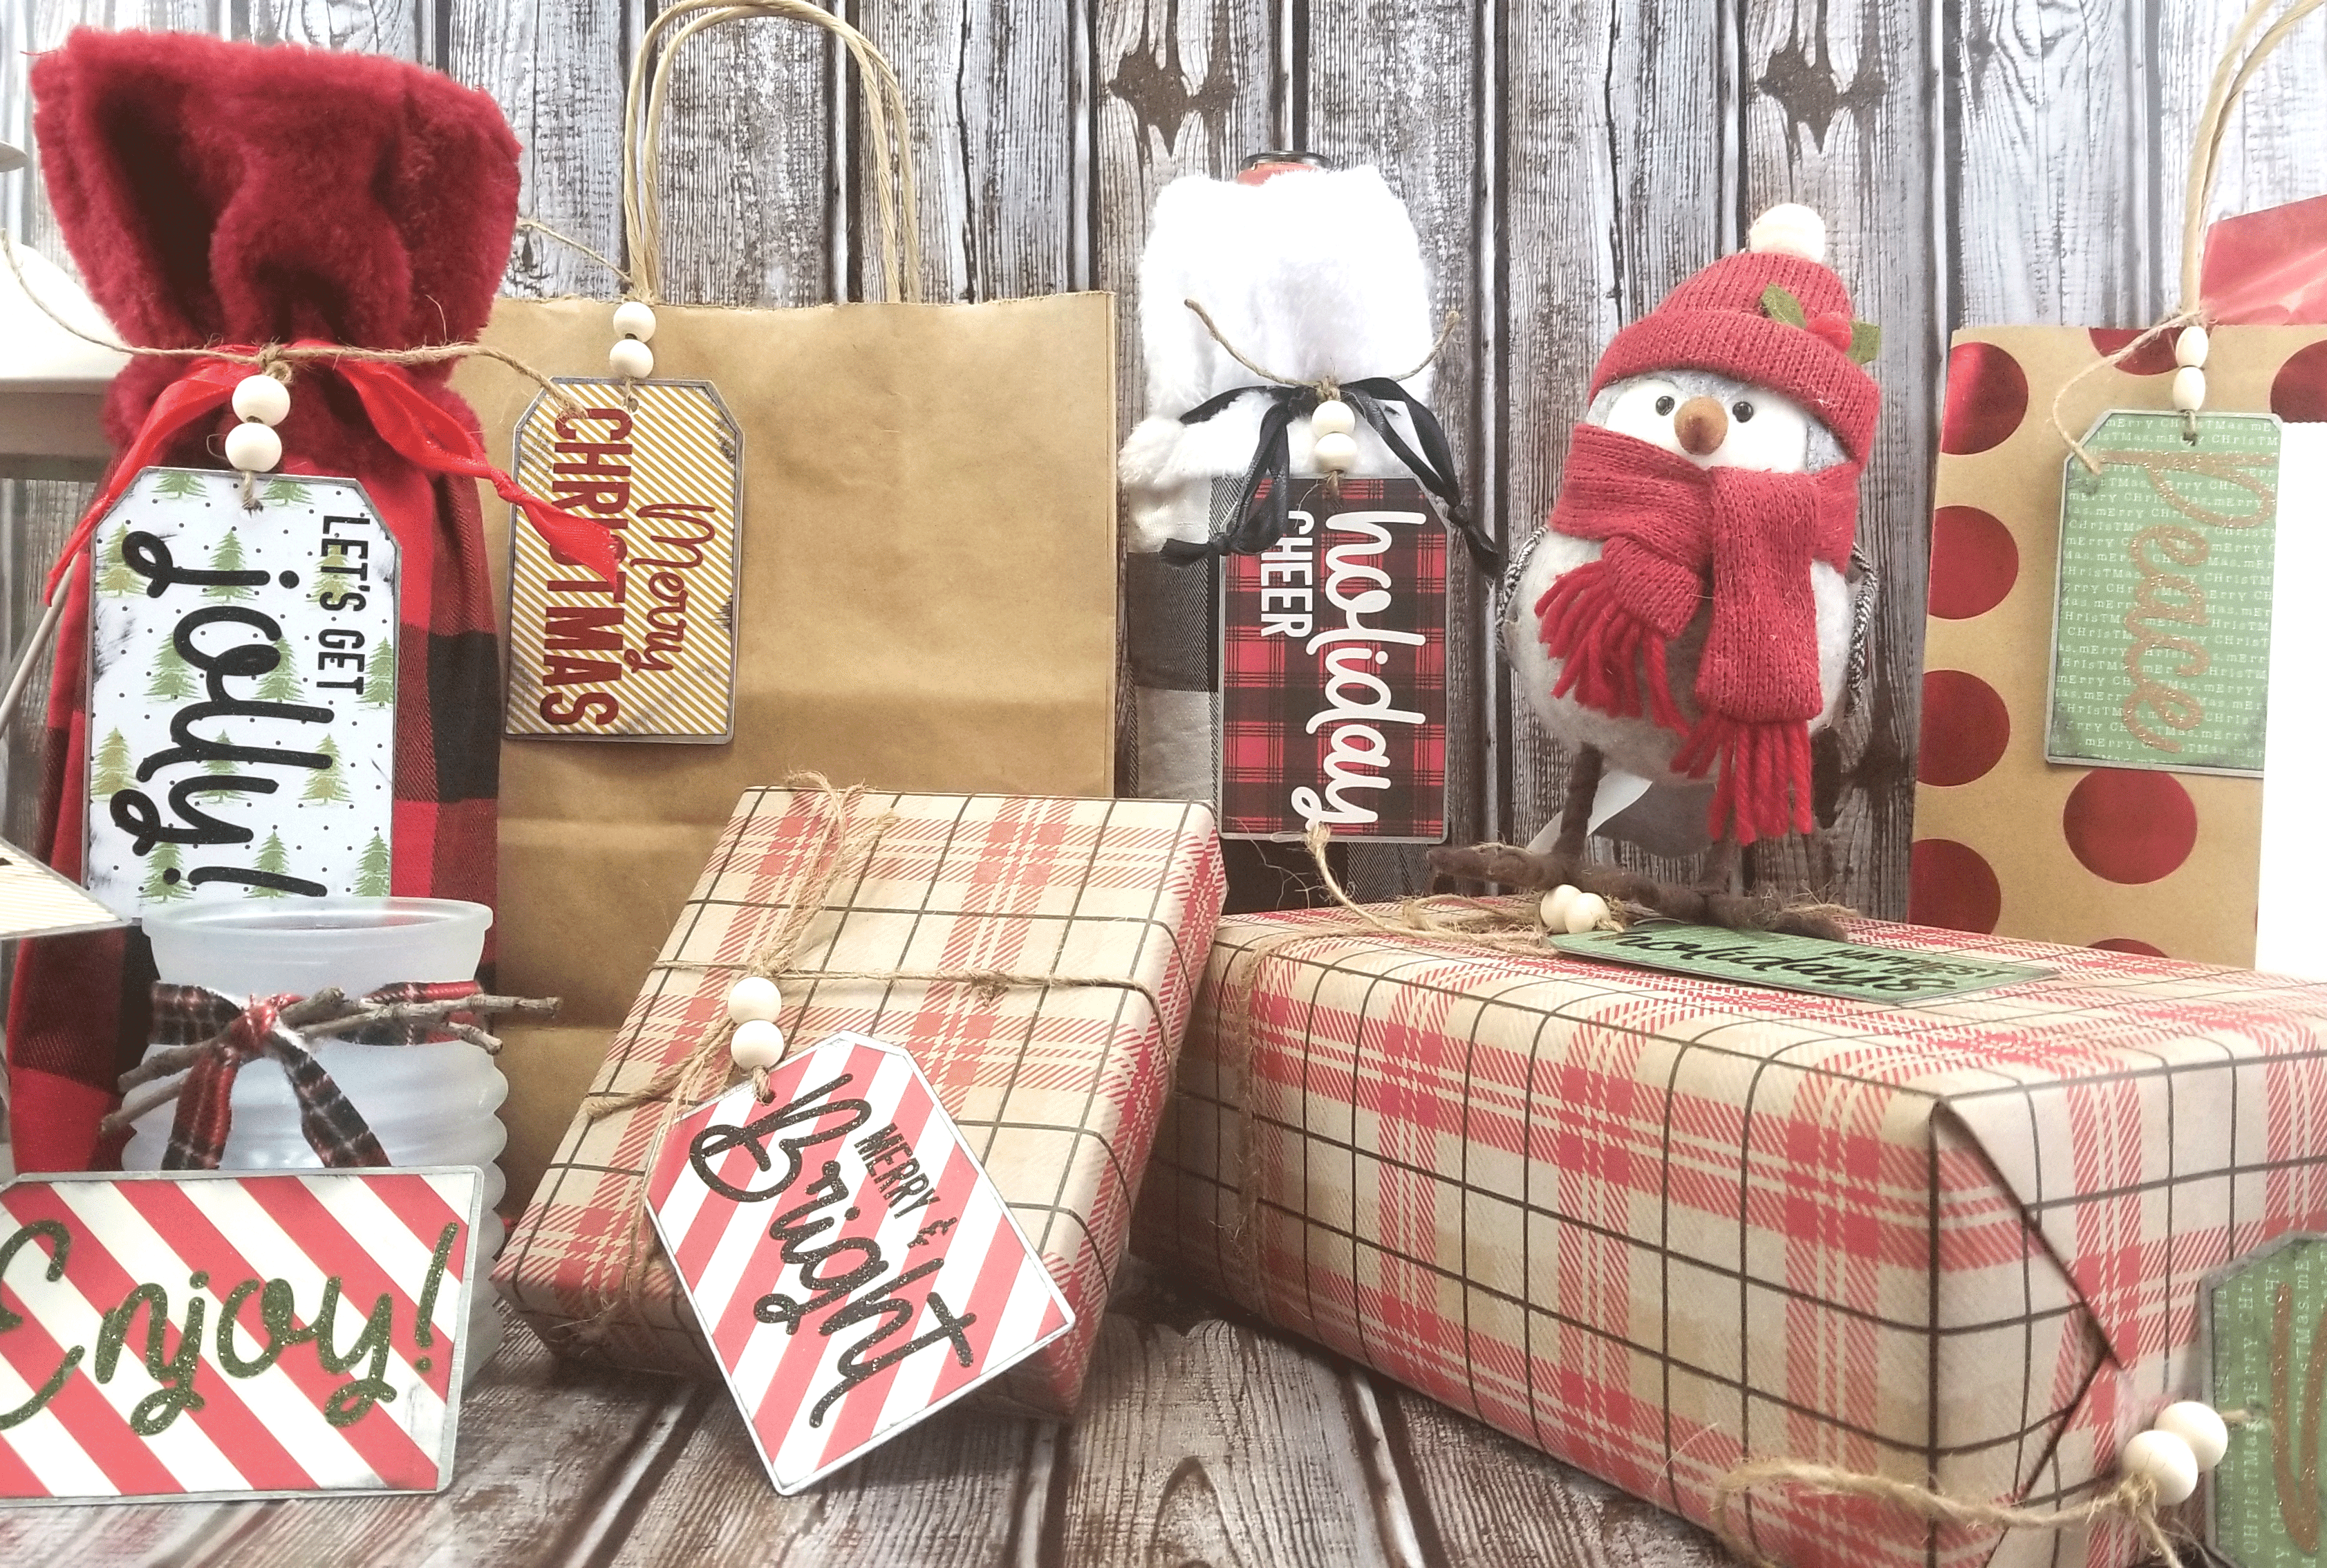
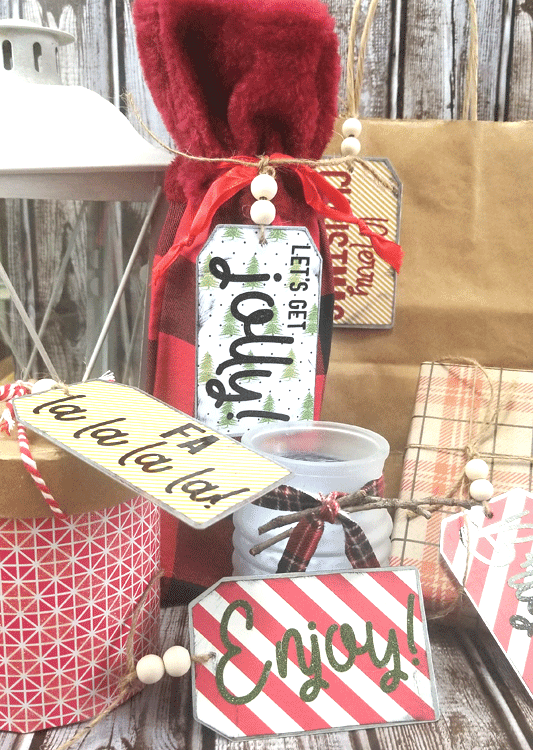
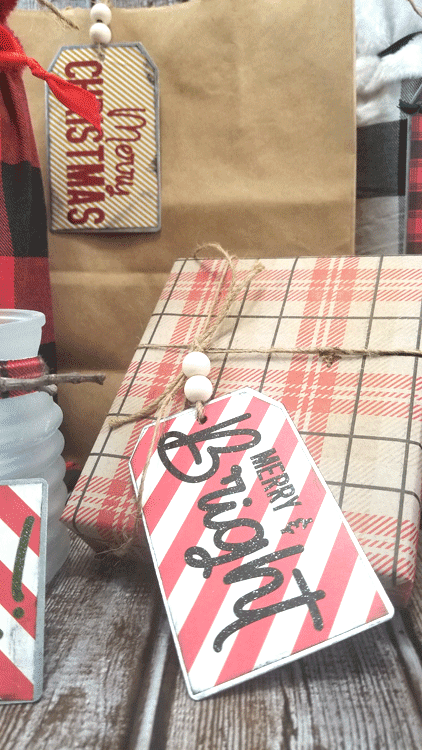
You can see how cute the glitter vinyl is in the close up pics. I just love it.
These buffalo check wine bags are from Dollar Tree and they are really cute. And the cute metal gift tags are perfect for them.
What do you think?
Here are some printable instructions if you need them.
Metal Gift Tags

Materials
- Metal Gift Tags
- Tag SVG/PNG files - Opt-In on blog post page
- Glitter Vinyl from StyleTechCraft
- Transfer Taper for Paper
- Mod Podge
- Wood Beads
- Twine
- Archival Black Ink
- Christmas Paper Pack
Tools
- Scissors
- Foam Brush
- Pencil
- Cricut Maker
Instructions
- Download the SVG Tag files onto your computer
- Upload the designs to Cricut design space.
- Add the tag designs to the canvas and re-size to the size for your metal gift tags.
- Rearrange them in design space so you can cut multiple files onto multiple colors of paper.
- Weed and add transfer tape.
- Choose your paper pieces and cut around the tag or trace around the tag and cut it out.
- Trim the paper just enough to leave a little bit of the metal gift tag showing all the way around.
- Use that one as a pattern to cut out enough paper for all of the tags.
- Use the black ink to add a grunge look onto the paper
- Cover the metal tag with a layer of Mod Podge.
- Add the cut piece of paper to the Mod Podge and smooth it down.
- Use the lead end of a sharpened pencil to poke through the paper and the hole in the tag.
- Add the vinyl pieces to the top of the paper.
- Cut a piece of twine about 8-10 inches long.
- Thread the twine through the hole in the tag.
- Place the two ends of the twine together and sting on two beads.
- Push the beads to the tag and tie a knot in the twine just above the beads to hold the beads in place.
- Add the tag to a gift bag, a gift box, a wine gift bag or even a tiered tray!
Recommended Products
As an Amazon Associate and member of other affiliate programs, I earn from qualifying purchases.
-
 20 Qty Wooden Crafting Gift Tags (6" x 3.5")
 -
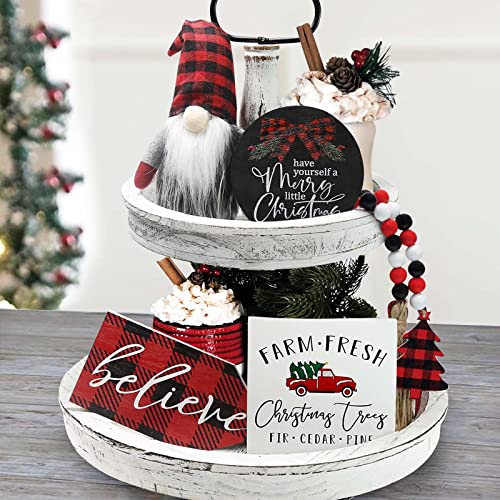 Christmas Decor - Christmas Decorations Indoor - Believe Merry Christmas Wooden Signs & Buffalo Plaid Gnomes Plush Set - Farmhouse Rustic Tiered Tray Country Decor for Home Room Table Mantle Fireplace
 -
 HRX Package Burlap Wine Bags with Drawstring, 10pcs Hessian Cloth Bottle Gift Bags for Holiday Giving Blind Taste Party
 -
 Hallmark 12" Large Christmas Gift Bags (Pack of 2; Red Merry, Kraft Snowflake)
If you like to see more crafts with this awesome glitter vinyl, check out these blogs that belong to more of the StyleTechCraft design team bloggers.
- Layered Winter Trees Candle Holder – Sparkle Living
- Retro TV Ornament DIY – Morena’s Corner
- Dollar Store Holiday Sled Ornaments – Sue’s Corner
- How to Make A Christmas Lantern – A Princess and her Pirates
Check out the Facebook page for StyleTechCraft. They show new products and you get to see even more from the other Design Team members.
Thanks so much for stopping by today!
Michelle


Sue Eldred
Monday 8th of November 2021
These turned out so cute. Great job.
Michelle
Tuesday 9th of November 2021
Thank you Sue. They were a lot of fun to make!