Add some colorful transfers to fan blades for a different take on this easy to make dragonfly DIY wood craft idea.
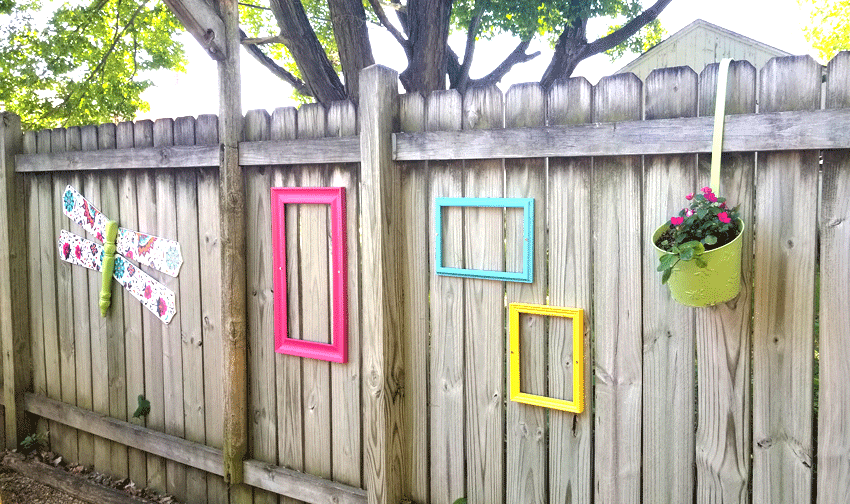
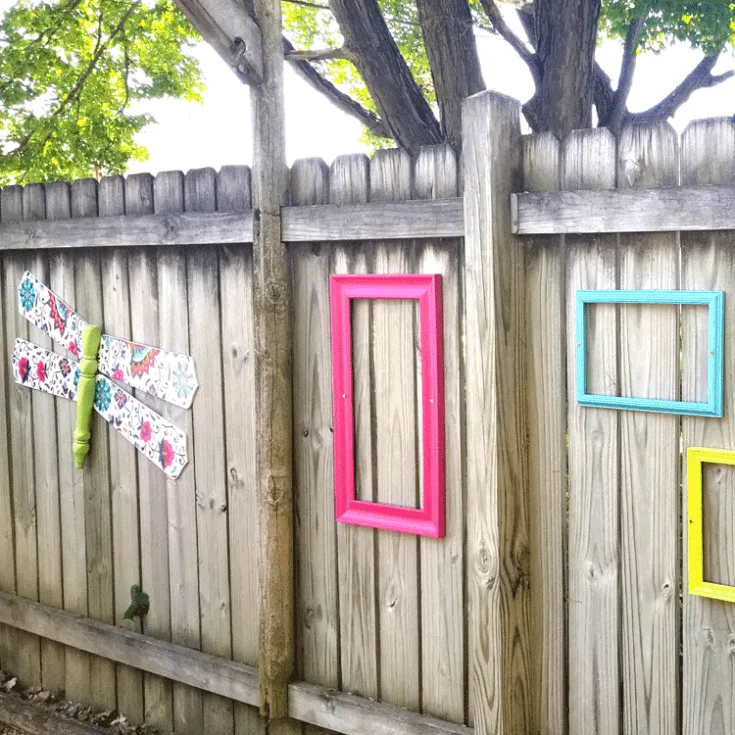
I am having a great time adding color and interest to my back yard patio space.
Last week I used some thrift store frames in bright colors to add to my fence and now I have added this DIY wood dragonfly to complete the fence decor.
The transfers were sent to me from Dixie Belle Paint Co. When I used to scrapbook we called these rub-ons. They were much smaller, of course but they work the same way.
It was an easy way to add some design to the wings of this dragonfly and I think it turned out super cute.
If you are loving upcycled and thrift store projects click here for more!
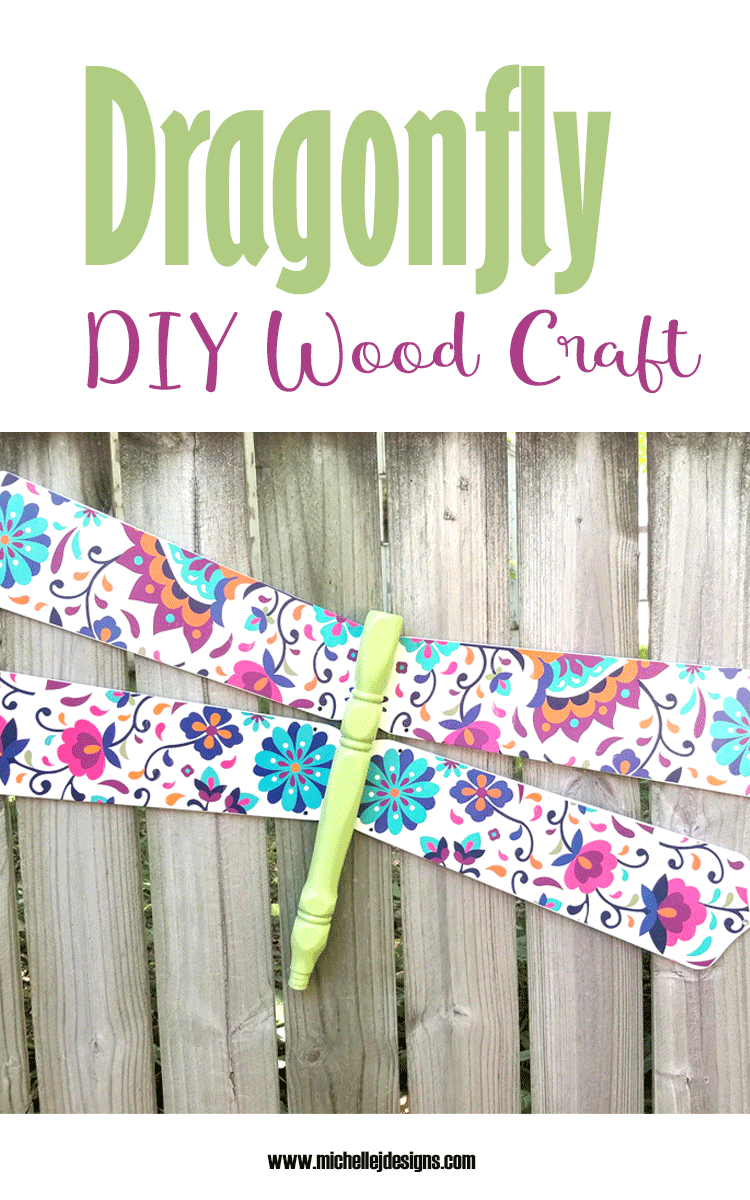
Dragonfly DIY Wood Craft
This really was a fun project. I had some fan blades in the garage to make a dragonfly a long time ago and we finally got rid of them. When I was asked if I wanted another set I took them knowing that I could use these transfers to make a great set of wings.
Dixie Belle sent these transfers to me in exchange for this post and I was more than excited to try them out.
They worked exactly like the smaller version I used to use a lot for cards and scrapbooking. The only difference was the size. If you took any of my classes or have been a scrapbooker you know how these work.
Basically you remove the backing from the transfer and then use the tool they provide to press and rub the design until it transfers to your project. So easy to use.
Materials Needed
I have added some affiliate links for your convenience. You can see my full disclosure here.
- Dixie Belle Transfers – Latin Floral
- Four fan blades
- One spindle – Mine is from the back of a chair but a stair spindle or a chair leg would work well
- Dixie Belle chalk paint – Cotton
- Dixie Belle – Gator Hide Sealer
- Paint Brush
- Foam Brush
- Drill & drill bits
- Screws
- Mini Miter Saw – Optional
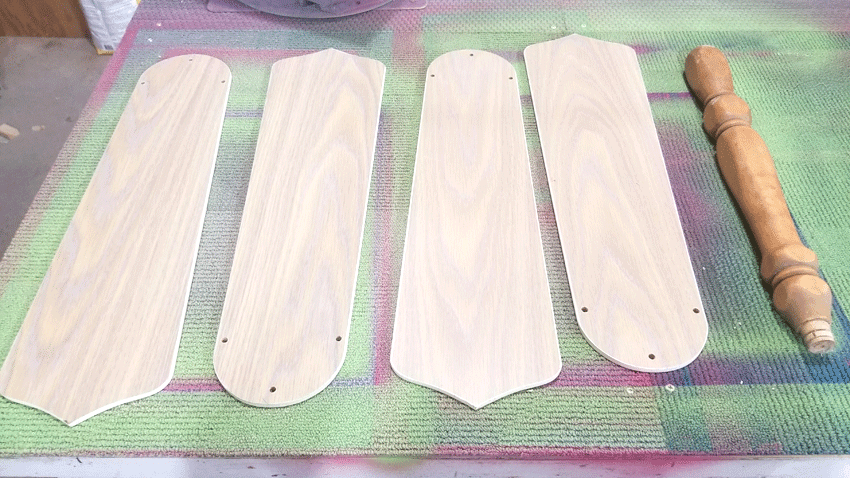
Step 1: Prep the fan blades
When I received these fan blades the metal pieces had already been removed. If yours still have any metal pieces be sure to remove them.
And you only need four blades. Mine had five so I just set one aside.
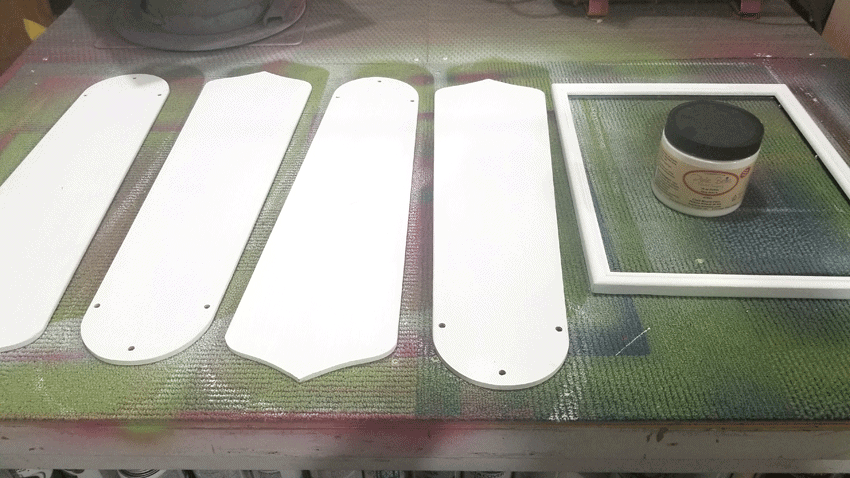
Paint the fan blades white and paint your chair spindle any color you want your dragonfly body to be. I used a pretty lime green spray paint.
Here they are before they were painted.
And here are the fan blades after two coats of the Cotton chalk paint.
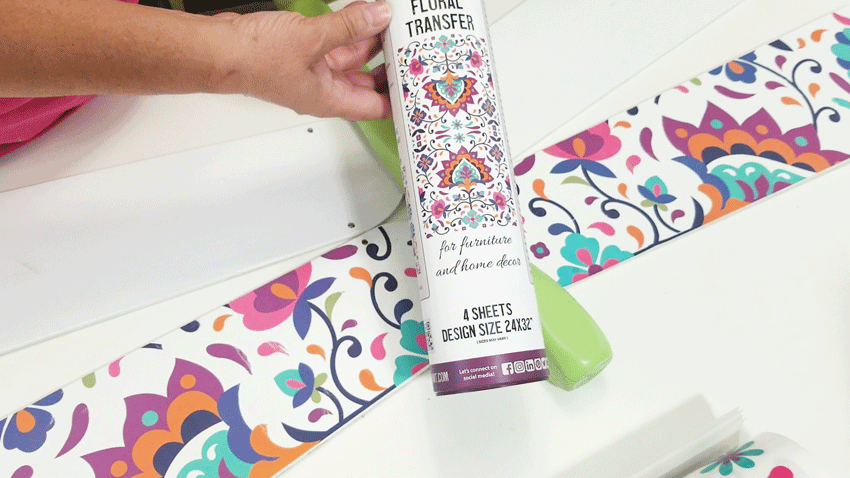
Step 2: Add the transfers
These transfers make DIY wood crafts and other DIY projects so easy.
Imagine if you were cutting each color from vinyl on a Cricut or Silhouette machine or using a stencil. They are both doable but this places all of the color all at once and is such an easy, fast way to add design to any project.
There are like 13 different designs of these transfers available from Dixie Belle. I had a hard time choosing. I also got the Magnolia flowers and I can’t wait to use them on something too.
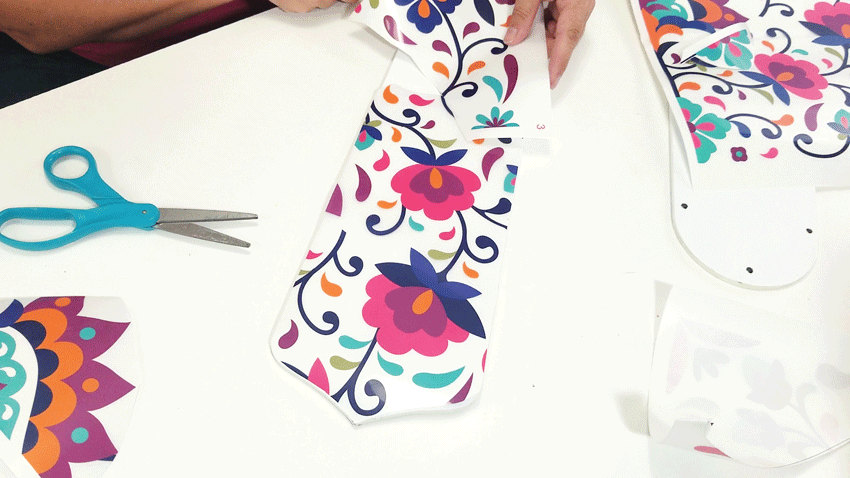
Plan out your design
You can see in the photo above that I had already done the top two fan blades when I started taking photos and filming. That is because I wanted to make a plan and make sure it worked before I told you how to do it. LOL
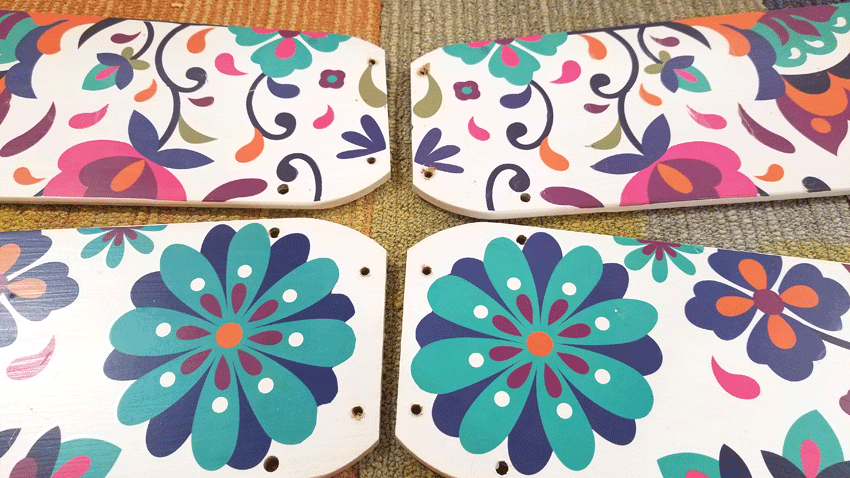
There are four transfers in the tube that when placed together make one large design. I wanted to mirror the wings on the dragonfly so I used one piece for each wing to make sure I could repeat the design.

On the bottom two fan blades I started by deciding which part of the transfer I wanted to use as the main piece then planned out which other parts I would use to finish it off.

I knew that I wanted the two larger pink flowers to run lengthwise across the blade so I started there.
Once I figured out how they would be placed I flipped the transfer and the fan blade over.

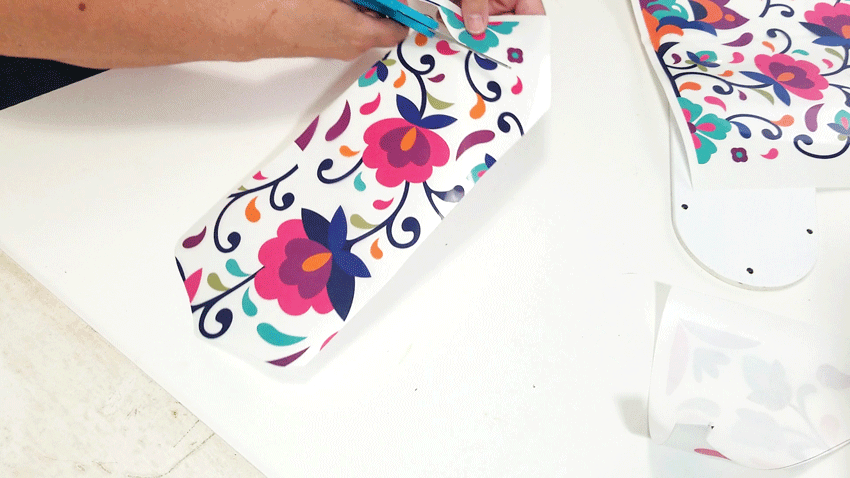
Use a sharpie or a pen or pencil to trace around the edge of the fan blade.

Then cut out along the lines that part from the transfer.

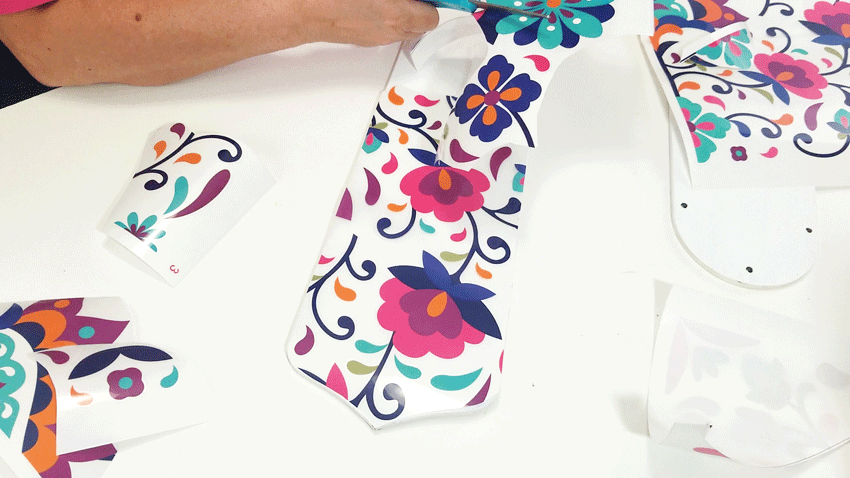
Cut the parts that will not work
You are probably confused by this title but here is what I mean. Check out the photo below. The flower that I am cutting off has a straight edge at the bottom.
I thought it would look funny to have the flower end abruptly so I am removing it and will put a different flower in it’s place. I know that the dark squiggle will end too but I am going to line up another dark squiggle to keep that going.
Adhering the transfer
Now I am ready to attach this part of the transfer. Then I will continue with my design.
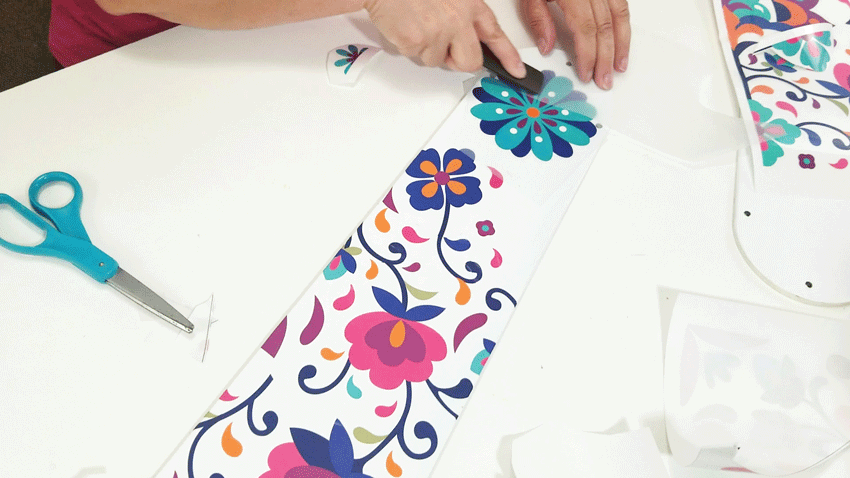
Peel the backing off the transfer and place it onto the fan blade.
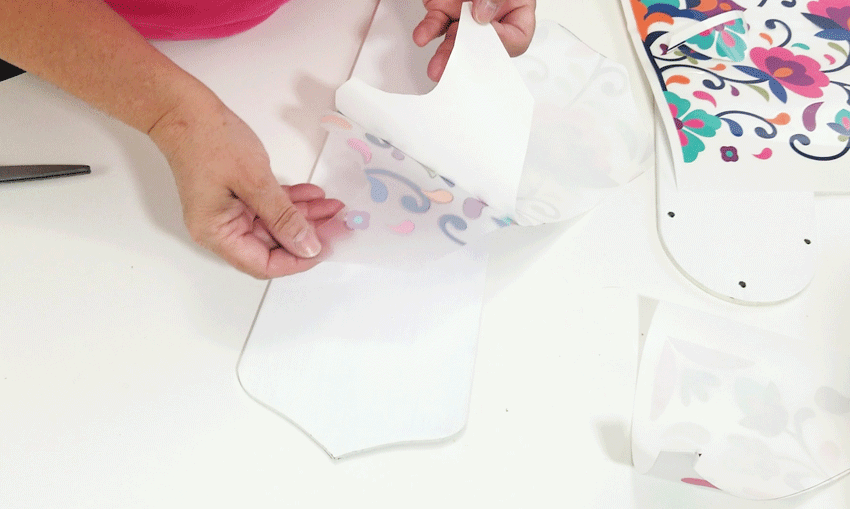
Use the tool to start rubbing on the top of the transfer. As you continue this process the top clear piece will start to come up as you pull it. If you see it starting to pull up the design, just place the clear part back down and burnish it some more until it is ready.
Keep going along the entire design until you finally can lift the clear piece off completely.
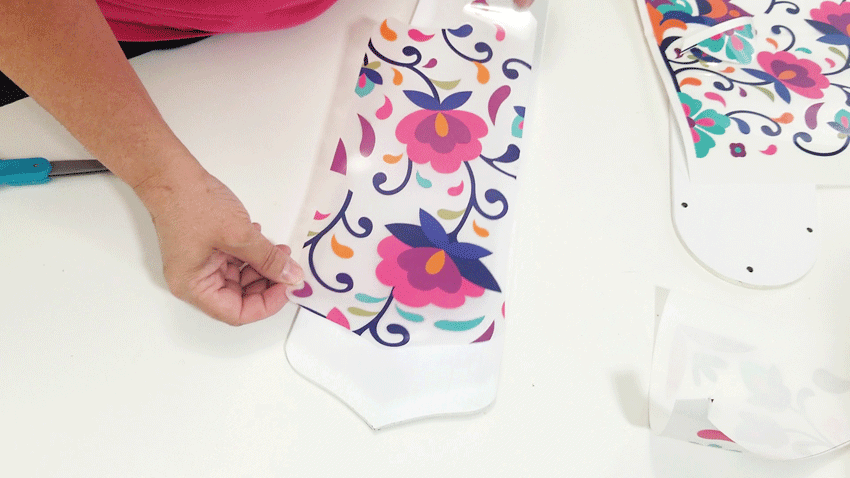
Now I am ready for the next piece of transfer.
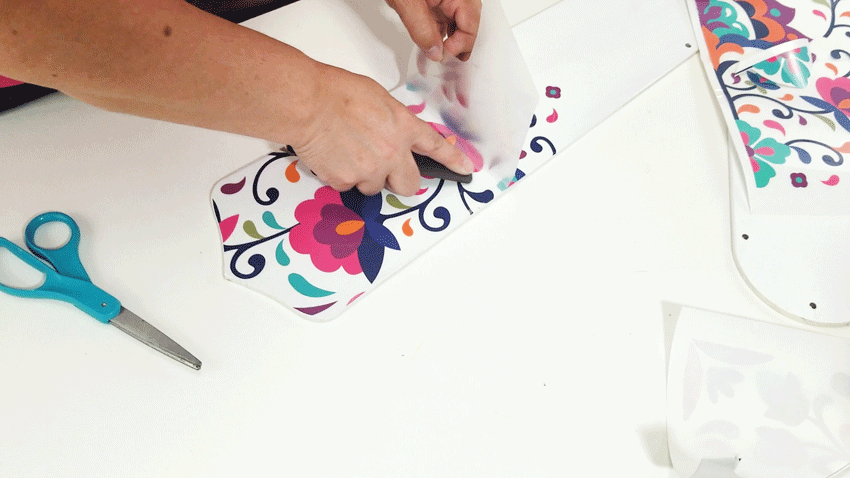
I am going to cut off some of the dark squiggle and line it up to create a nice looking, seamless design.
This is sort of how I want to have it line up but before I transfer it over I need to cut off the big flower next to it. You can’t see it in photo but there is a flower next to that one that doesn’t quite fit on the fan blade.

I cut that part off the large flower. Then I cut the large flower away from the rest so I could add it on separately.
Place each piece down as you go so it doesn’t get mixed up.

Filling in and finishing
Once this small area is finished and lined up with the main section. I wanted to fill in the rest of the fan blade. The big flower that I cut out earlier fits nicely and takes up most of the space.
After that I just chose some pieces that could fill in the gaps and make the design look like it was supposed to look that way the entire time.


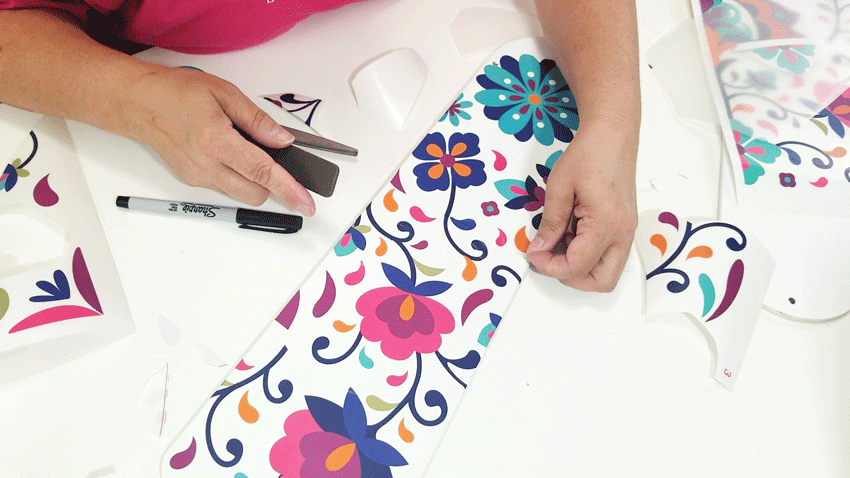
Now everything was all filled in.
All of these instructions and photos probably make it look difficult but it really isn’t. I think this wing took me about 20 or 25 minutes to create.
Then I did the same thing on the other lower wing trying to get it to work out close to this wing.
You don’t have to add your design the way I did either. You can create your own design or lay the entire transfer down and put it all on at once. I just wanted mine to be a little different.
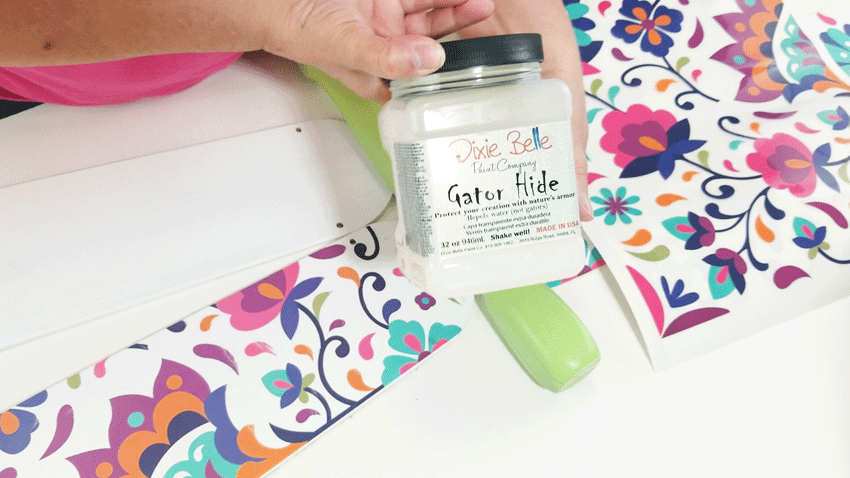
Step 3: Seal the dragonfly
Once the wings were done I gave them three coats of the Gator Hide sealer. (I had previously sealed the body) Be sure to wait at least 2 hours between coats. This will seal the DIY wood craft for the weather.
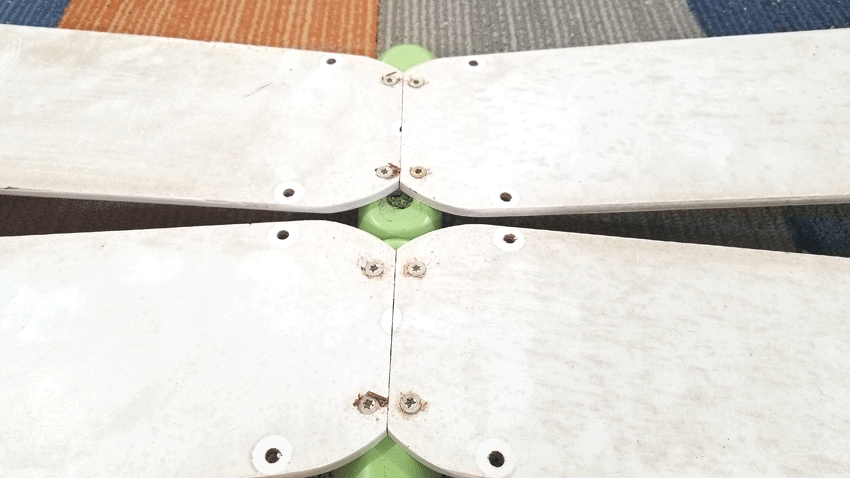
Step 4: Assemble the dragonfly
Jeff was helping me with this part. He wanted the wings to line up better on the chair spindle so he trimmed the inside edges at a slight angle to make them fit.
Then he drilled two new holes in each fan blade for this dragonfly DIY wood craft.
And he added holes to the ends of the wings to attach it to the fence.

Then we turned everything upside down including the dragonfly body to attach his wings.
Step 5: Hang the dragonfly DIY wood craft
He was now ready to be hung up on the fence. I was so excited.
We just used screws and they went right into the fence boards.

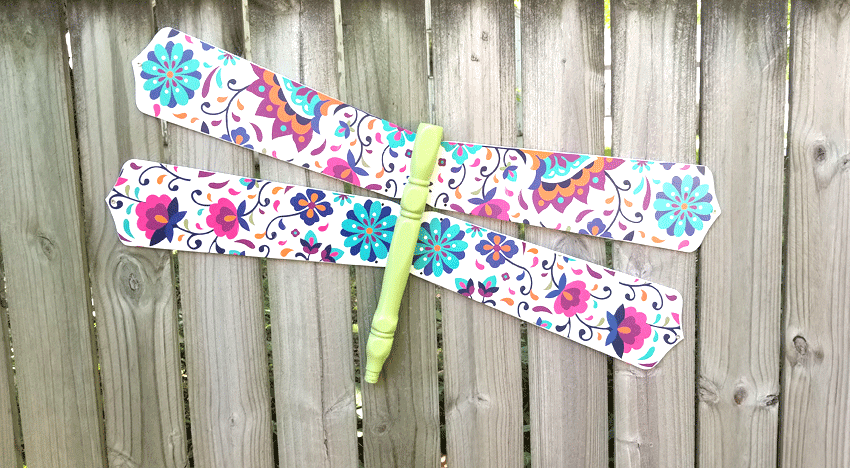
I love the way he turned out am so happy I finally made my wood dragonfly.
I have added some printable directions below for you.
Dragonfly DIY Wood Craft

Add some colorful transfers to fan blades for a different take on this easy to make dragonfly DIY wood craft idea.
Materials
- Fan Blades
- Chair spindle
- Dixie Belle Transfers - Latin Floral
- Dixie Belle Chalk Paint - Cotton
- Gator Hide Sealer
Tools
- Paint Brush
- Foam Brush
- Mini Miter Saw - Optional
Instructions
- Prep the fan blades by removing any metal pieces
- Paint the fan blades with the cotton chalk paint. Mine needed 2 coats.
- Paint the chair spindle any color you want. I used a green spray paint that I already had.
- Plan out your design for the transfers. I mirrored the two wings on each side.
- Once you figure out the design, flip over the fan blade and trace it onto the back of the transfer.
- Cut it out and apply the transfer using the instructions included.
- Cut and piece the design if needed to fill in blank areas.
- Use 3 coats of the Gator Hide sealer to make it weather proof. Be sure to let it dry at least 2 hours between coats.
- If you want, trim the inside edge of the blades to fit the chair spindle a little better.
- Drill holes to attach it to the chair spindle and at the other ends of the fan blades to attach to the fence.
- Then screw it onto the fence.
- Enjoy!
Recommended Products
As an Amazon Associate and member of other affiliate programs, I earn from qualifying purchases.
-
 GIFTME 5 Metal Ant Wall Decor Set of 4 Colorful Indoor Bathroom Kid's Room or Outdoor Garden Yard Art Wall Sculptures
 -
 YEAHOME Cute Bees Metal Wall Art, 3D Wall Decor, Vibrant Yellow Wall Sculptures & Statues for Farmhouse, Porch, Patio, Lawn, Fence, Backyard Set of 2
 -
 Beware of Dragonfly Vintage Metal Tin Sign Retro Funny Tin Sign for Wall Decor—8" x 12"—Dragonfly
I hope you love this awesome dragonfly DIY wood craft project.
Thanks so much for stopping by and happy crafting!
Michelle


