Hi there! This is two projects in one…kind of. I wanted to have a dry erase wall calendar that included some color. And, I wanted to be able to incorporate some seasonal vinyl wall art to go with the calendar. So, my idea was to create a formica samples wall calendar and create four different removable layered vinyl designs to hang above the calendar.
The formica samples allow me to use the dry erase pens and mark on them. Then I can wipe them off and start over the next month. I love this idea and I love the color the samples add to the piece.
It looks like an organizational piece but also colorful like a piece of art. I think it turned out so fun and I can’t wait to change the top removable vinyl pieces as the year progresses. Although I love the summer beach days and it will be a little sad to take it down.
This post includes a whole bunch of free cut files for you if you want them. They are available in the resource library! The seasonal vintage truck pieces, the calendar months and some removable stickers to use on the calendar are all included. It is very fun! I hope you check it out.
If you already have the password to the free resource library then you can access it here.
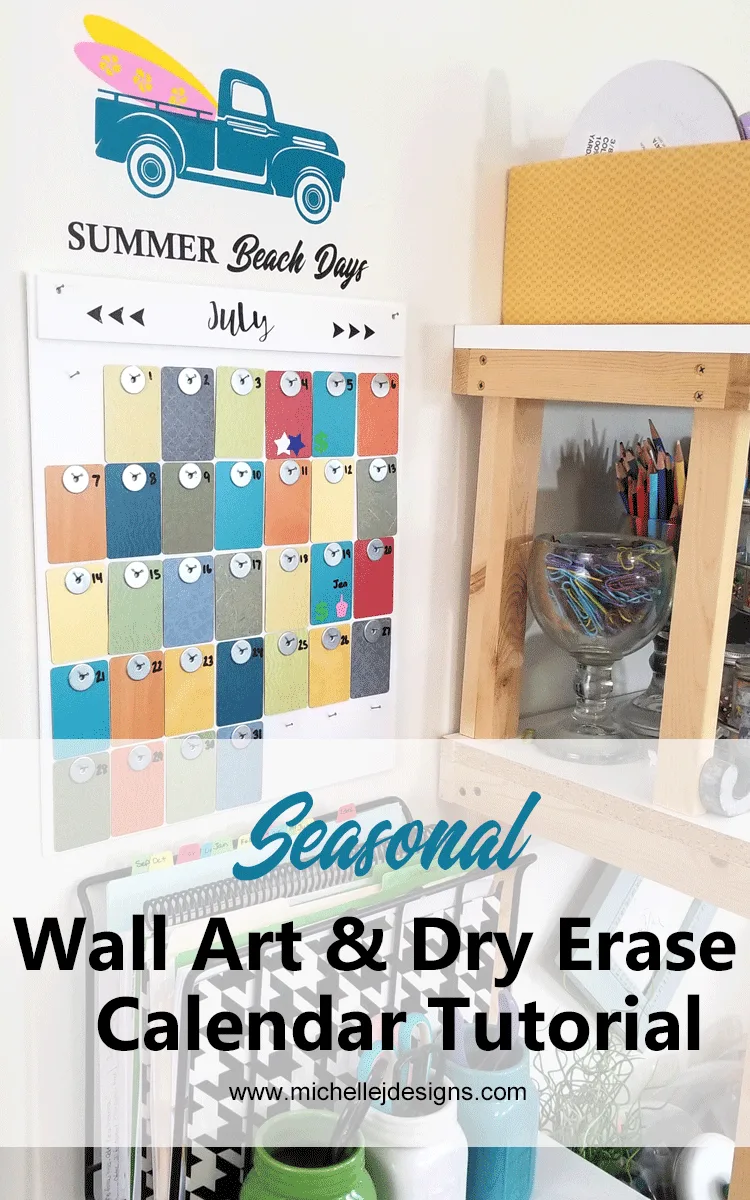
Formica Samples Wall Calendar And Seasonal Wall Art
This is a sponsored post. StyleTechCraft has provided me with the removable vinyl for this post. I am also including affiliate links for your convenience. You can read my full disclosure here.

I have to be honest that I haven’t used removable vinyl very much. I wasn’t sure how long it would actually stay on the wall or project so I usually just went for the regular vinyl. But I don’t think I have ever tried to remove it.
Our challenge this month for the StyleTechCraft design team was to use the removable vinyl. I created a fun set of seasonal cut files with seasonal designs to be changed four times during the year. Right now my wall is sporting the summer season…of course!
I have always loved the vintage truck so I incorporated it with different seasonal items loaded in the back. It think all of the seasons turned out really cute.
Summer
This is the piece I have hanging right now.

Fall
I will hang this piece in September.

Winter
I can’t wait to hang this over Christmas time.

And Spring

I have included the above full PDF and JPG files in the free designs. If you don’t want to cut out the vinyl you can just print these and hang them on your wall!
The cut files also include the different pieces individually. Here are my screenshots from the Silhouette for cutting out these designs. I knew I wanted to cut them out all at one time so I didn’t put like seasons together…per say.
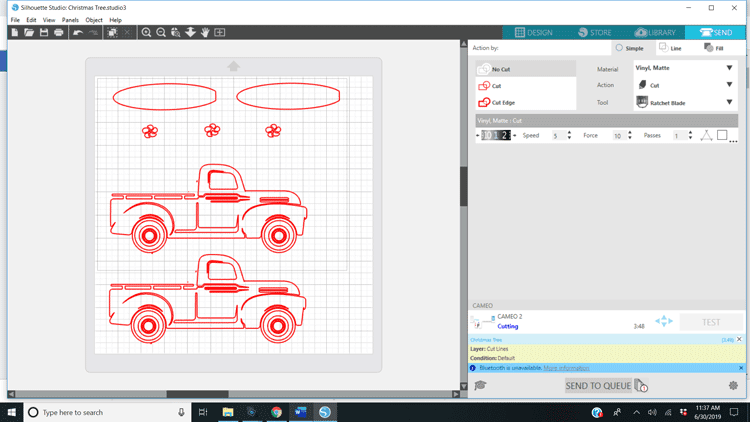
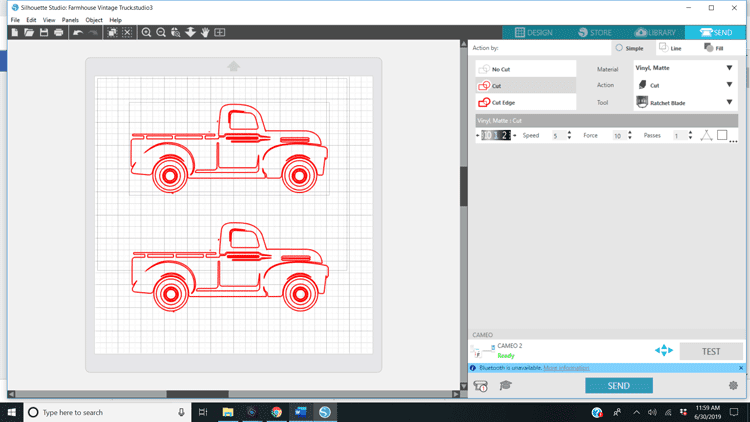


Putting The Designs Together
Once I had all of these pieces cut in the colors I wanted I layered the summer wall art onto the wall. Here is a very short video of me putting it all together.
The rest of the seasons are all cut and ready to go when it’s time.
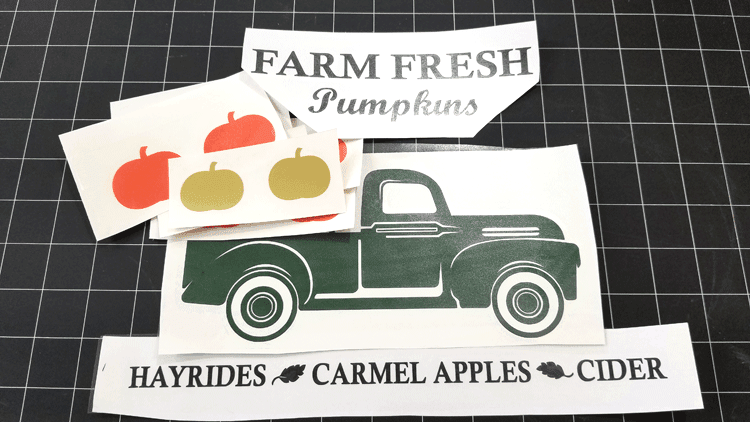

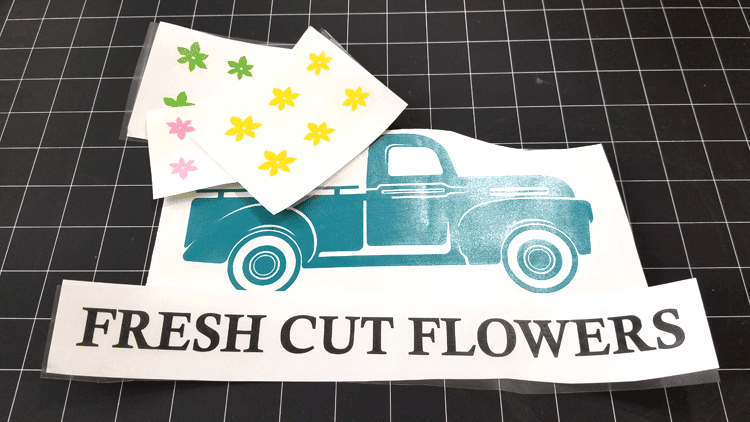
How To Create The Formica Samples Wall Calendar
Materials Needed:
Formica Samples Wall Calendar

The color and the use of dry erase markers made these formica samples the perfect choice for my wall calendar. I wanted something unique and stylish and I think I did that.
Materials
- Formica Sample Chips
- PVC Ceiling Tile
- Washers
- Super Glue
- Nail File
- Small Nails
- Dry Erase Pen
- SytleTechCraft Vinyl
- Transfer Tape
Tools
- Pliers
- Saw for cutting ceiling tile
Instructions
- Measure and cut the pvc ceiling tile to the size of your calendar. Mine is 14 inches x 17 inches
- Cut 6 pieces of the tile for the months. I used both sides
- Sand the back of each washer with the nail file then super glue the washer over the hole in the formica sample piece. You can omit this entire process if the holes in your formica sample chips are all at the same level. Mine weren't so they were going to hang funny and uneven.
- Use a pencil and mark the holes for the nails. I used 7 across (7 days in a week) and 5 down to allow for months with 5 weeks.
- Also mark 2 holes for the month piece to hang at the top.
- Use a hammer and a plier to hold the nail and hammer them in place...gently. If it goes through the back a little bit just push on it with a piece of formica.
- Use a dry erase marker to mark the days of the month on each formica sample
- Add some sort of hanger on the back. I used 2 sawtooth hangers.
- Using the cut files download. Cut the months out of vinyl and use transfer tape to add it to the cut pieces of pvc tile. Use both sides of the piece. So January and February would be on the same piece.
- Add the formica tiles and the current month piece to the calendar and hang it on the wall.
Step 1: Measure And Cut The Calendar Pieces
The first thing I did was measure and cut the tile pieces. These are pvc ceiling tiles and cut easily with a saw.
I used the formica samples and laid the across the piece leaving 1/4 inch on each side of the end samples. This gave me my width size.

Then I did the same for the length.

The pieces for the months were 13 inches wide by 1 3/4 inches tall.
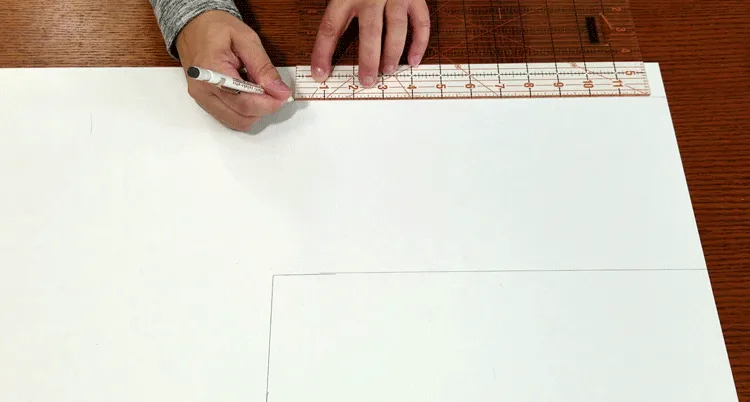
Jeff cut on the lines for me and I got started on the formica sample chips.
Be sure to drill the holes in the pieces that will have the month titles on them.
Step 2: Add washers to the formica samples
I wanted to just hang them from the original hole but they were not all in the same place so they would have looked all wonky hanging. The solution was to add a washer to each piece, lining it up with the top of the formica to ensure all of them were even.
Sand the back of each washer using a nail file. This helps he glue to adhere better.

Add a drop of the super glue above the hole and a drop below it on the front of the formica sample.
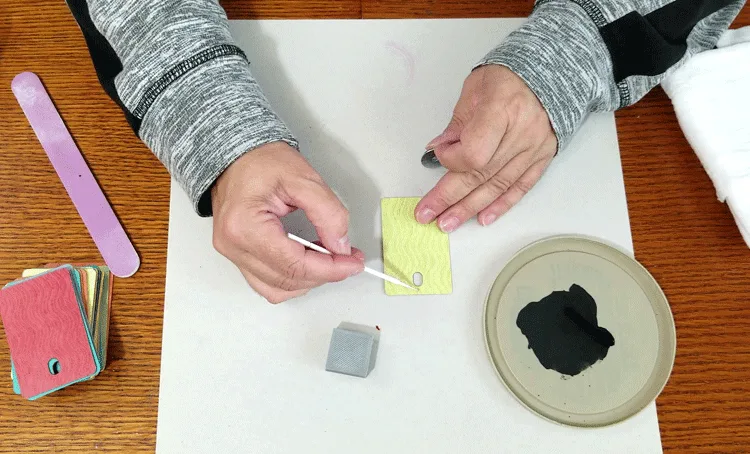
Use something to make sure it lines up with the top of the formica piece so they will all be even.
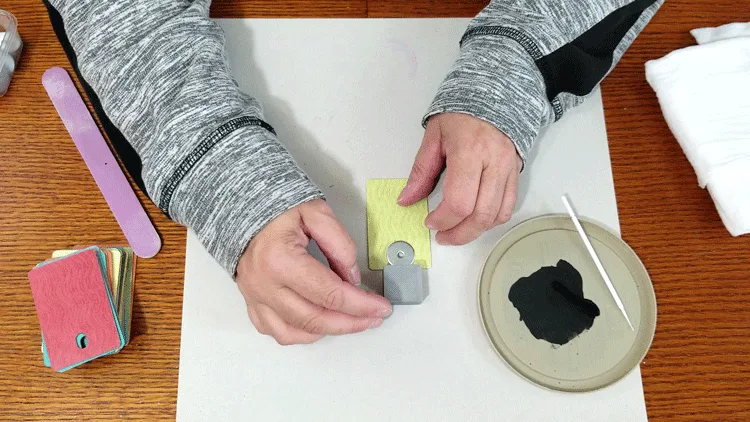
There is a tiny bit of time to get this right before it is set for good. Then add a little to the back of the washer. It will get pulled in and secure it even more.
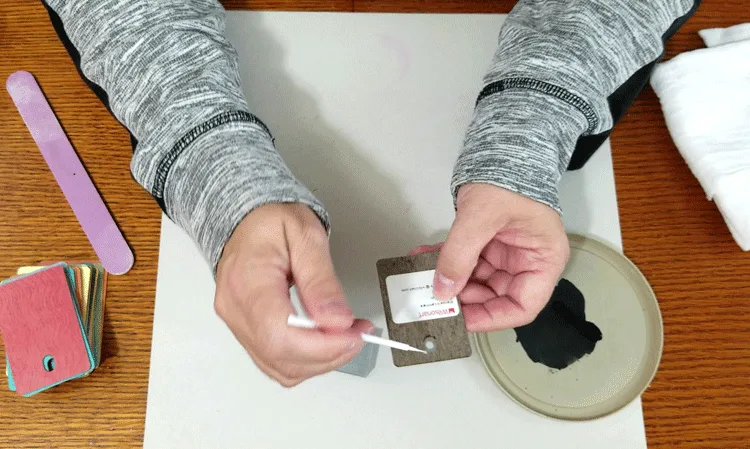
Continue this process until all 31 days of formica samples are done.
Step 3: Mark the spots for the nails and add the nails
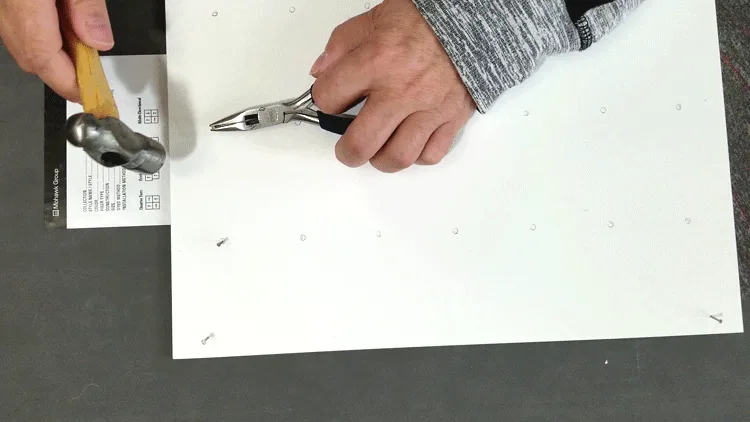
I laid out a row at a time and marked the nail spots with a pencil then used a pair of pliers to hold those small nails. My fingers were too fat to hold it and hammer it. Don’t for get the two holes for the pieces that have the months on them.
Step 4: Cut the month titles from the vinyl
Any StyleTechCraft vinyl would work for this part. I love the black polished metal. It looks pretty so that is what I used. Here are my screen shots for these. I needed two of the 12 x 12 pieces.
These titles are part of my free cut file you can get from the resource library.
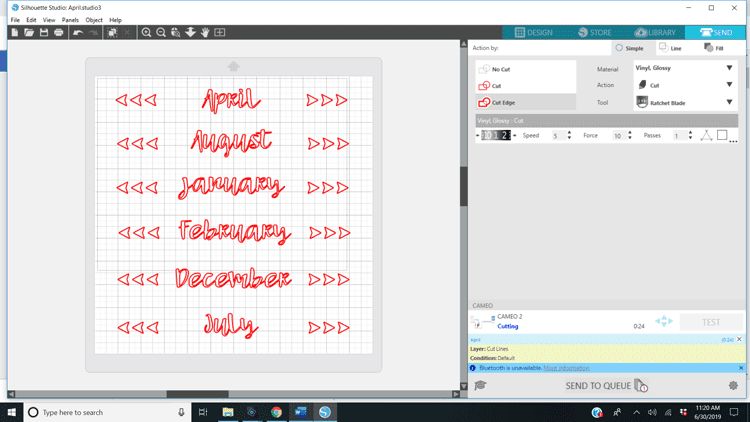

Once the titles are cut, add one to each side of the 6 small tile pieces. Remove the extra vinyl from around the title.

Weed the small pieces out.
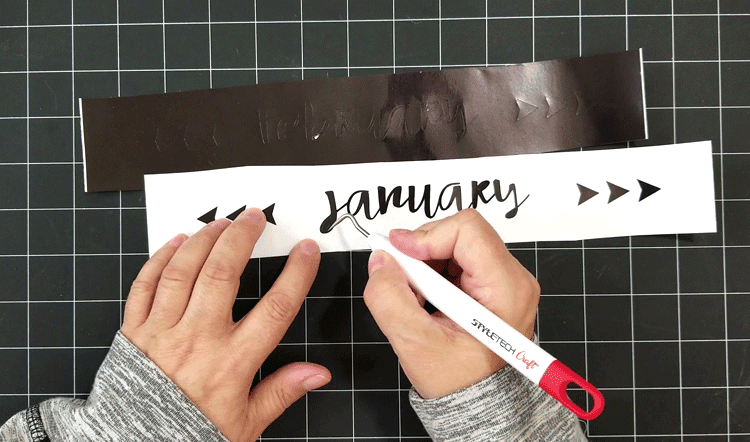
Apply the transfer tape.
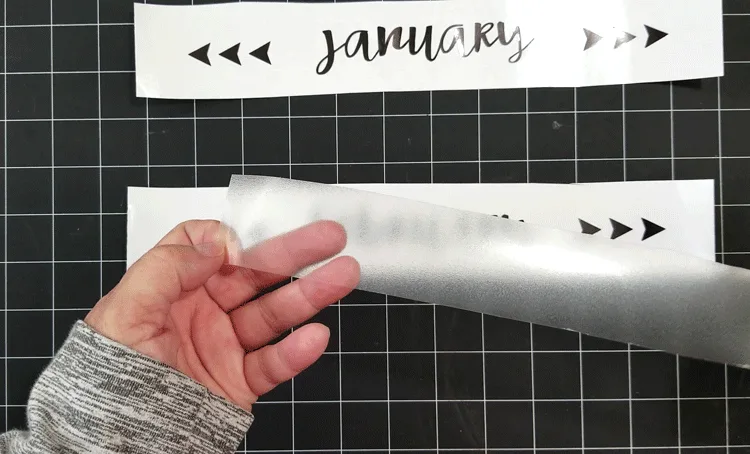
Peel the design away from the backing.
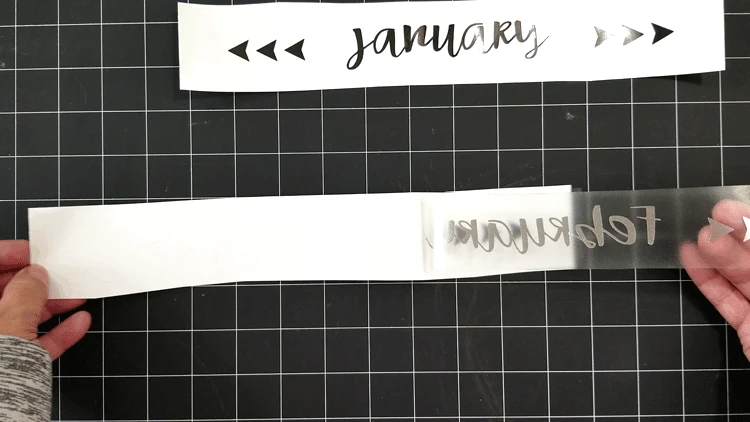
Then apply it all as one piece to the cut tile doing your best to center it.

Step 5: Put it all together
This is the best part!
Place all of the formica chips on the nails using the current calendar as your guide. I did not add the days of the week but I started mine week on Sunday like a regular calendar.

Then I added some of the small shape designs for specific events. You can see the stars on the 4th of July piece and I have a cupcake to mark my sister’s birthday and some dollar signs so I don’t remember our paydays (like I would forget those. LOL) These were made with the removable vinyl so I can take them off, and use them a few times before cutting new stickers.

I love the way it looks and I really like the little bit of an industrial look the washers give it. And I love it with the wall art at the top. I think it will be fun to change it out every few months.
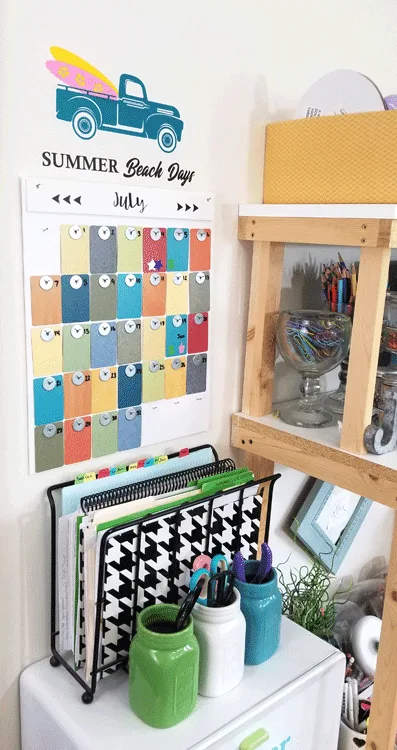
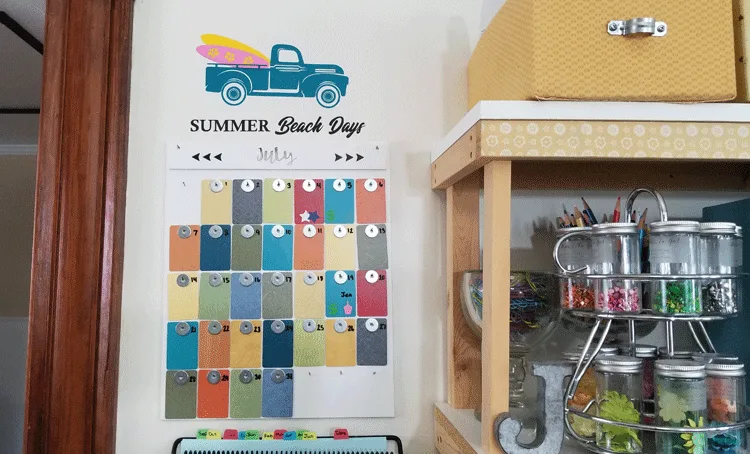
What do you think?
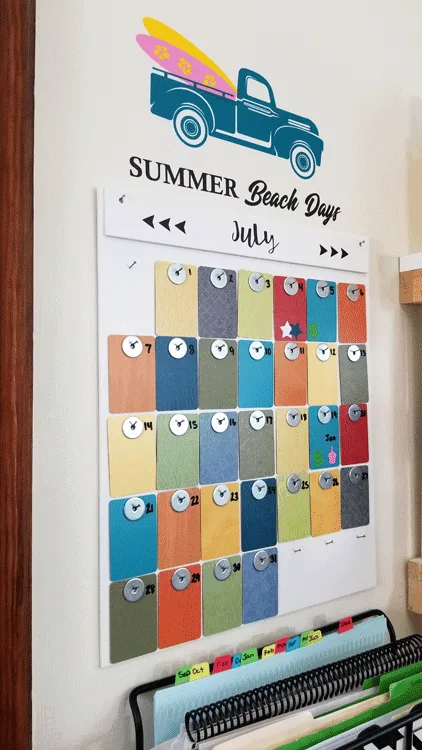
It looks great next to my craft space on my desk.
Don’t forget to sign up to get free access to my resource library so you can download all of these piece. If you are already a member you can go directly to the library here.
If you would like to follow StyleTechCraft on social media just click the links below.
Thanks so much for stopping by!
Michelle


Nancy Lou
Friday 5th of July 2019
So colorful and useful, Michelle! So fun to see how you create. Thanks for sharing.
Michelle
Saturday 6th of July 2019
Thank you Nancy. I love the way it turned out!