Hi! Wait until you see the fun project I made with the help of Nancy’s Notions and the Dimensional Kaleidoscope Dresden Template. I used the template to create a DIY farmhouse half windmill. Mine has a twist though…it is not metal or wood. It is fabric!
The people at Nancy’s Notions sent me this template to play with in exchange for this post but all of the opinions are my own. You can read my full disclosure here.
Nancy’s Notions really knows about sewing. The company was founded in 1979 and has grown tremendously. They are located in rural Beaver Dam, Wisconsin and host “Sewing With Nancy” on public television. You can watch full episodes on You Tube too. They carry sewing, quilting, and embroidery supplies, patterns, fabric, designs and more.
The minute I saw it the shape of the Dimensional Kaleidoscope Dresden Template it reminded me of windmill blades. The farmhouse look is so popular and even though all of the half windmills and windmills I have seen are made from metal or wood I decided to break the mold and create a unique DIY farmhouse half windmill using fabric.

Supplies Needed To Create A DIY Farmhouse Half Windmill
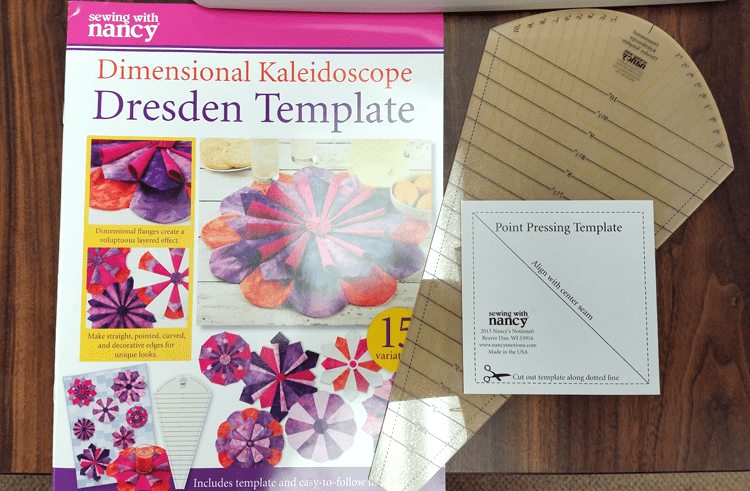
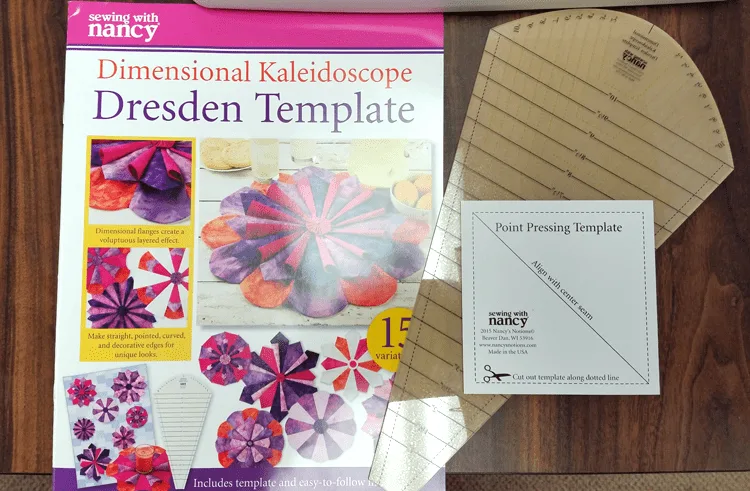
Nancy’s Notions Dimensional Kaleidoscope Dresden Template
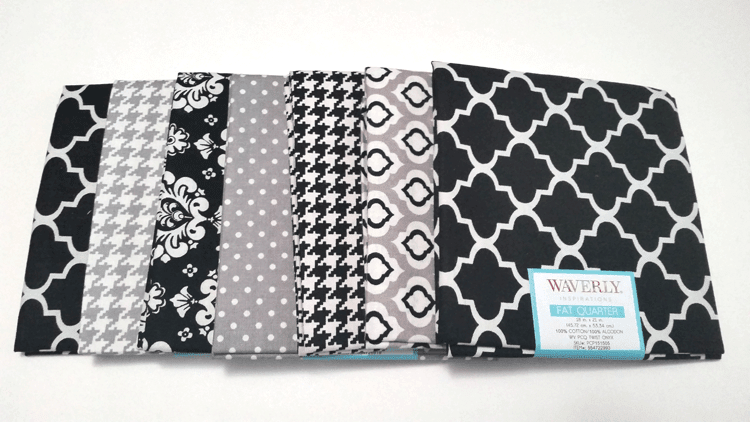
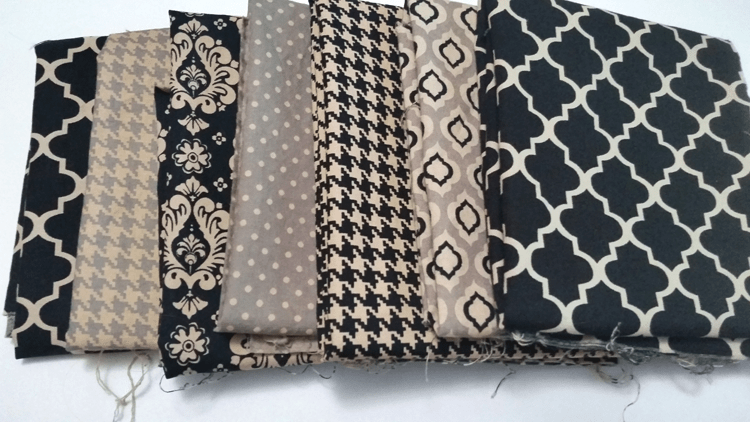
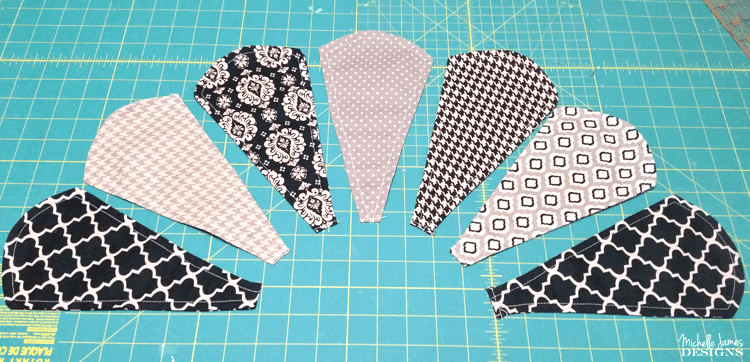
6 – 7 different fabrics – I used fat quarters
Quilting Ruler
Rotary Cutter
Scissors
Thread
Sewing Machine
Iron and Ironing board
Sharpie Marker
Getting Started
Ever since I saw the beautiful, huge, metal half windmill in an episode of Fixer Upper I have wanted one. But have you priced them? They are quite expensive. When I received my Dresden Template I saw a half windmill in my head. I wasn’t sure if I could pull it off. But I really wanted to try.
I am not a quilter… and have never been a detailed sewer but this template made cutting and measuring so easy. Creating an entire quilt is never going to be my thing but the types of projects I do create just became a lot easier! The right tools can make all of the difference in the world. I would have loved to have had some of these projects when I was completing my bedspread and pillow shams or my basket liner.
To me, this template looked complicated but after reading the instructions I had and “A Ha” moment. It became so clear and I knew this would be easier than I thought.
The first thing I did was tea stained my fabrics.
I boiled water and added 15 tea bags, turned off the burner and let them sit for 10 minutes, removed the tea bags and added the fabric and let it set for about 7 minutes.
I wrung them out and placed them in cold water for a few minutes. Then I wrung them out again and threw them in the dryer.
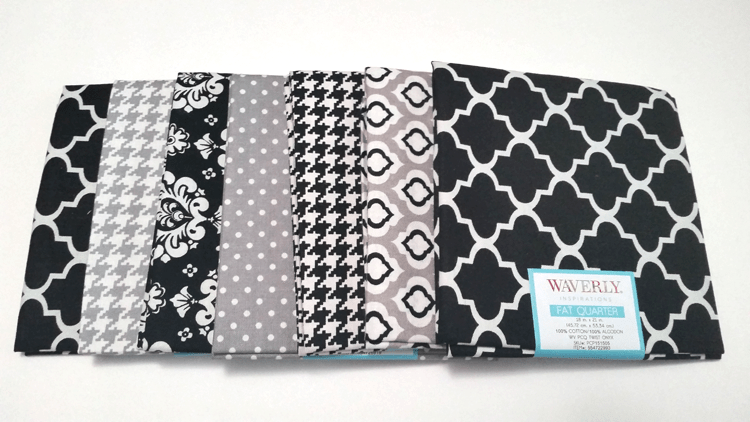
Before and after! I loved the new look.

Using The Dresden Template
This is the part that scared me to death until I sat down and read the instruction booklet that comes with the template.
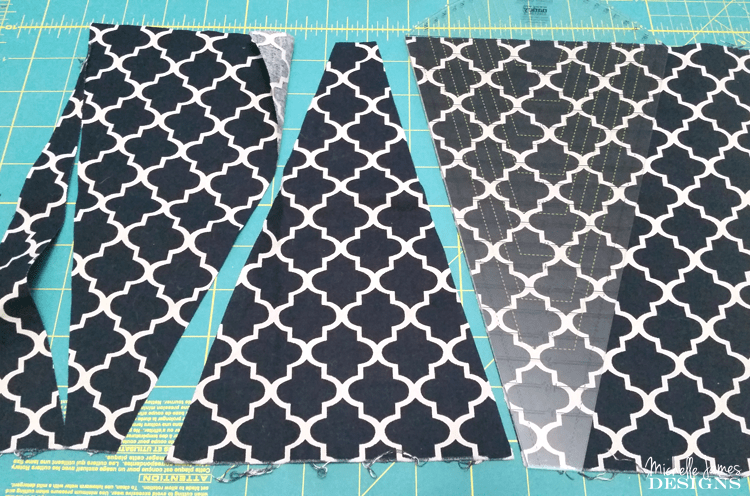
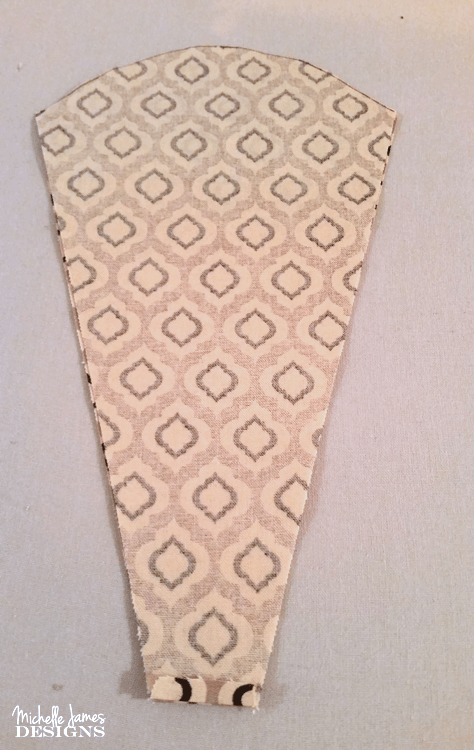
I wanted the largest “windmill blades” I could get so I went with a 10″ measurement.
Using my regular 12″ x 6″ clear ruler I measured my fabric to a 10″ strip. Just long enough to cut out one blade. (one blade is two cut pieces sewn together)
When I had my 10″ piece of fabric. I laid the template onto the fabric and lined up the 10″ in mark to the top of the fabric and the bottom edge of the template to the bottom edge of the fabric.
The rotary cutter makes quick work of cutting the fabric along the edge of the template on both sides. Then just flip the template, line it up with the cut edge and cut again. With this fabric I was making two blades so I cut four of them. All of the other fabric patterns only needed two cut out to make one finished blade.

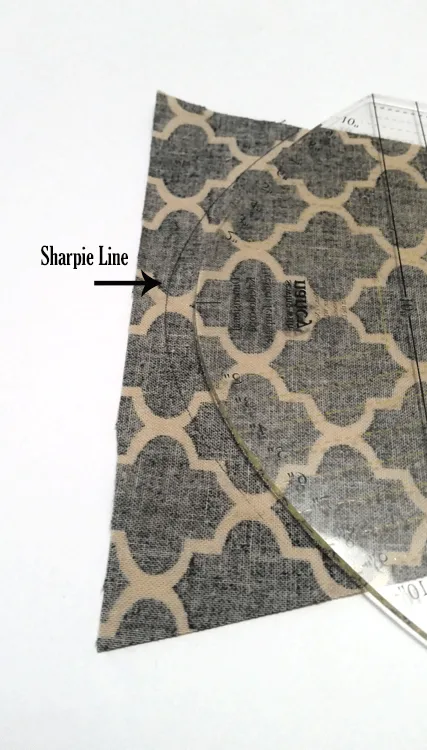
When they were all cut I created the curved top. To do this I lined up the bottom of the fabric with the yellow markings that correspond with the size of my piece.

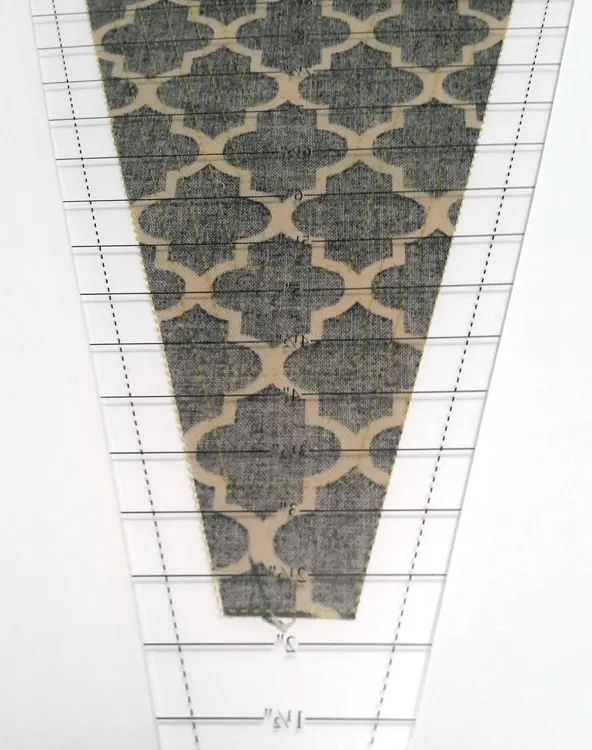
Using a sharpie I marked the curved edge at the top. I did this on the wrong side of the fabric. The rotary cutter and I sometimes don’t get along so I used scissors to cut this edge.

For the half circle at the bottom I repeated this entire process but I used a 5″ measurement instead of a 10″. It ended up being way too big. I thought I was going to have to start over throwing these pieces out and cutting new pieces but I didn’t! All I had to do was re-cut the fabric to the smaller 3″, then re-place the template and cut the sides down. It was easy and only took a couple of minutes.
Sewing The Pieces For My DIY Farmhouse Half Windmill
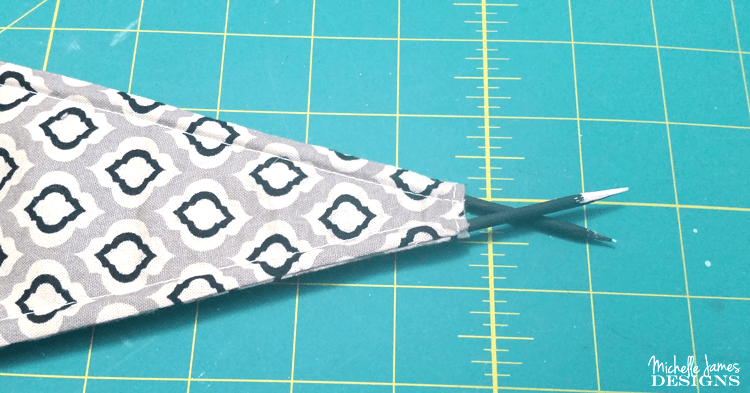
I stitched up the blades first. I needed to keep the bottom open but I didn’t want a raw edge showing so I ironed and stitched each piece at the bottom first.
Then with the right sides together I stitched around the remaining three sides. I clipped the curved edge so it would lay flat when I turned in right side out.
To turn it I used the end of a long paint brush pushing the brush from the curved edge down through the open part at the bottom.
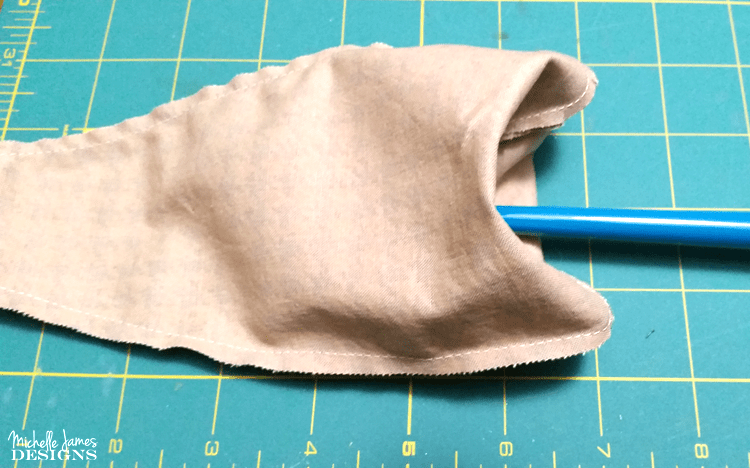

Remove the brush and pull it right side out and iron it flat. Then I top stitched around the edges. This was to give it some detail but also to be able to insert the wooden skewers to keep the windmill blades from falling over.


The little half circle at the bottom was sewn together by placing two of them right sides together and stitching the seam then repeating this process until they were all attached. To finish the top I ironed the edge over and stitched it down.
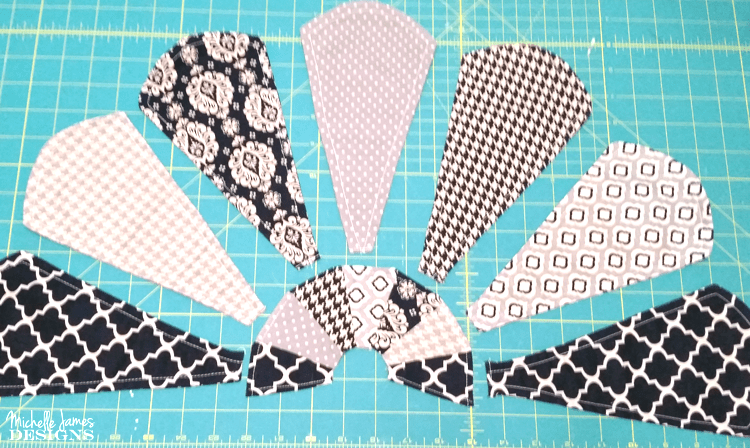

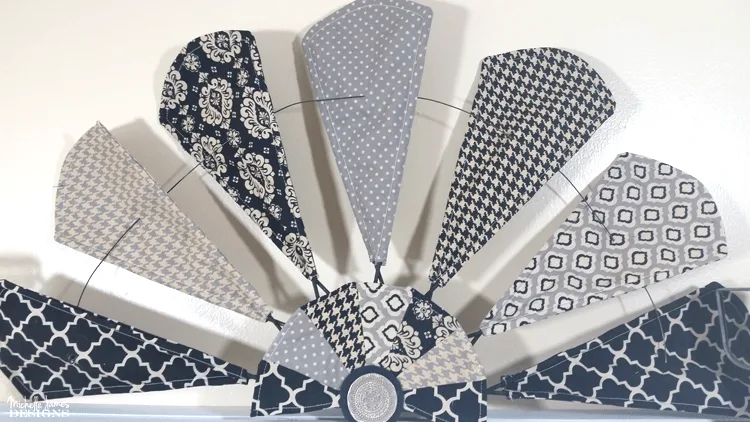
I tried to mix up the patterns a little bit.
Assembling The Half Windmill
Figuring out how this would all go together was the hard part. Jeff came up with the idea of the wooden skewers and the piece of foam. I thought it was brilliant.
He cut a piece of foam for me just smaller than the half circle and I painted it and the bottoms of the skewers black. When they were dry I placed the skewers into the fabric blades.

Then I pushed them into the top of the half circle of foam.


The small half circle covered the front of the foam piece and I added a black circle of felt and a decorative metal piece to finish it off. It ended up looking pretty nice.


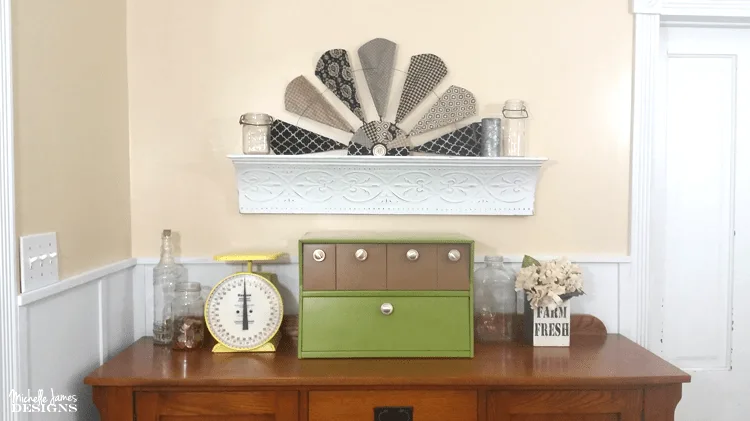
The last thing to do was to add the wire. All farmhouse windmills have the wire running through them. We had wire in the garage so I cut a piece long enough and just poked it through the fabric on each blade. The ends are just wound up into a little wire circle so they won’t go anywhere.


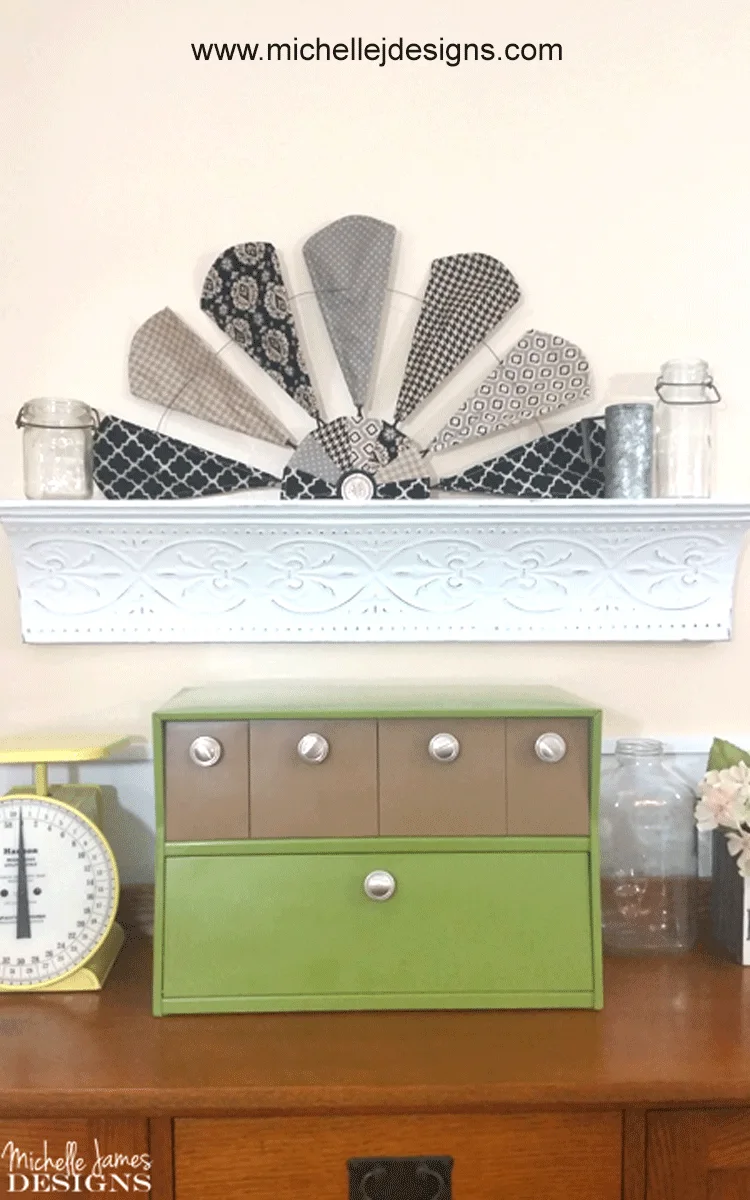
The Finished DIY Farmhouse Half Windmill
We hung a shelf I made over just for this and placed it in our kitchen. This was an empty wall so I was excited to have it up.
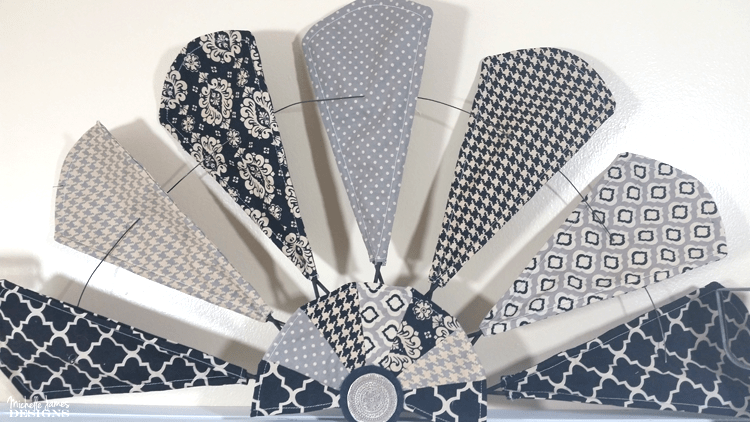


What do you think. Yay or nay on a DIY farmhouse half windmill made of fabric? I was pretty skeptical through the entire process but in the end…I really like it a lot!
If you like it too be sure to pin it!


And be sure to hop over to Nancy’s Notions and check out all of the good stuff they have. You do not have to be a quilter or a fabulous sewer to use these tools. I love the rulers for card-making and had one for everyone in my classes when I had my store open. The ironing tools are great just to have. The worst thing is ironing something big and having it go all over the floor. They have a thing for that!
And hemming pants? There are tools to help you iron the hem perfectly before sewing it. These things just make life easier. As I mentioned before…I was amazed at how many things I wanted!
Have a great day and thanks so much for stopping by!
Michelle


Bobby Saint
Saturday 6th of January 2018
I like that you provided some tips on how to make a farmhouse windmill. The step by step instructions that you provided, as well as the illustrations, really make it look very simple to do. However, I just don't have the time to do this especially with the busy schedule that I follow. I'll probably just search for a couple of spoon windmills that are readily available for purchase online. Thanks for sharing this, though. http://www.showcase101.com/outdoor/patio-lawn-garden/windmills.html
Michelle
Saturday 6th of January 2018
Thank you Bobby! Time is always a factor in DIY projects. I hope you fine one!
Toni
Wednesday 21st of June 2017
Wow, what a cute idea. I've wanted one of those windmills for a while and I might just have to make my own with material. I love how creative you are, it turned out great!
Michelle
Wednesday 21st of June 2017
Thank you Toni! I am so glad you like it. You should definitely make one and let me just say the template is a real time saver. You should get one before you make your own. You won't regret it.
MicheLle james
Tuesday 20th of June 2017
What a great proJect Michelle!! Love how it looks on the shelf!
Michelle
Wednesday 21st of June 2017
Thank you! It was fun to put together but the template made it "sew" easy! LOL!!
Carolann
Tuesday 20th of June 2017
I love how this looks on your mantel! What a fun and creative project!
Michelle
Wednesday 21st of June 2017
Thank you! I am in love with it too. I actually stop and look at it every time I am in the kitchen. LOL! Thanks for you kind words.
Heather Northington
Monday 19th of June 2017
Love Love Love! What a fun project. You really did a great job on this one. I think I need one in browns and greens.So much fun!
Michelle
Tuesday 20th of June 2017
Thank you Heather. I was sort of worried the entire time that it would not come out looking good. But I really like it! You should make one. It was not hard to do at all!