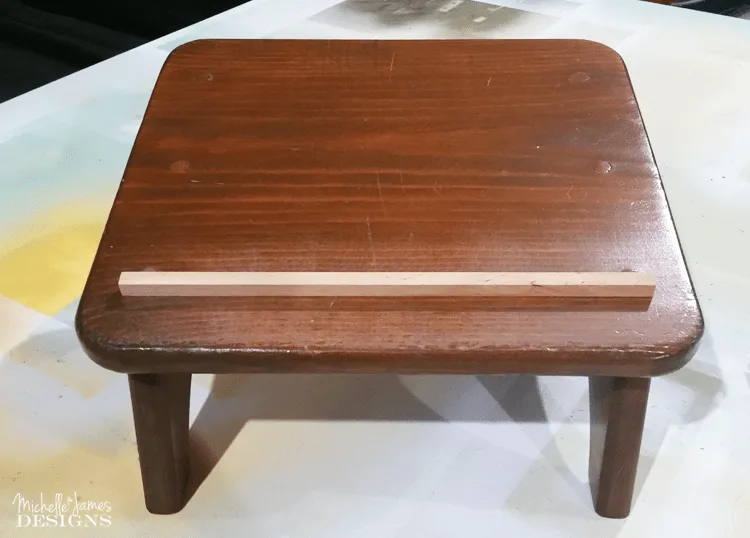
A few months ago I spotted this great little thing at the flea market. It immediately looked like an Ipad holder to me but I think it was supposed to be a footstool. Anyway, I got it for $5 and I think it was totally worth it.
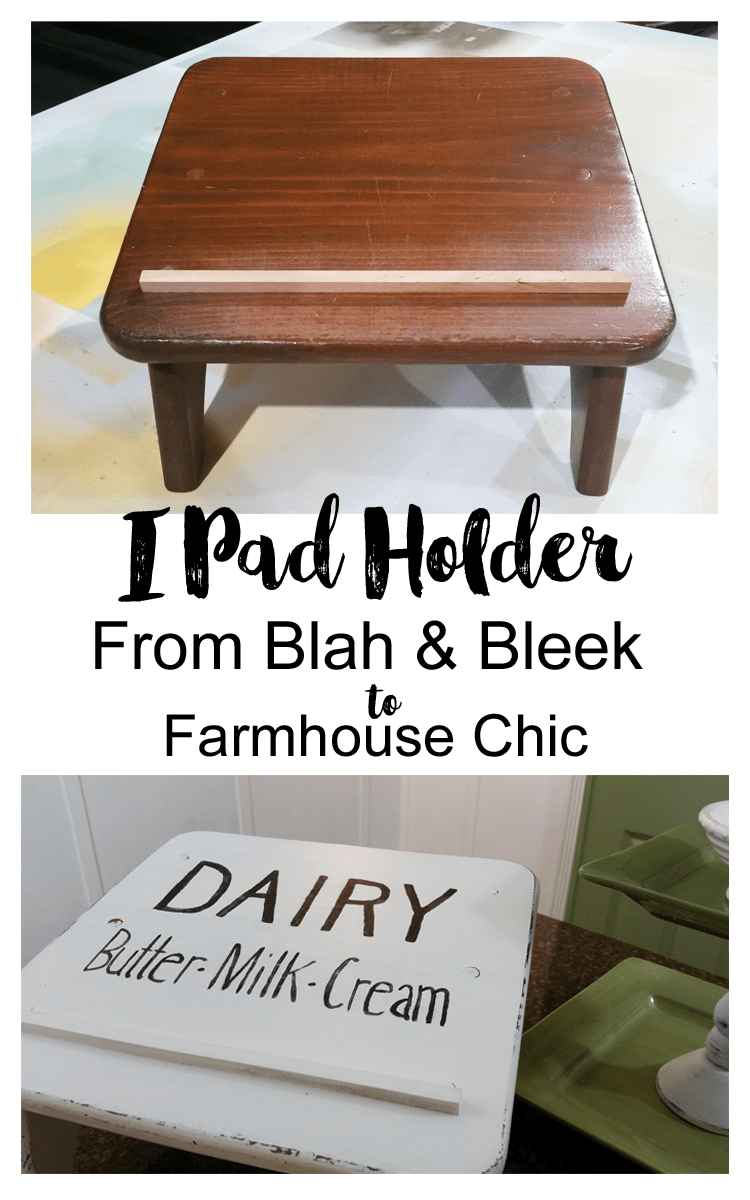

IPad Holder
Supplies list:
I am using some affiliate links for your convenience. You can see my full disclosure here.
Footstool or Ipad/Tablet holder
Basswood Strip – I used 3/8 x 3/8 piece.
Black Chalky Finish Paint – I used Americana Decor – Carbon
Paint Brushes – regular and foam
Sanding Block
Photoshop or Word – I used Photoshop to create my text for the top of the Ipad holder
Tutorial
This really was an easy project and I pretty much got it done in a day. Most of that was waiting for the paint to dry.
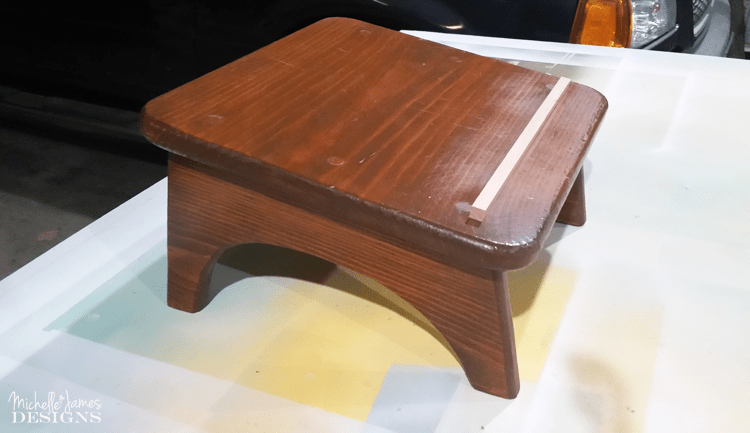
The first thing I did was sand the piece a little so I could add the basswood strip.
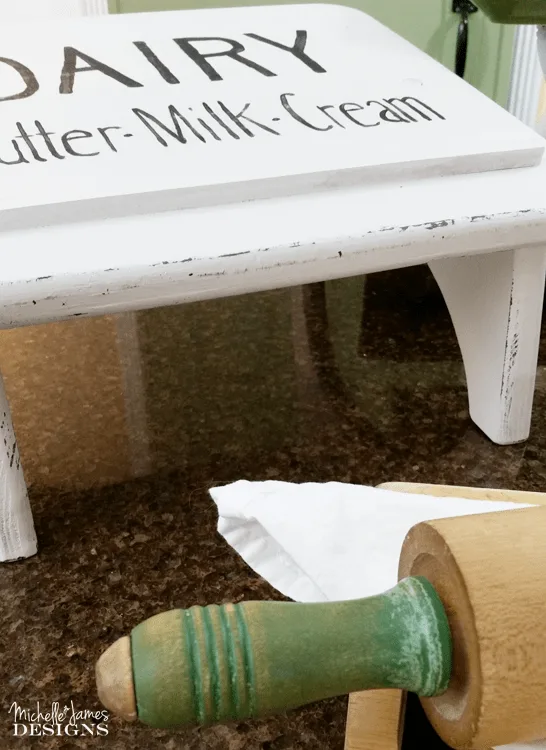
I needed this because the legs in the back are higher than the front legs to it creates a slope. This creates a “stop” so the Ipad/table won’t slide off the front.
Then we measured and cut the basswood strip at 8 inches.


Then I primed it with my favorite paint/primer in white. I did not take a photo of this step because you guys know all about it. I always do this so I don’t get bleed through. If I was painting this a darker color I would probably skip this step but when I am using white as my final color I ALWAYS do it.
After the primer was dry I mixed up the Diva of DIY Chalk mix with my white latex paint to create my own chalk style paint. I was lucky enough to be part of a group of bloggers who were sent a sample of the mix to try.
I had never made my own chalk style paint before and it was pretty fun. And it worked like a charm.
I followed the “recipe” that came with the mix. Basically it was 1 cup of latex paint, 4 tablespoons of the mix and 2 tablespoons of hot water.
I still have quite a bit left over for another project and I think I have one in mind already!
Anyway, I gave the ipad holder a coat of the chalk style paint and let that dry.
I always want the distressed look so out came my handy sanding block. I sanded around the edges and it came out perfectly!

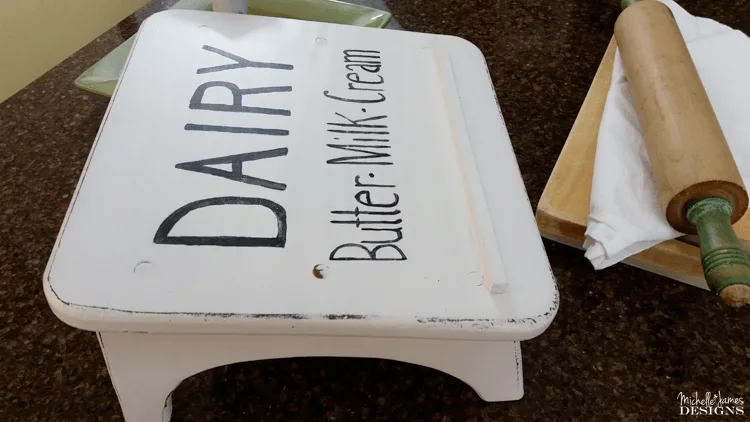
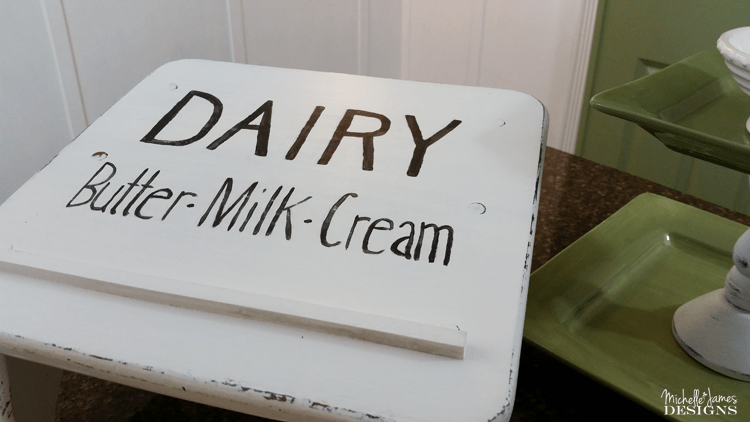
Then it was time for the top. I created my text on the computer using Photoshop Elements. Using a pencil I drew it it onto the top. I got out the black chalky finish paint and used a small brush to carefully hand paint it on.
I used this technique for the Piano Bench and for the Farmhouse Stool.
Now if this turns you off from the project, don’t let it. There are several tutorials out there for transferring designs onto wood or you can use a Cricut or a Silhouette to create the letters. You could even use vinyl letters instead of hand painting.
When I was happy with the design and it was completely dry I used the creme wax over the entire piece.

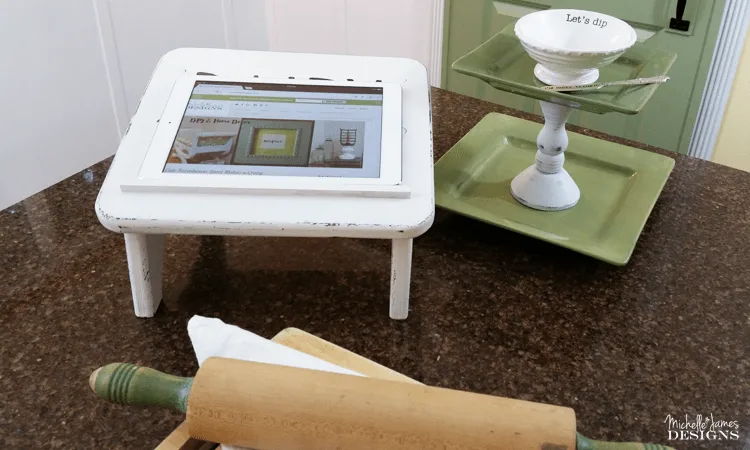


What do you think? I really like it a lot and think I will use it quite frequently.
Don’t DIY?
I found some Ipad /recipe book holders that would be super cute in a farmhouse kitchen!
Wooden Cookbook Holder & Ipad Stand – Made With 19th Century Reclaimed Wood
Boston Warehouse Cookbook and Tablet Stand, Bake Design
Here are what some of the other bloggers created with their Diva of DIY Chalk Mix. This was really fun!
Thanks for stopping by.
Michelle


Robert Smith
Tuesday 30th of August 2016
very creative. i like it but i don't have time to do. my sister is very pratical, she love making little things and handmade-products so i'll show this to her. she must be so excited. have a nice day!
Toni | Small Home Soul
Sunday 28th of August 2016
So so cute! I am in need of an iPad holder for my kitchen when I'm making a recipe that I haven't yet printed out. This holder is perfect because any spills will go under. And when not in use it's like a cute little farmhouse sign, love it!
Michelle
Sunday 28th of August 2016
Thanks Toni! I appreciate the compliment. I love it. I actually used it the other day when I made some pies. It was perfect for my tablet. Thanks for stopping by.
Susie from The Chelsea Project
Friday 26th of August 2016
This is so adorable. I bet you get lots of folks asking you to make them one. You know my birthday is coming soon. Wink. wink. #NoPressure #we'llTalk Love it!! XO Susie from The Chelsea Project
Michelle
Friday 26th of August 2016
Thanks Q's. My birthday is coming up soon as well. We can make a trade! LOL! I am glad you like it and thanks so much for stopping by!
Lisa
Friday 26th of August 2016
This is a brilliant re-purpose, Michelle. I adore it.
Michelle
Friday 26th of August 2016
Thanks Lisa! I was really happy with the way it turned out. I have had it in my garage for months and am so glad I finally got it out and done!
Leanne from divaofdiy.com
Friday 26th of August 2016
What a great find! I love the way you thought outside of the box on this one! Thank you for participating in the Diva of DIY Chalk Mix Challenge! I can't wait to see what you do with your leftover chalky paint!
Michelle
Friday 26th of August 2016
Hi Leanne! Thanks so much for the sample. It was wonderful to work with and I keep looking at this and loving how it all came together. Yes I have enough of my mixed paint to use and I still have some of the mix too. Yay!