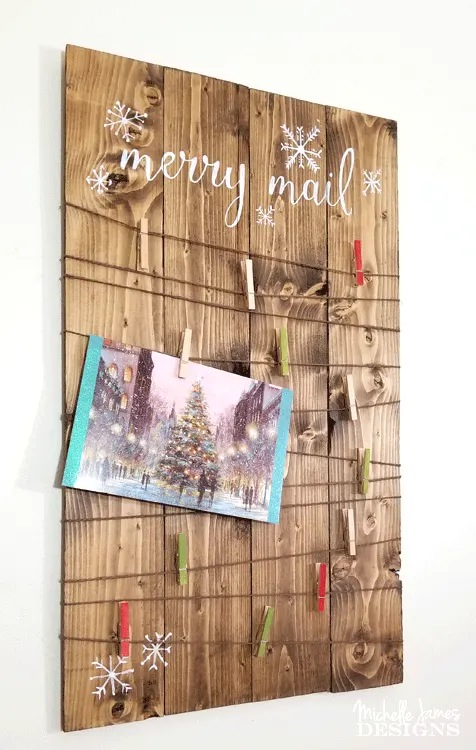
It is time to start making my new decorations that I want for Christmas this year. I decided on this project because some organized people always get their cards to us the day after Thanksgiving and I don’t have a place for them. Well, this year I am ready. Check out my new handmade, rustic Christmas Card holder!


Making A Rustic Christmas Card Holder
This was easy to make. Even the wooden sign. But if you don’t want to make a sign you can purchase the wooden part and decorate it with the rest of the goodies. This is what you need for the whole scha-bang! I have included some affiliate links for your convenience. You can read my full disclosure here.
Materials List For Rustic Christmas Card Holder
Pieces of Wood for sign – I used wood fencing or a wood panel already finished
Wood Glue
Stencil – I made mine with my Silhouette Cameo
Craft paint – white, red and green
Stencil Brush
Small Line Brush
Hot Glue Gun and Glue
Step 1
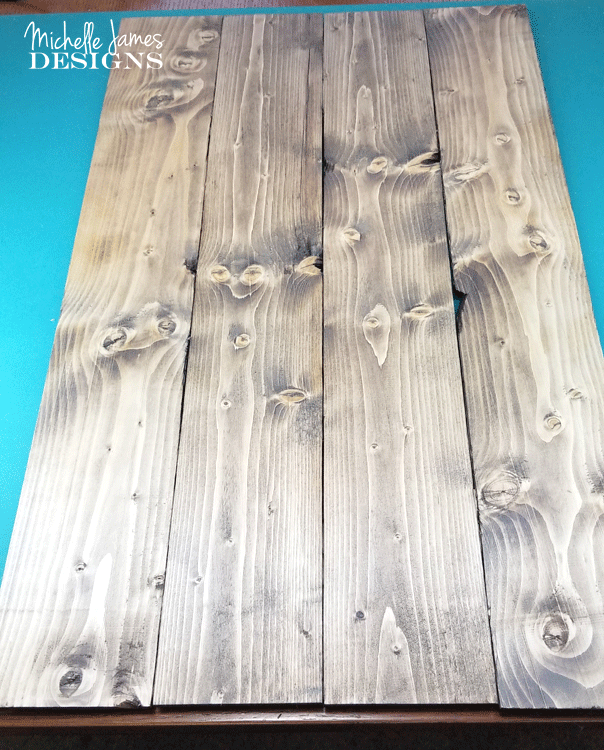
Create the wooden sign. Jeff and I purchased some 6 foot length fence boards for .99 each. They are 3.5 inches wide and I cut them to be 24 inches long. Then I cut two pieces for the back that are 15 inches long.
These fence boards are pretty rough so we ran them through the planer then did some light sanding. If you don’t have a planer then sanding with a palm sander would do the trick, it would just take a little longer.
Line up the boards with the edges snug together facing down. Add some wood glue to the two smaller boards and place one close to the top and one close to the bottom. This will hold all of the boards together. Set something fairly heavy on top of the board or clamp them in place until the glue is completely dry.
Stain the front and the back of the sign.

Step 2
Create your stencil. Here is the screen shot of my Silhouette software.
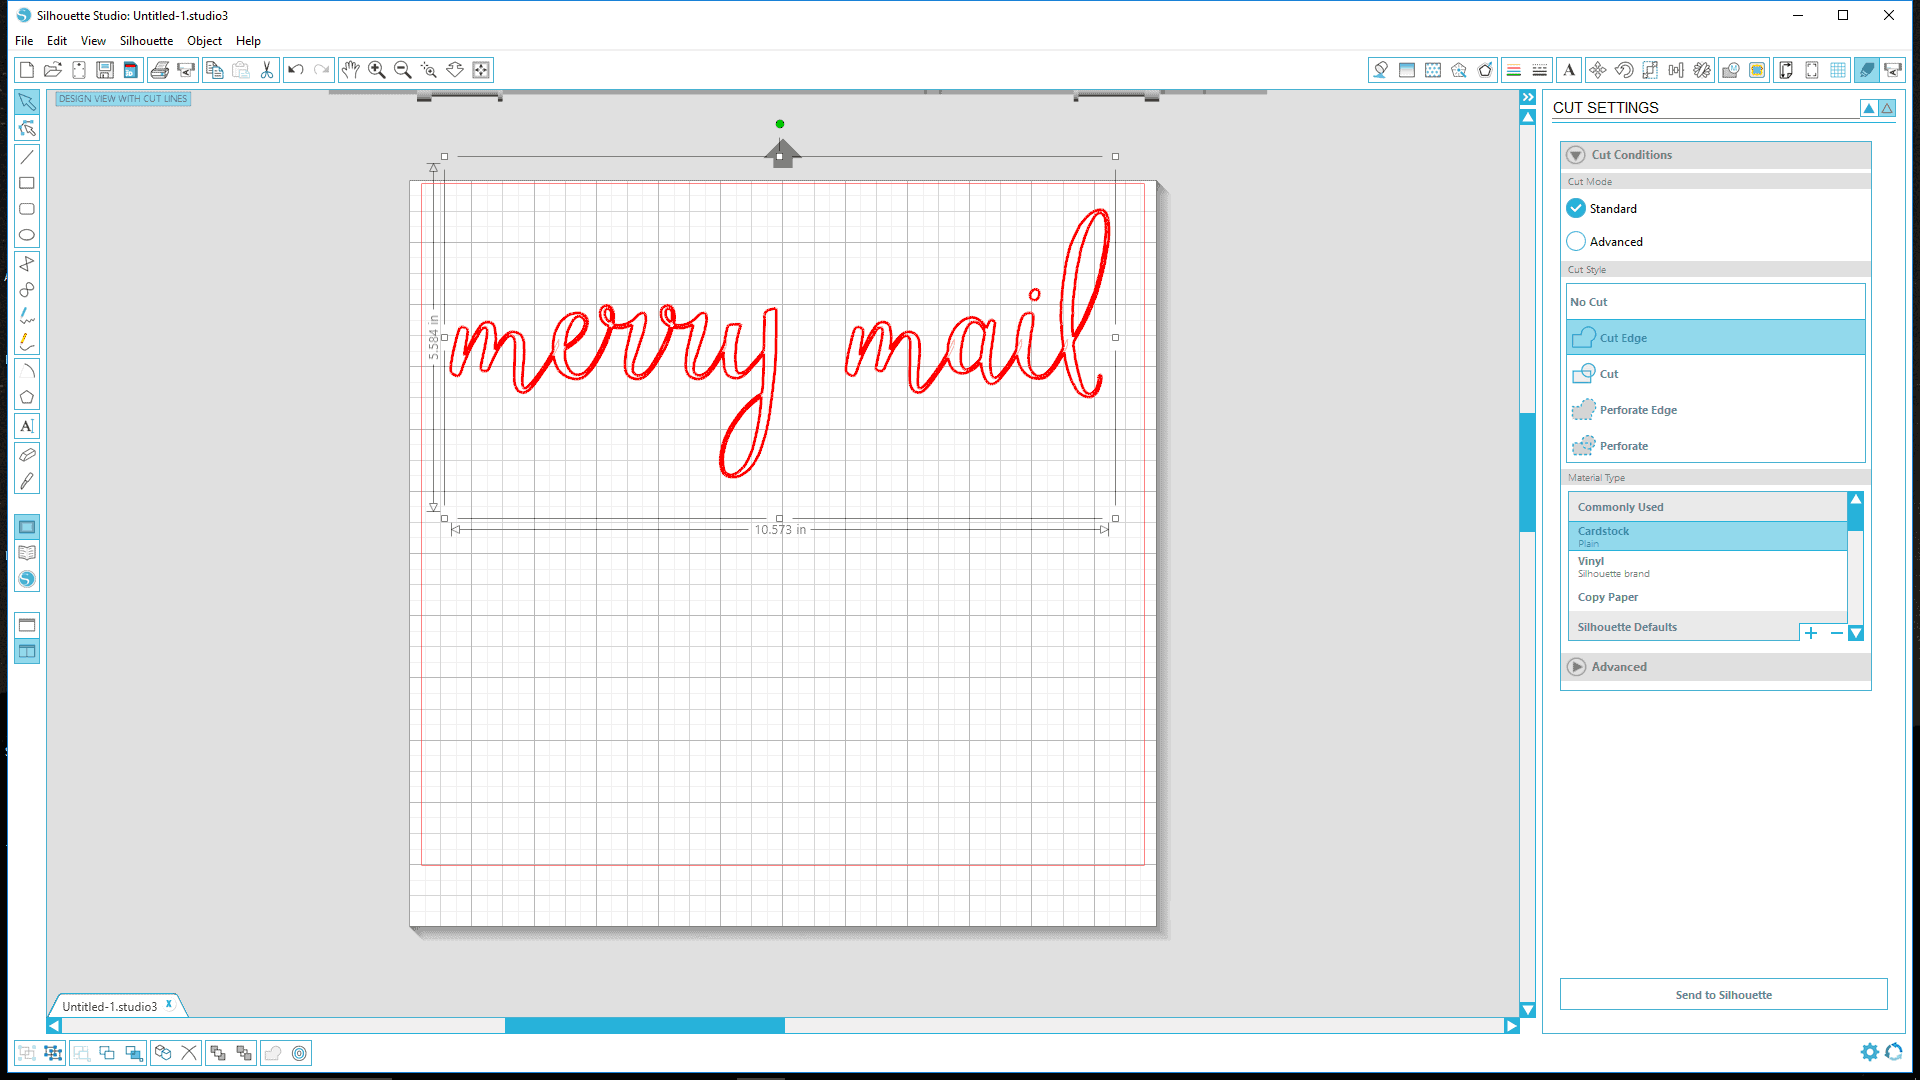
I liked the saying “Merry Mail” Things like this are all over Pinterest and I thought about changing it to “Happy Mail” but I decided to leave the “Merry”. I used Mulberry Script as my font. Since my sign is 15 inches across I wanted the text to take up most of that so I made it extend across the entire cutting mat which is 12 inches wide.
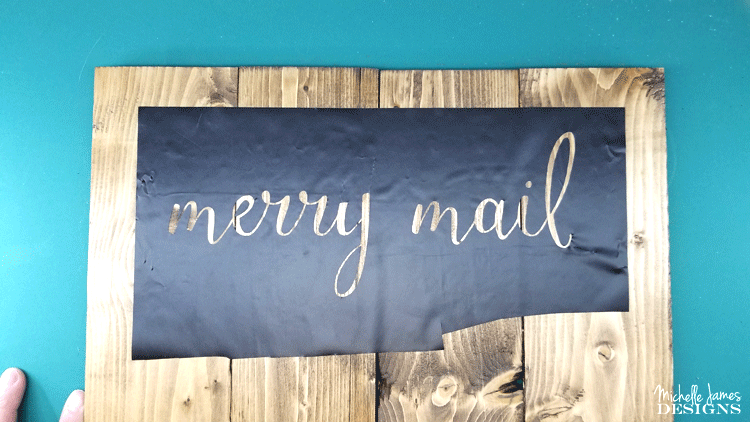
Cut the saying out of vinyl to make the stencil. Apply the stencil to the front of the sign.

Step 3
Use the white paint and a brush to stencil in the letters. Remember to use a small amount of paint so it doesn’t seep under the vinyl.


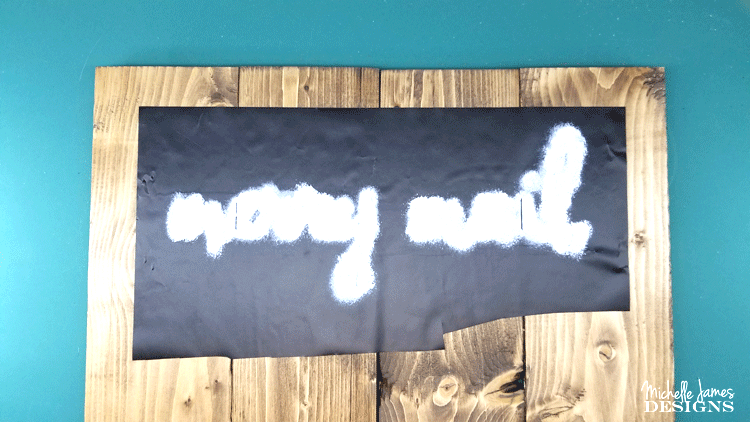

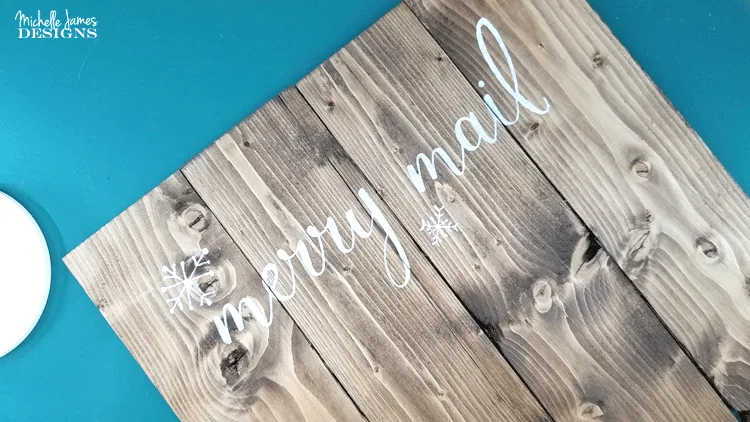
Remove the vinyl. It is a little hard to see in the photo below but it came out nice.


Step 4
Paint the snowflakes. Use the small liner brush to paint the snowflakes by hand. If you don’t like snowflakes you can paint Christmas lights or just polka dots. Whatever you like! I added a few snowflakes to the top and a couple at the bottom too.

Step 5
Add the twine. Start by placing a glob of hot glue on the back of the board toward the top. Place the end of the twine into the glue and add more glue on top. I wanted it to be secure.

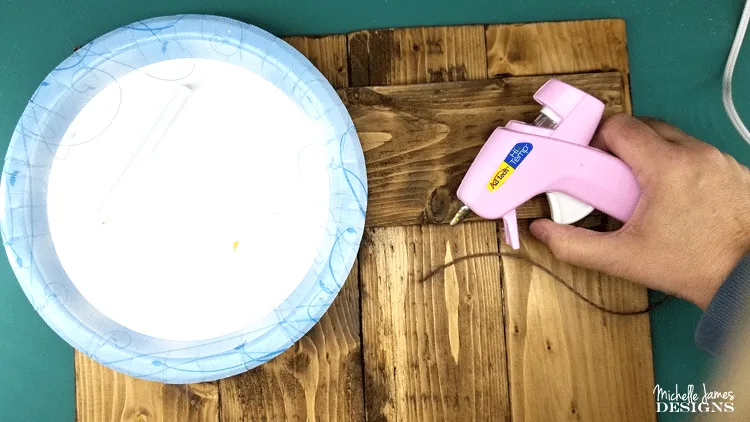
Then start wrapping the twine all the way around and around until you get to the bottom making sure it is pretty tight. Cut the twine and repeat the hot glue process.
Step 6
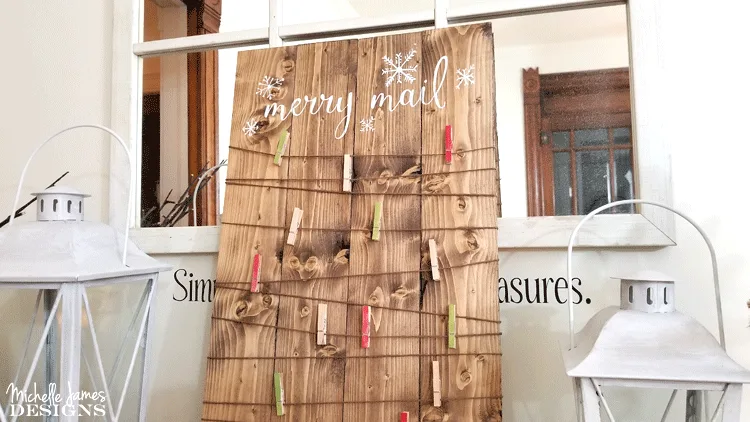
Paint the clothes pins. A little bit of red and green is just what this board needed. I could have added some of these colors when I painted the snowflakes but I decided to paint the fronts of the clothespins instead. I did not paint all of them, just some of them. The rest I left natural.


Step 7
Putting it all together. The last thing is to add a hanger to the back. We put some small screw eyes on either end and added some wire. This way I can use a command hook to hang it to the wall. You could also use a saw tooth picture hanger. Both would work well.
Add your clothes pins to the twine in random places and wait for your Christmas cards to roll in!
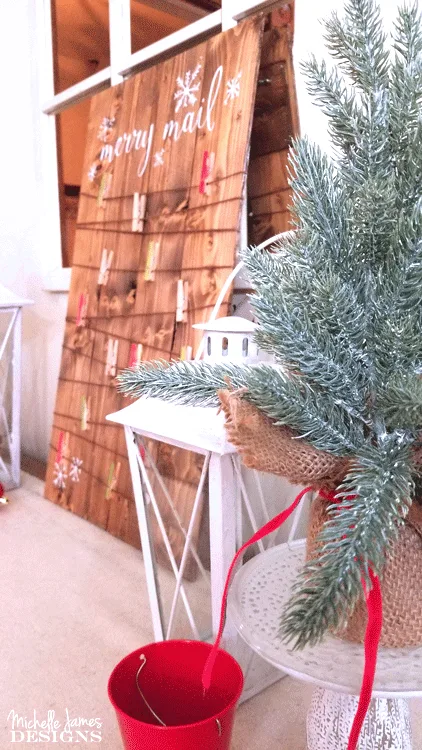
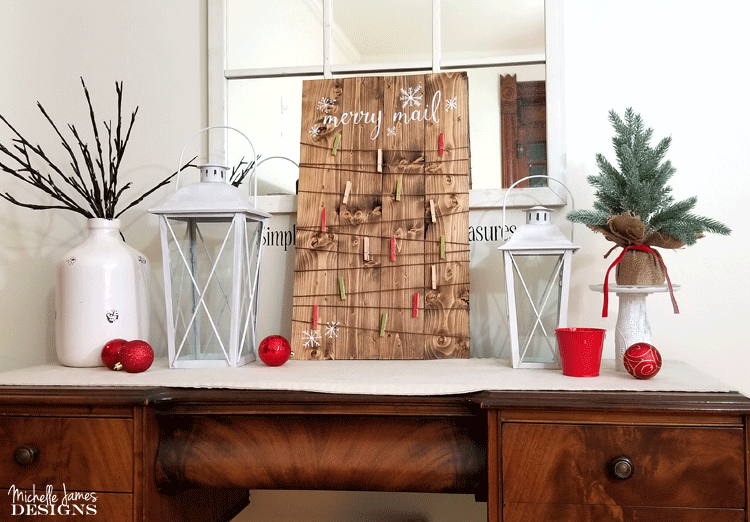
You will have a place to put them the minute they arrive and it will look so cute and be so organized! Yay!


How do you hang or display your holiday cards? I would love to know.
Thanks so much for stopping by.
Michelle


Sue
Thursday 9th of November 2017
your Christmas card holder makes me smile for miles. i love it so much. it looks like something that wayfair or pier one would sell for big bucks. you could open a store.
Michelle
Thursday 9th of November 2017
You are so nice Sue. Thanks for those nice compliments. I am so glad you like it. I have had one for a while but it was time for a change! I love this one too.
Carolann
Thursday 9th of November 2017
I just love this for holiday mail, Michelle. It's truly a great idea and keeps all of your cards neatly organized and so very pretty too. I'd love to make one too! Great work!
Michelle
Thursday 9th of November 2017
Hi Carolann! You should definitely make one. It was fun!