Color changing vinyl is an awesome product. I am showing 2 ideas for this adhesive vinyl that changes with cold water or liquid.
I can’t get enough of this StyleTechCraft color changing vinyl. It makes me smile every time I watch the cold water or any cold liquid change the color of the vinyl.
The temperature change triggers the change. These two projects change from white or clear to blue and from pink to purple.
If you saw my Personalized Valentine Glasses post then you may have seen the pink/purple color change before. But you can never get too much of this.
I have made these projects with StyleTechCraft vinyl. Being on their design team is so fun and they sent me the vinyl to use in these fun gift ideas.
And, of course I am using Dollar Tree products. Combining Dollar Tree items with Cricut designs is one of my favorite crafting tricks.
If you LOVE Dollar Tree crafts and gifts then you are definitely in the right place.
Color Changing Vinyl Ideas
I am going to show you two really great gift ideas (or ideas just for you) that are perfect for the color changing vinyl.
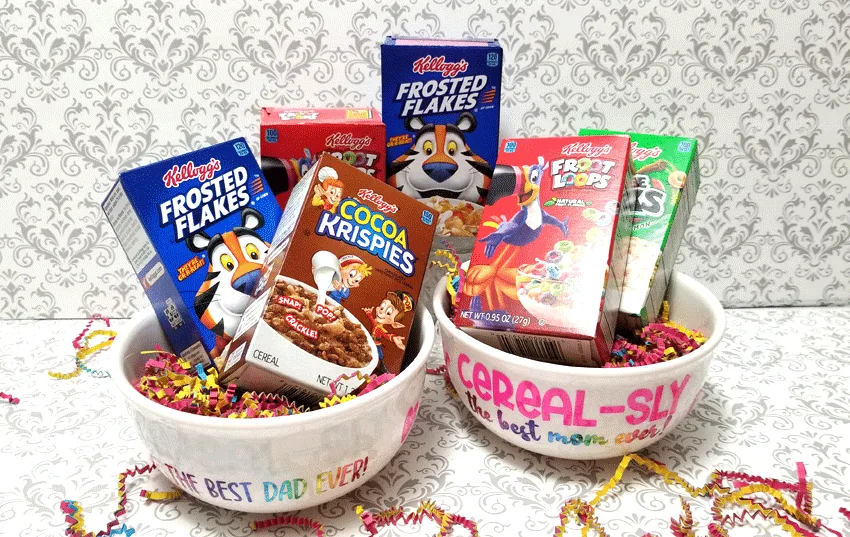
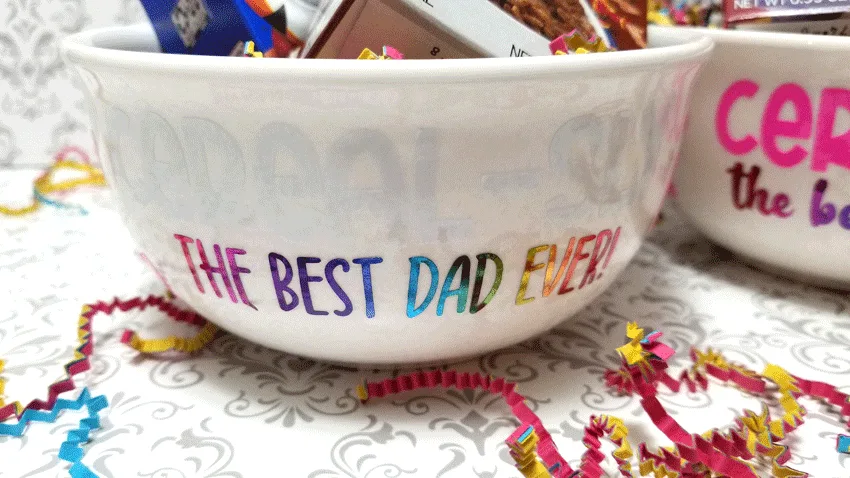
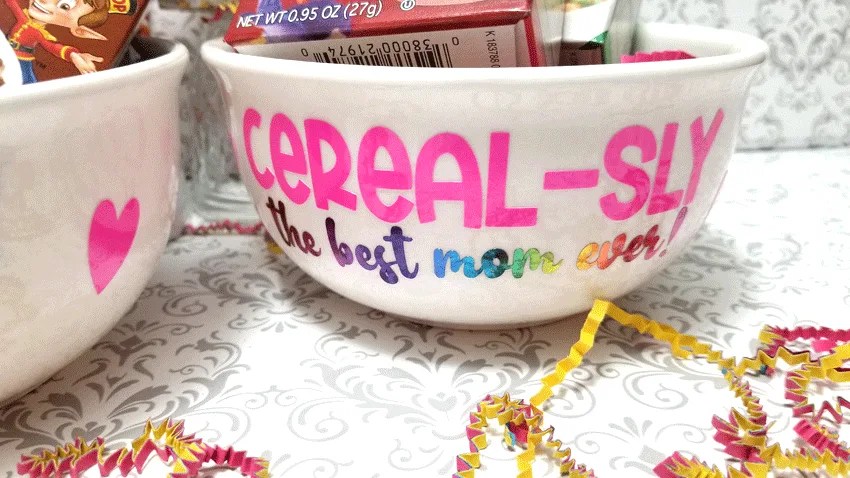
The first are some really fun color changing cereal bowls. The bowls are from Dollar Tree and the “cereal-sly” text will change color with the cold milk they add to the cereal. I am giving these to my son and daughter-in-law.
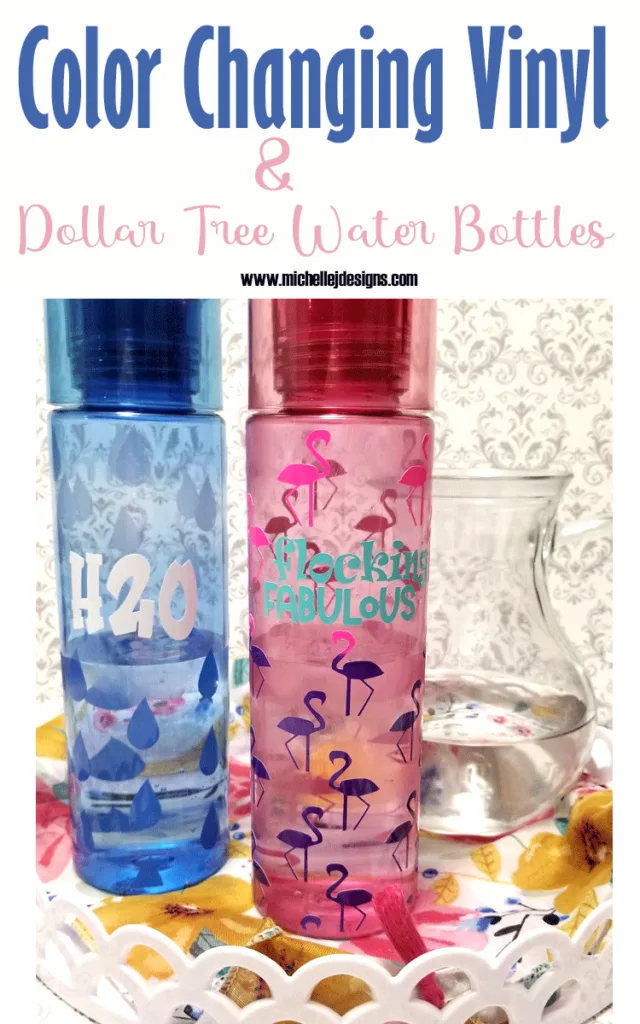
And the second are some Dollar Tree water bottles with a pattern “wrap” around them that changes color with the temperature of the water.
You are probably wondering…
How does color changing vinyl work?
I am glad you asked. There are a couple of types of color changing vinyl. Some change with heat, like the sun and some change with cold. This can be anything cold like the air, a cold window, or water or liquids. Temperature changes trigger the color to change from one color to a different one. It is the coolest thing ever.
Does color changing vinyl work on insulated tumblers?
No, a friend of mine tried in on a Yeti and it did not work. Now a Yeti is a great, great product so maybe it MAY work on a cheaper model that isn’t as insulated but I would say, no, don’t use it on an insulated bottle or tumbler.
How to cut color changing vinyl with a Cricut
StyleTechCraft has made a fantastic and fun vinyl but it is thicker than the glossy craft or opal vinyls that I use most of the time so I played with the Cricut Maker settings a little bit to get it to cut perfectly the first time.
I created a couple of free SVG files for you to grab if you want.
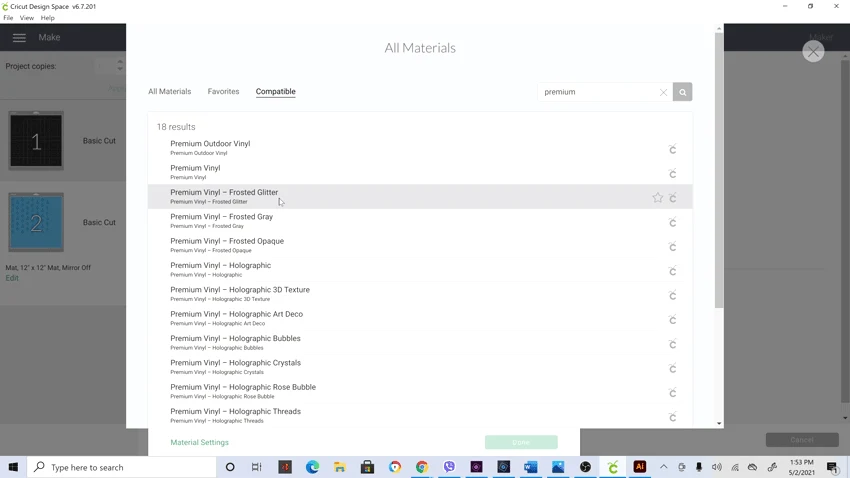
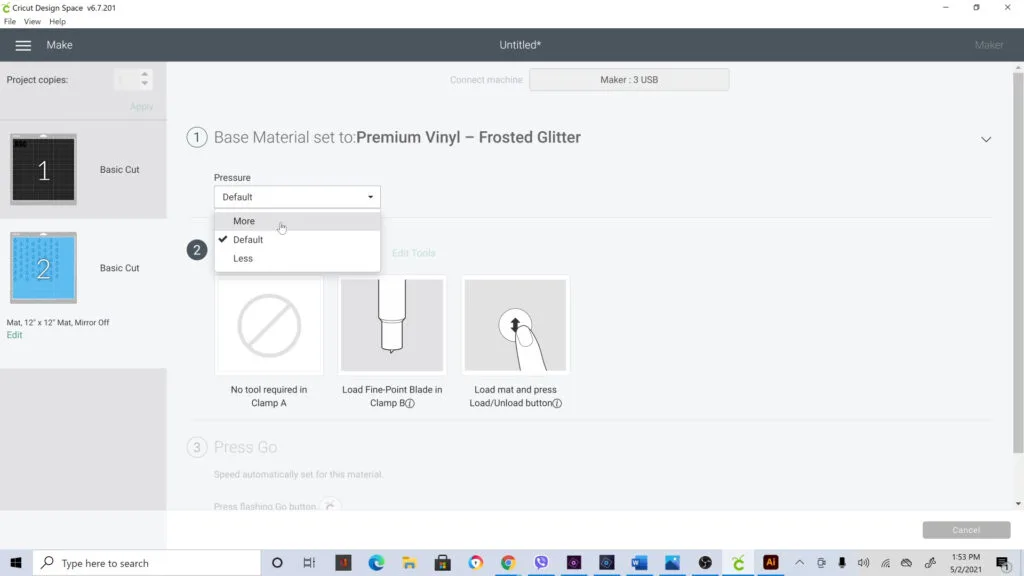
The first part of getting a great cut is to have a design that is not too complicated. I find this with most vinyls but with a thicker vinyl it is even more important. These are the Cricut Maker settings I found worked perfectly:
- Search for premium in the “browse products” space
- Choose premium vinyl frosted glitter
- When choosing your pressure, click on the toggle and use “More”
Materials needed for these projects:
I have added some affiliate links for your convenience. You can see my full disclosure here.
- Dollar Tree Cereal Bowls and skinny water bottles
- Cereal Bowl SVG files – Use the opt in form above to get these for free
- Skinny Bottle Wrap SVG files – grab 8 designs for 50% off when you opt-in for the free cereal bowl designs
- Color Change Vinyl Cold Blue
- Pink/Purple Color Change Vinyl
- Rainbow Heart Vinyl
- Transfer Tape
- Cricut Maker
- Acetone (nail polish remover)
- Cotton Ball
Now that we have covered the basics…let’s get started!
Step 1: Cut your design with your cutting machine
Upload the free SVG files into your cutting machine design space. I am using a Maker so I will be showing Cricut design space.
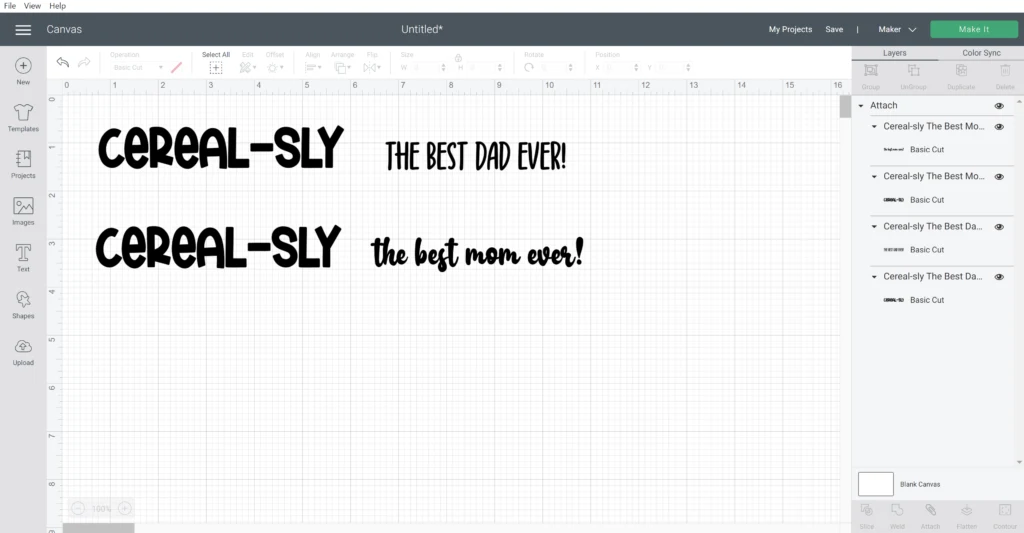
For the cereal bowls I used the cold blue on one and the cold pink/purple on the other. So I ungrouped the text and separated the Cereal-sly from “the best dad/mom ever!”
The screen below is how I set it up so I could cut it all at the same time.
Be sure to attach everything as well so it doesn’t jumble around on the next screen. Cricut likes to try to save vinyl but by clicking attach, things will stay put and you can position the vinyl on the mat accordingly.
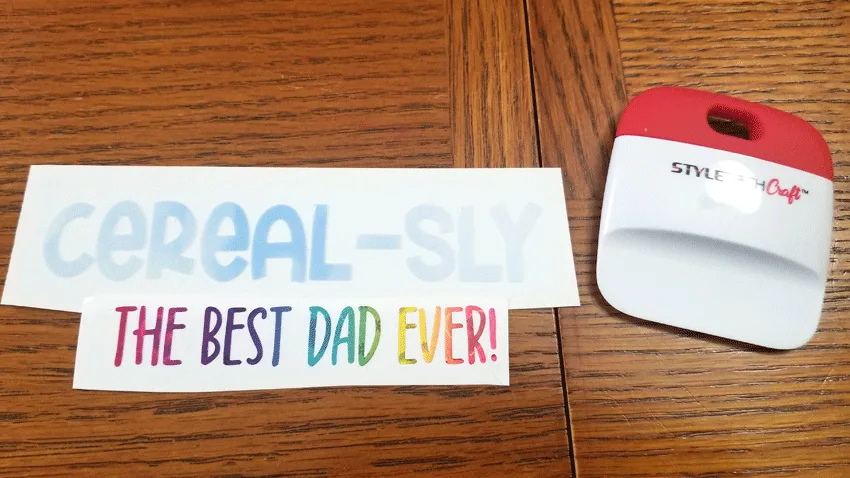
This is how it came out when cut. Isn’t it pretty?
For the skinny water bottles I created a patterned design that wraps around the bottle.
It looks like this in design space.
Ungroup the droplets from the H2O text and move the text over next to the droplets.
It probably isn’t necessary to move the H2O text over since the Cricut will separate the designs by color but I like to do it anyway. I don’t know why. LOL

Then just hit continue, choose your machine and use the settings I mentioned above.
Mine came out perfectly the first time! I was so happy.
Step 2: Weed the design and add transfer tape
Go ahead and weed all of your cut designs and add transfer tape to the top.
You may be wondering why there is a separate row of water droplets over to the right.
After the design was cut and the transfer tape is over it I wrapped it around the bottle to check the fit. When it came together in the back it seemed a little off center.
It was an easy fix to cut one row off and add it separately after the large piece was added. Then I could center it between the rows and it was less noticeable.
This can also be fixed by adjusting the measurements in design space.
Or after it is cut you can use a paper trimmer or scissor to trim it down before adding it to the water bottle if needed. I had to do this with the flamingo design.
Step 3: Add the cut image to your project
This is the fun part!
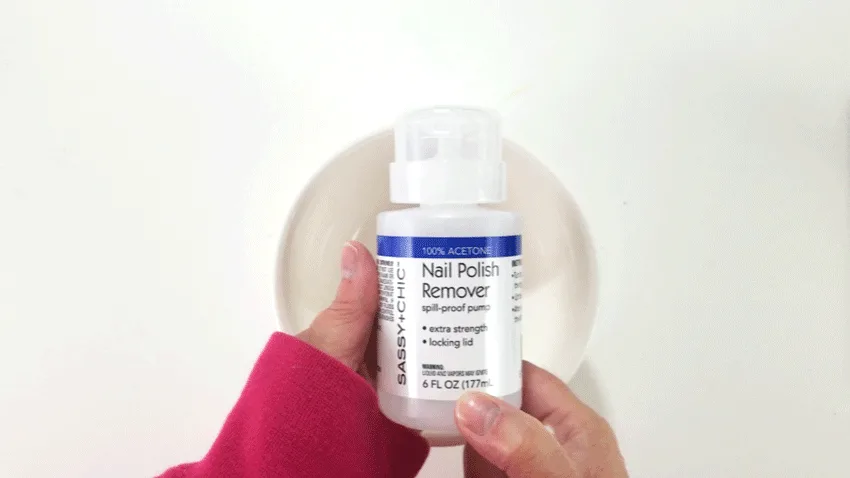
First be sure to clean the item. With the cereal bowls I cleaned them with some Acetone and a cotton ball. But don’t use this on the water bottle. I did on the pink water bottle and it made it cloudy and weird. It is hard to see in the photos. Just use soap and water on these.
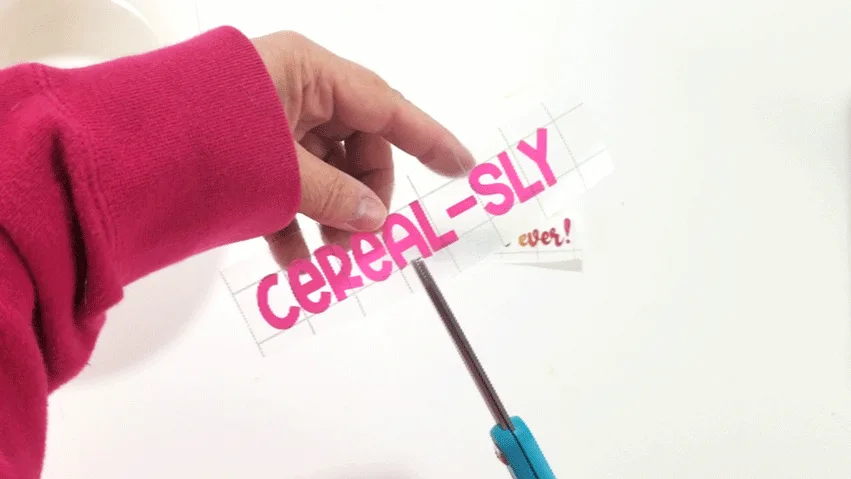
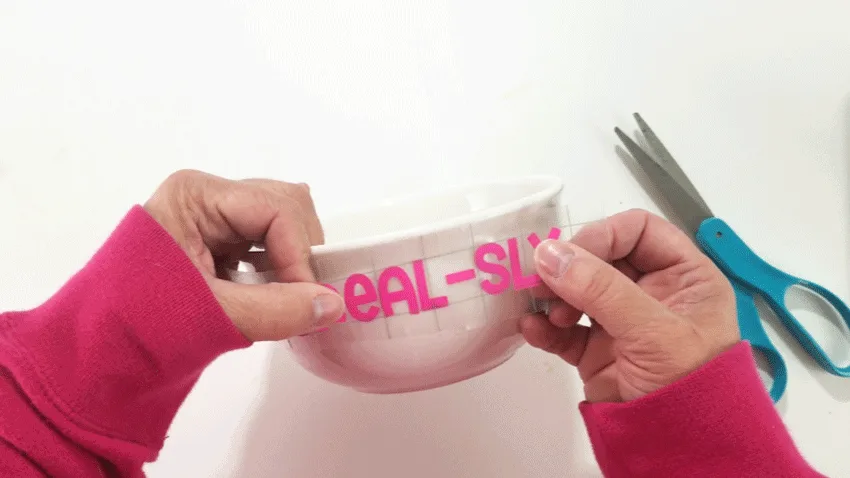
When adding an image to a curved blank like the cereal bowls, cut little slits in the transfer tape before laying it down. This will allow you to adjusts the text so it is straight.
Then just add it to the bowl and remove the transfer tape.
Repeat these steps for the second line of text.
I had some of these hearts cut from the Valentine’s Day glasses post so I just added them to the cereal bowls too.
For the water bottles, start at the back of the bottle and place the edge of the transfer tape, then wrap it around and remove the tape. It was a lot easier than I thought it would be. I like the straight bottles.
To add the text on the bottle you can either place it right over the wrap design, or you can figure out where you want it then remove a couple of the design pieces and place the text down.
I removed a couple of the pieces.
On the water drip bottle I removed one droplet but on the flamingo bottle I removed three flamingos for the “flocking fabulous” text.
Finishing Up!
You are all done! Now add some cold water or milk and watch the magic happen!
I added some of the mini boxes of cereal to give with the bowls. It is just so fun!
I cereal-sly love these bowls.
Here are the finished water bottles. They are so cute. The color change vinyl doesn’t work on the insulated tumblers but the opal vinyl would look fantastic on those. I love that look and the opal changes colors in the lighting.
What do you think? Will you try this at home?
I hope you will get out there and get some of this awesome vinyl. It is really fun and people are impressed when you add it to a gift.
Some other gift ideas for the temperature changing vinyl would be:
- Coffee mugs
- Wine glasses
- Beer mugs
- Mason jar glasses
- Kids plastic cups
- Ice bucket
- Even a window design
You can follow StyleTechCraft on Facebook to see all of their posts.
Check out the Facebook page for StyleTechCraft. They show new products and you get to see even more from the other Design Team members.
Thanks so much for stopping by today!
Happy crafting,
Michelle











Sue Eldred
Friday 7th of May 2021
These are so much fun. Great projects.
Michelle
Friday 7th of May 2021
Thank you Sue. I am glad you liked them!