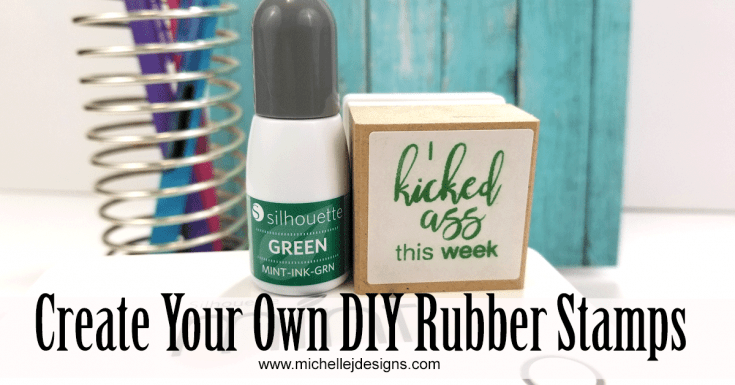
Have you ever wanted to create a card and just didn’t have the right stamp? Or you wanted a stamp that says something specific and you couldn’t find it anywhere? This post is for you. You can create your own DIY rubber stamp using the Silhouette Mint machine! This little machine is awesome and I wish I had purchased it a long time ago.
If you like this stamp design you can use it by downloading the file from my resource library. You can also sign up and get the password for the library at the bottom of this post.
How To Create A DIY Rubber Stamp
I have loved stamping for about 30 years now. I was first introduced to a rubber stamping store in San Francisco when I was on a trip with some friends. From that point on I have loved everything about this hobby! When Silhouette came out with the Mint I was really intrigued but thought it would be way too expensive for me. That was until about 2 months ago. I was poking around on Amazon and saw it for less than $35. This little bundle came with the machine, the software, four ink colors and two stamps. I was so excited! I ordered it right then and there!
It is easy to use and takes up no space at all. I just love it and I know you will too.
See exactly how to make your DIY rubber stamp in the step-by-step video below.
Be sure to subscribe to my You Tube channel!
If reading the steps is more your style keep going!
Materials And Tools Needed To Create Your Own DIY Rubber Stamp
I have added affiliate links for your convenience. You can read my full disclosure here.
Create Your Own DIY Rubber Stamp With Silhouette Mint

Create your own unique stamps using the Silhouette Mint. It is so easy and you can personalize each one.
Materials
Instructions
- Create design for stamp in Mint software program
- "Print" the design onto the stamp with the Mint machine
- Mount the stamp to the included mount
- Ink the stamp using Silhouette inks
- Let the ink soak in for about 15 - 20 minutes
- Blot the excess ink off the stamp by stamping it onto a sheet of scratch paper
- Stamp the design onto the included sticker and adhere it to the mount
- Enjoy!
Notes
The prep time listed above is time to design the stamp. The active time is the time it takes the machine to "print" it and the additional time is waiting for the ink to absorb into the design.
Step 1: Design your stamp in the Mint software program
When you open the Mint design software program it is similar to most design programs. I found it very easy to use. The first thing to do is to choose the size stamp you are using.


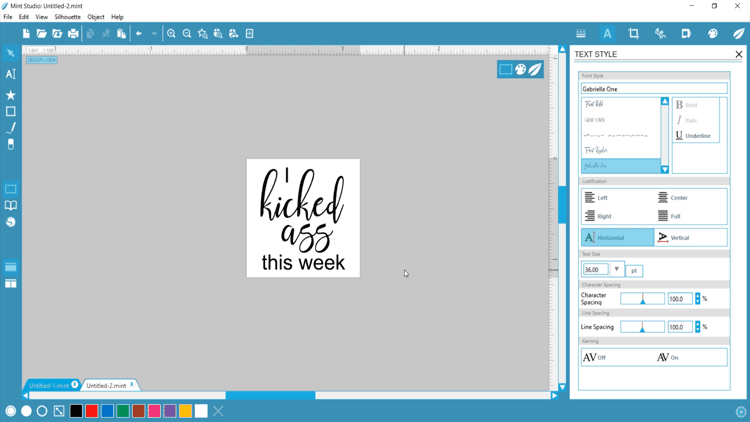
The next step is to create and design your stamp. I used text only on this stamp. You could also purchase stamp designs from the Silhouette website.
When designing your text stamp, choose your fonts and font sizes from the right side of the screen and type in the text.
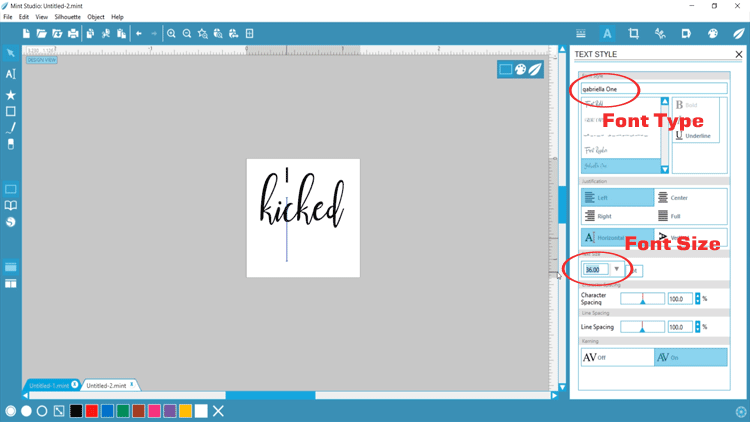

Highlight the text and use the grab bars to move each word into place.

When you are happy with the design click on the mint leaf symbol in the upper right corner to get to the “print” stamp screen.
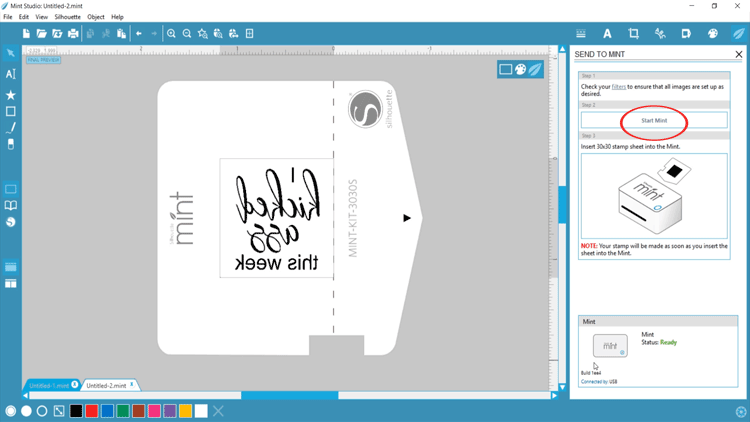

Step 2: Send the stamp to the machine to “print”
Make sure the Mint machine is plugged in, hooked up the computer, and turned on. Click send to mint.
The light on the Mint should start blinking. Then you are ready to add in the stamp material.

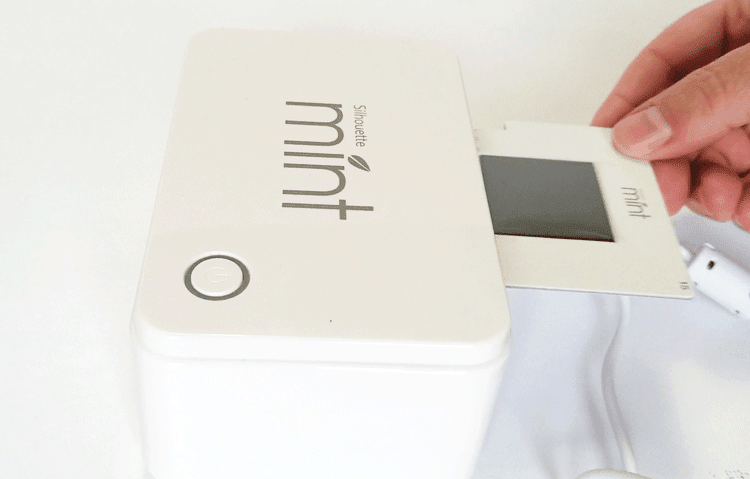
Feed it into the machine and let it go. It will make its way to the other side.


After a bit when it finishes the “print”, remove the stamp.
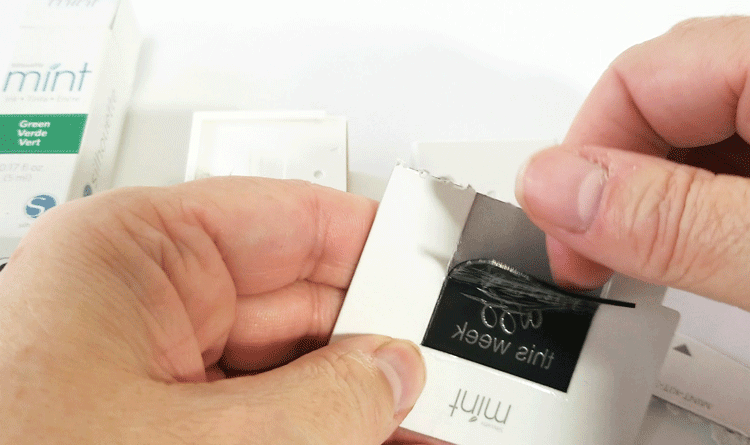
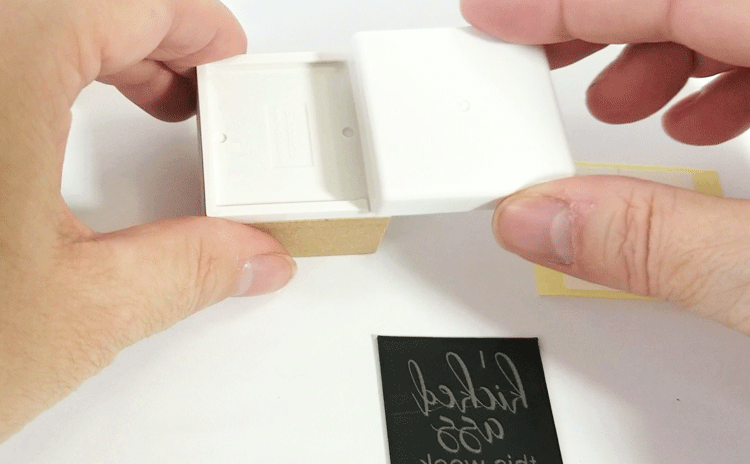
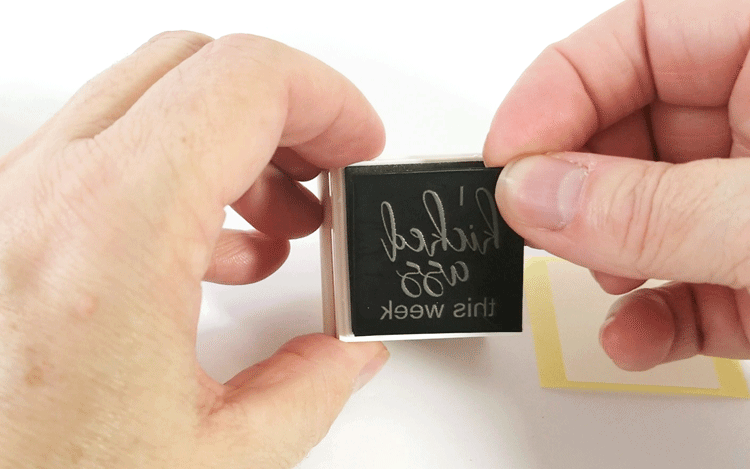
Step 3: Apply the stamp to the mount
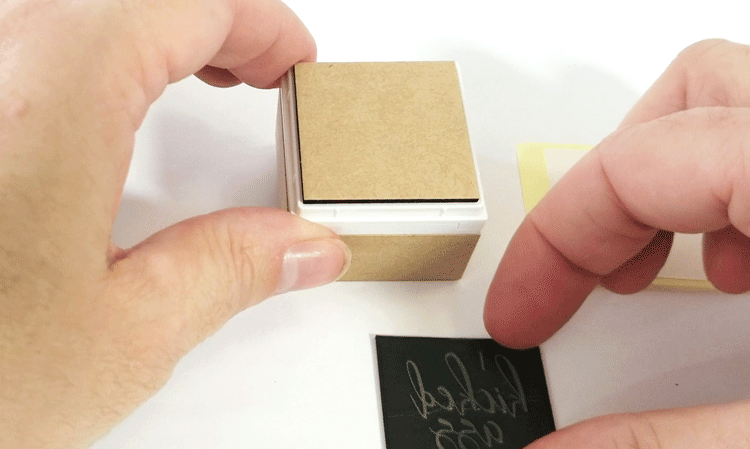
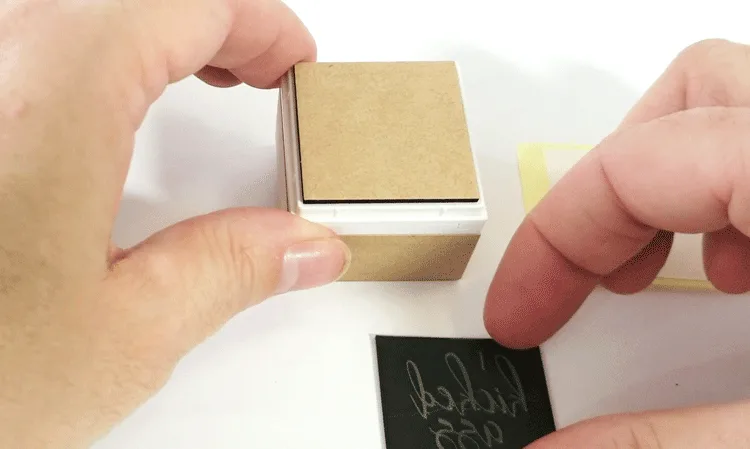
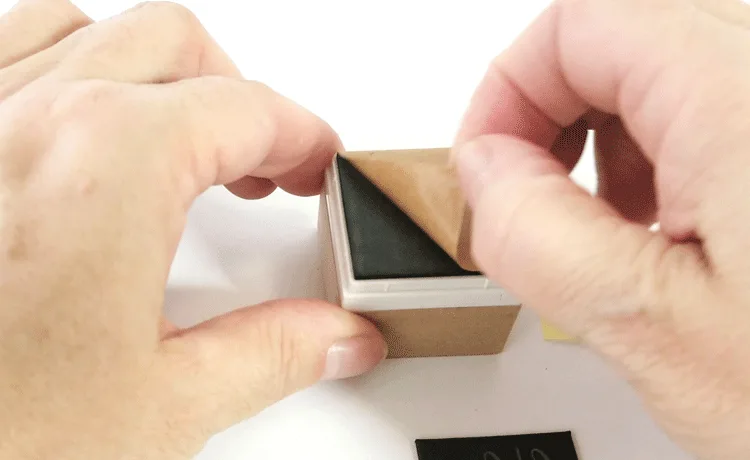
To complete your DIY rubber stamp you need to remove the black stamp from the outer cardboard. First fold the cardboard over on the perforated line.

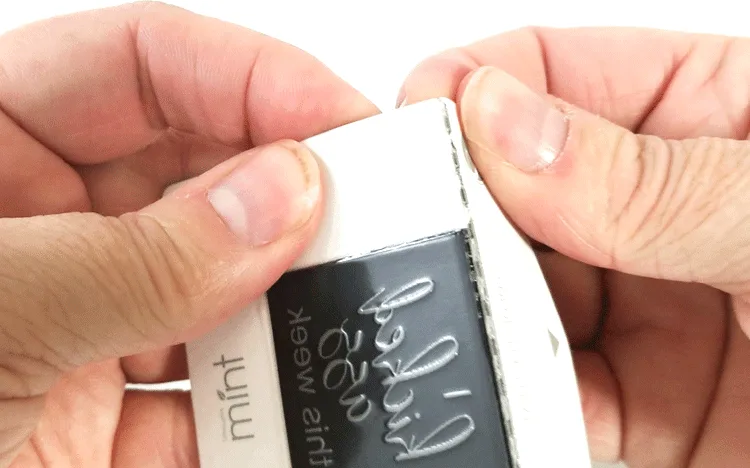
Next remove the stamp and the plastic from the stamp.

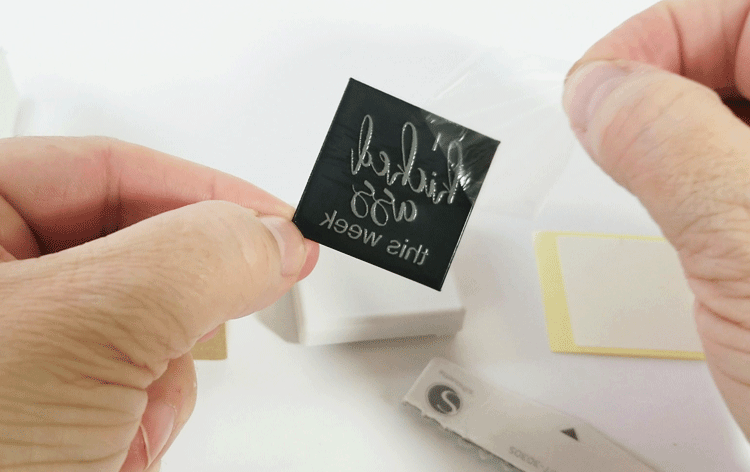

Assemble the mount, peel off the paper to reveal the sticky area and carefully adhere the the stamp to the mount.


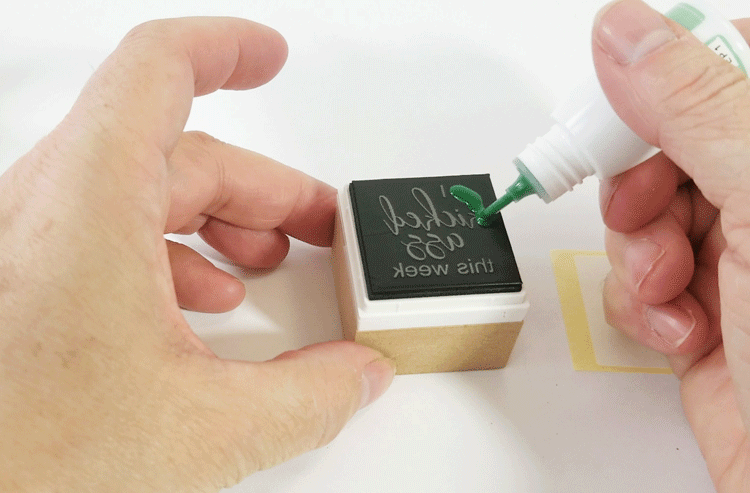
Step 4: Ink the stamp
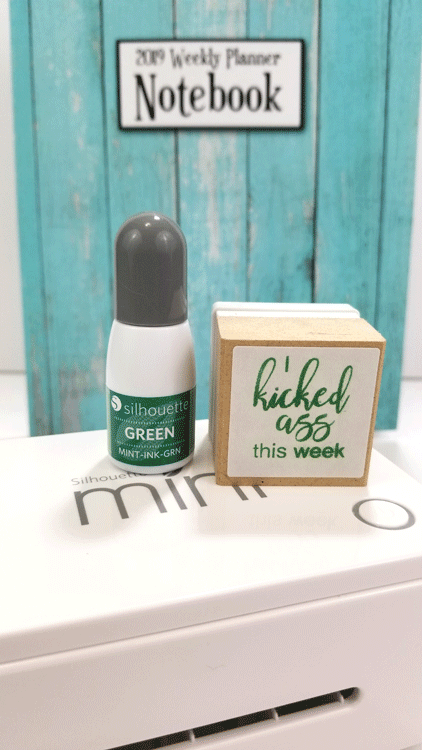
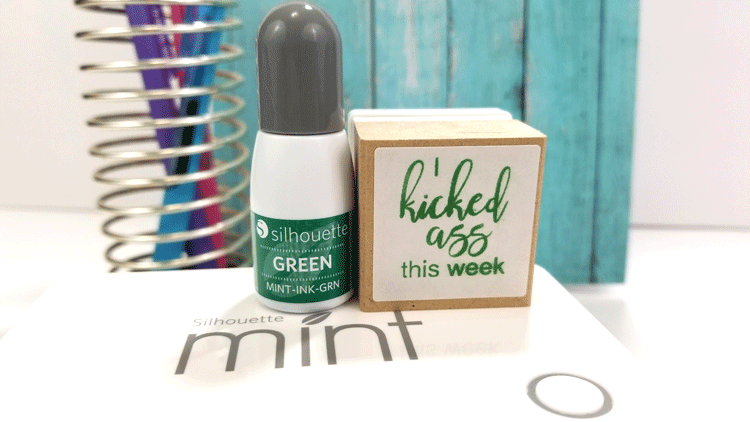
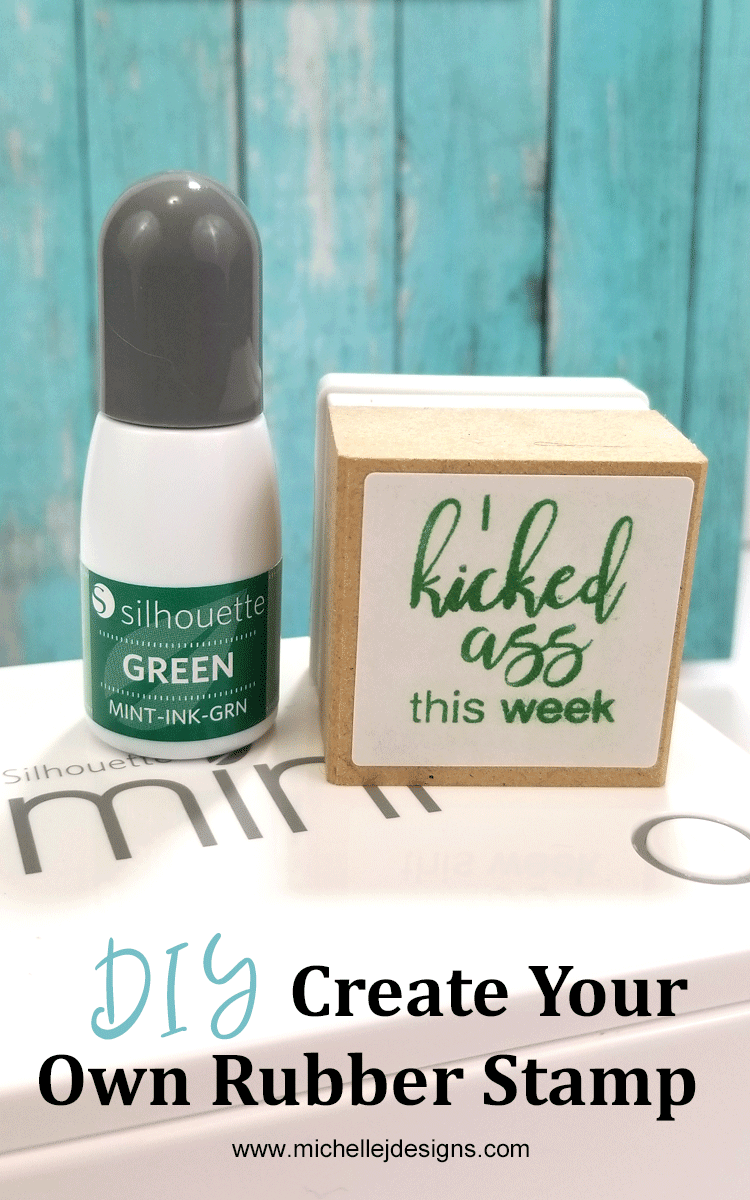
Once the stamp is mounted it is time to ink. You can use multiple colors if you want. I chose to use green for mine.


The Silhouette Mint inks come in small bottles. All you have to do is open the bottle and start applying the ink to your stamp. If you are using multiple colors be sure to try not to get them to run into each other too much.


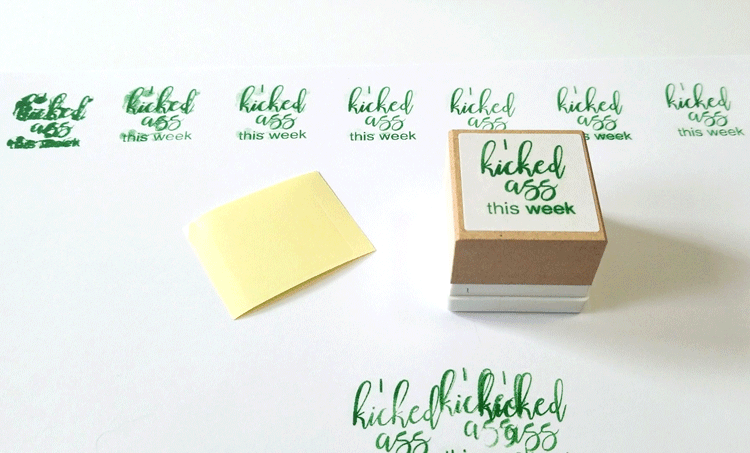
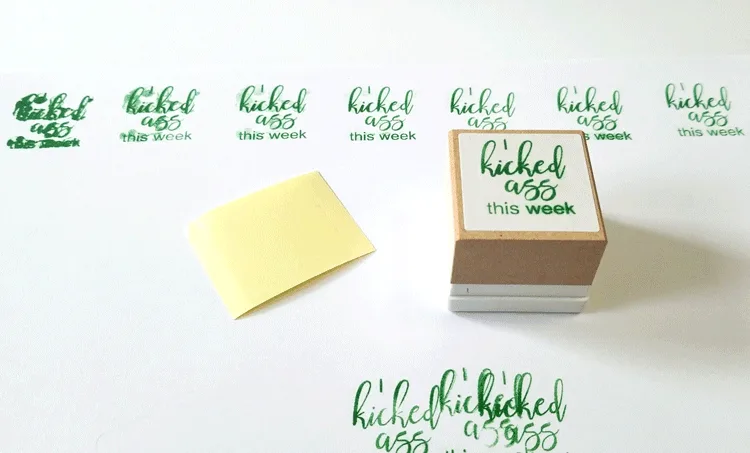
Now comes the hard part. You need to be patient for about 15 – 20 minutes so it can soak into the stamp. After that, stamp it a few times onto a sheet of scrap paper to clean off any excess ink.
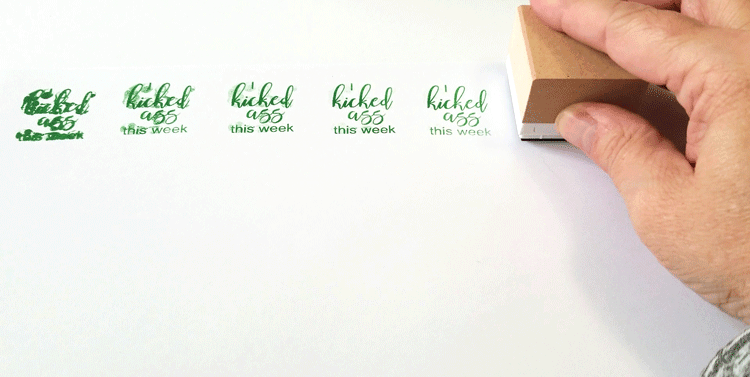
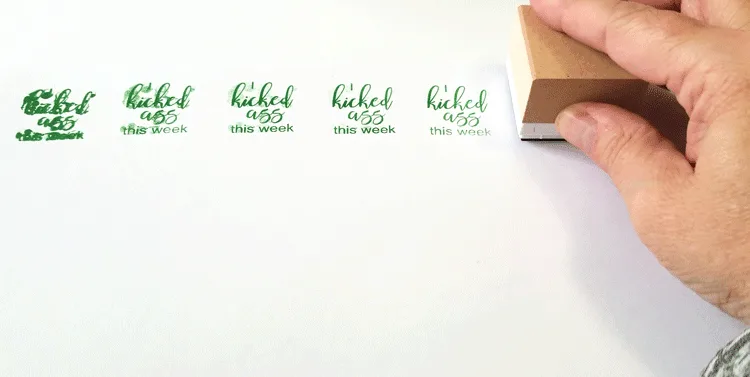
Then stamp your design onto one of the stickers included with the stamp.


Place that sticker onto the top of the stamp as carefully as you can. Keep it straight.


Isn’t is awesome? Now you have your own designer, unique rubber stamp.
What do you think? Is this something you might try? I didn’t think so at first but when I saw the price I couldn’t pass it up. NOW I am really excited to have my own Mint machine.
I made and address stamp for one of my friends and that was fun too.


If you would like to see me create my own DIY rubber stamp check out my STEP BY STEP VIDEO HERE!
This stamp is to use in my planner! You can see ALL OF MY PLANNER DESIGNS HERE
I don’t design just planners you can see ALL OF MY COMPOSTION BOOKS AND JOURNALS HERE
Thanks so much for stopping by!
Michelle


Julie Briones
Monday 14th of January 2019
GREAT tutorial, Michelle. Didn't know you could make stamps this way!
Michelle
Monday 14th of January 2019
Thank you Julie! I love this little machine. It is great for business too. You could make your own logo stamp. So fun!