Jeff and I have wanted to change our dining room into an office space for a long time. We have been working on it and will have a formal reveal sometime in the near future but for now I want to show you our latest project. The file cabinet re vamp!
File Cabinet Re Vamp
Last year Jeff’s office moved into a new location and they all got new furniture and work stations. Some of the old furniture and things were being sold or given away. If I remember correctly the file cabinets were free. We took four of them thinking we would span a counter top over two and make a desk for each of us.
We are finally getting around to creating this space so we needed to re-vamp the file cabinets.
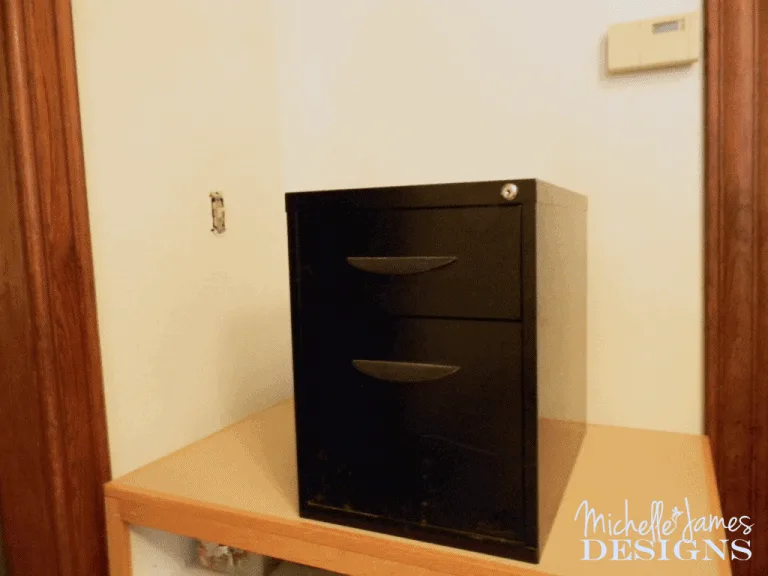
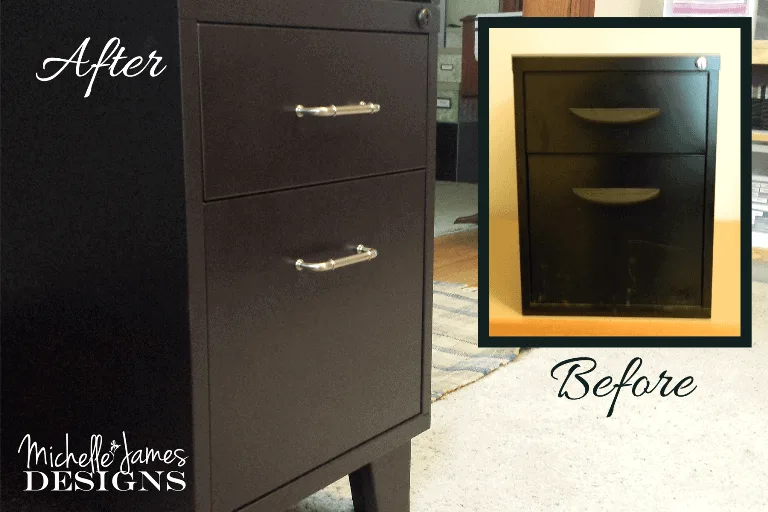
This is how they looked before. They were 20 1/2 inches tall and we needed them to be 29 1/2″ to be table/desk height. I knew I wanted them to have legs but 9 1/2″ legs seemed really long. We looked around for different alternatives but just couldn’t find what we wanted. I suggested making shorter legs and adding a cubby of some sort at the top. Jeff is really creative so his design brain kicked in and he came up with a really great plan.
We found some pieces of wood in the “cut off” area in Menards. The pieces are 1 x 4 and they are usually about 2′ long – ish! They cost about .45 cents each and they fit in the car! Which is always a plus. We purchased about 10 of them.
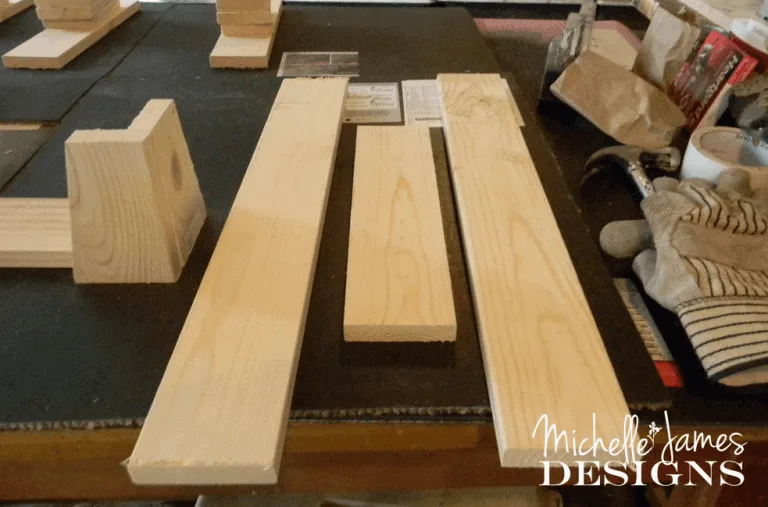
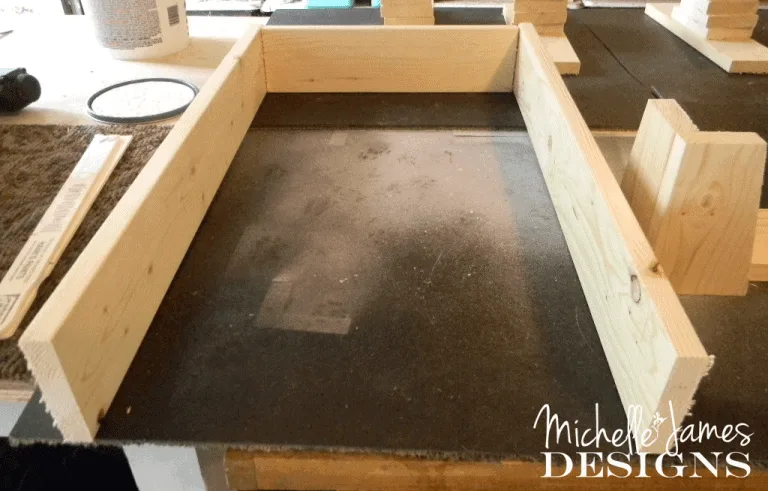
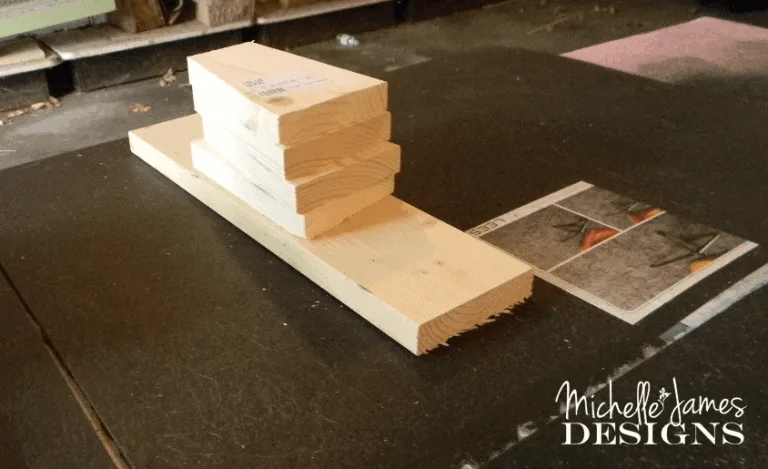
These are the parts that make up the cubby at the top of the cabinet.
He cut the long pieces to length and the short piece to fit the width.
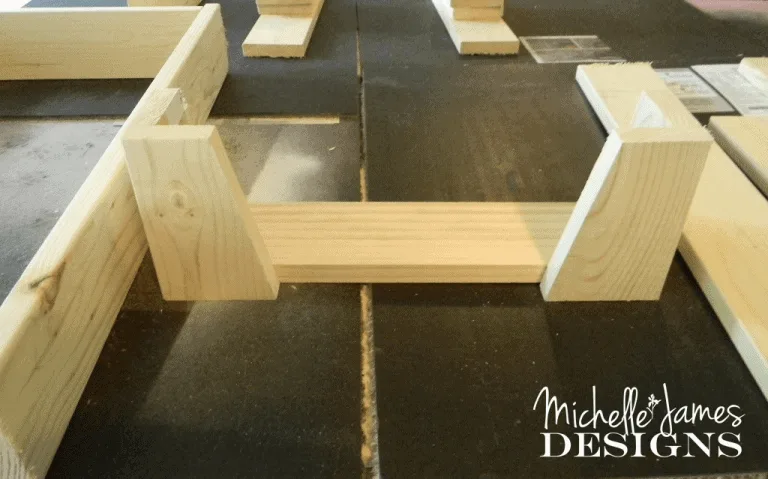
These are the parts for the legs. This is just for the front. He used two of these piles per each file cabinet. They ended up looking like this.
The long piece was mounted to the underside of the cabinet.
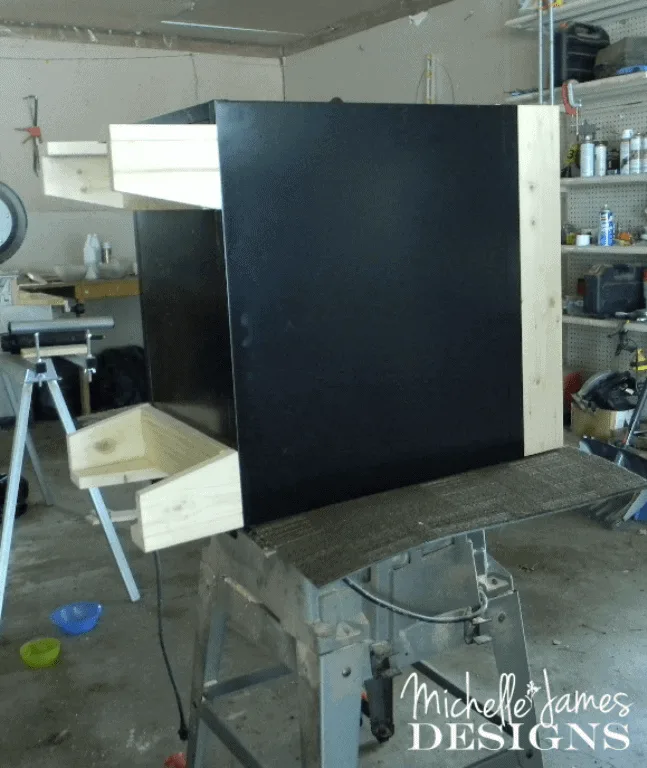
This picture is weird because the cabinet is setting on it’s back. But you can see how the legs are mounted on the bottom and the cubby is mounted at the top. We have them here so we can give the wood parts a coat of Kilz primer before painting. This really helped to make the spray painting easier.
Before we painted, Jeff removed the drawer pulls. We gave it a couple of coats of Rust-Oleum Metallic Finish Spray Paint, Oil Rubbed Bronze spray paint. This is my new favorite. It is sort of a brown/black. I like that it is really dark but not quite black. I find I use it a lot.
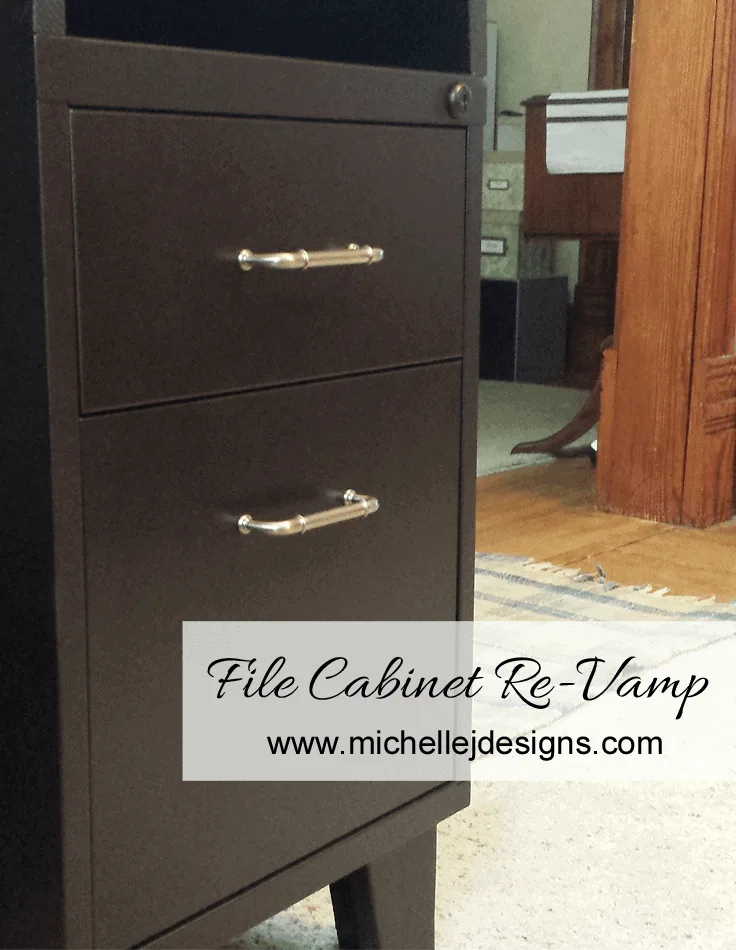
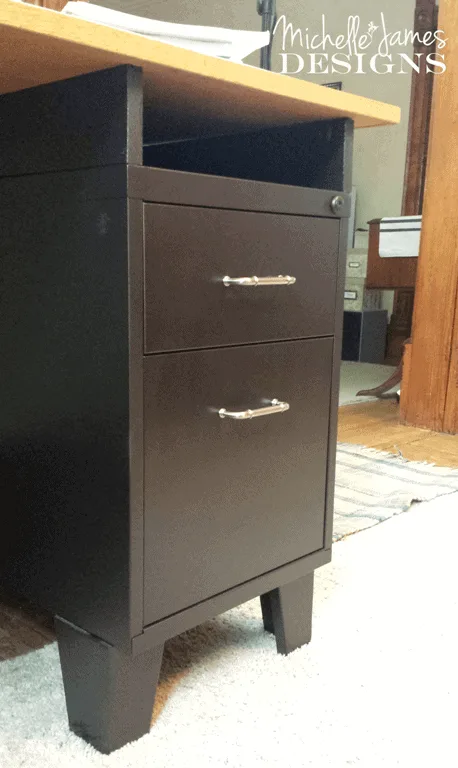
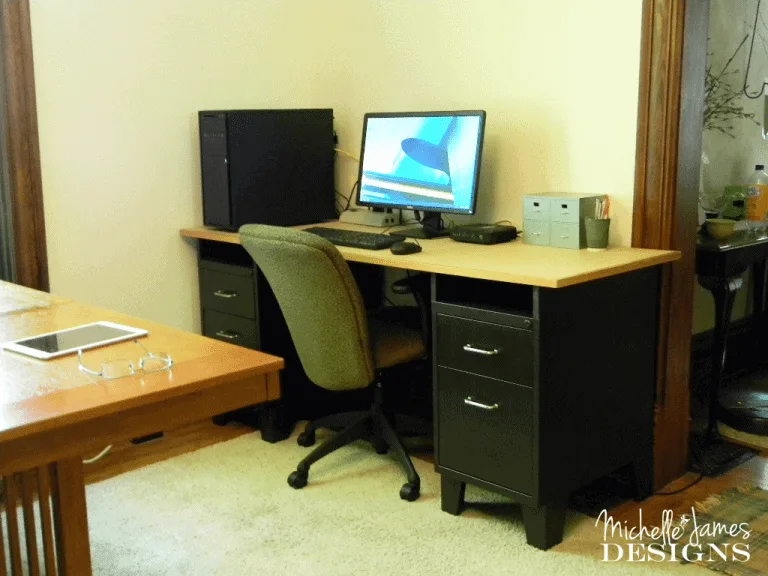
After the paint was dry (which seemed to take forever is the damp, rainy weather) we added the pretty drawer pulls we picked out and they looked so good. It is amazing what some updated and pretty hardware can do.
This is Jeff’s desk and still not quite ready for the full reveal but you can get a sneak peek of what our desk units will be like. All in all I think we paid under $30 per desk. The top was $15 and the drawer pulls were about $3 each. We did purchase some of the spray paint. I didn’t have enough for the four cabinets. (You will see my desk later) Hint..Hint..it will be much prettier than his.
So what do you think? I am excited to have some more office storage and think they turned out quite nice.
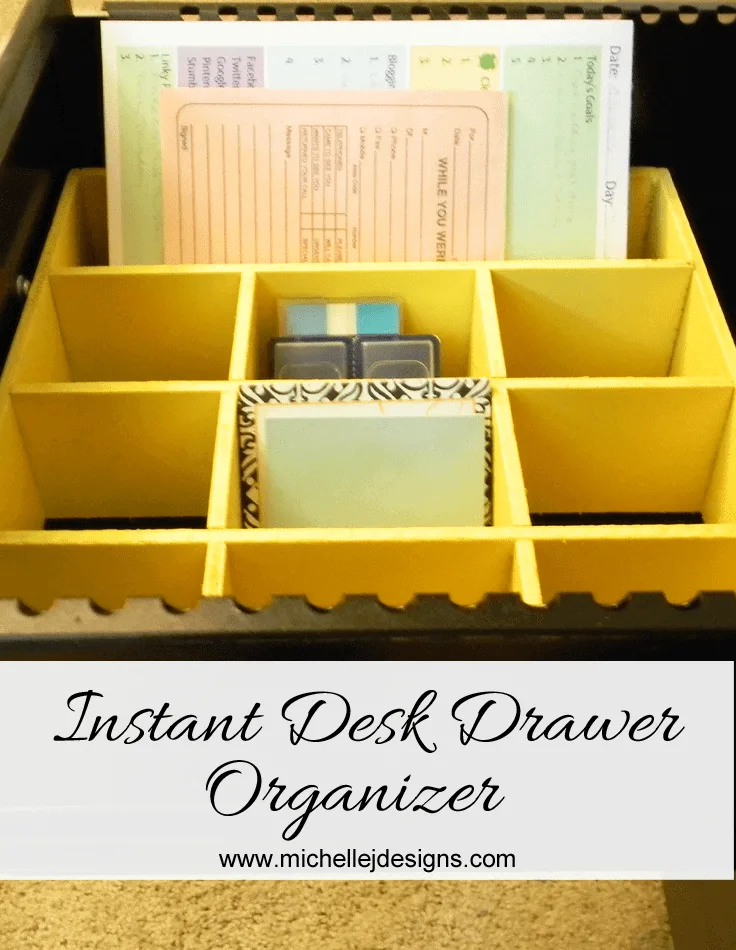
Be sure to stay tuned over the next couple of weeks so you don’t miss the office all put together and pretty! And, check this out! My Instant Desk Organizer that fit perfectly in the top drawer!
Thanks for stopping by.
I am sharing this post at:
Link It To Me
I am so excited that this post was featured at:
Inspiration Monday – Thank you!



Susie from The Chelsea Project
Friday 5th of August 2016
This is such a clever idea. It made an amazing desk. I will be getting a photo out on social media later this week. Thanks so much for linking to Friday's Furniture Fix. Susie from Chelsea Project
Michelle
Friday 5th of August 2016
Thank you Susie! These things were pretty ugly when we got them. I am amazed at how some legs, paint and new hardware can really spruce things up. Thanks for sharing too.
Sue
Friday 3rd of June 2016
You and Jeff are a great team. Without your inspiration, I would not have thought of this idea for the legs.
Michelle
Friday 3rd of June 2016
Thanks Sue. We are (most of the time) a great team. LOL! He does help me an a lot with my projects and I could not do them without him. Thanks for noticing his talents!
Susie Bentz
Thursday 2nd of June 2016
Fabulous!
Michelle
Thursday 2nd of June 2016
Thank you Susie! They are very useful and pretty!
Carolann
Wednesday 1st of June 2016
Love this Michelle, Wow, he did a fab job!
Michelle
Thursday 2nd of June 2016
Thank you Carolann! We do love them and use them every day. Jeff is a genius when it comes to the detailed work. Too bad he doesn't LOVE it! LOL!
Vickie@Vickie's Kitchen and Garden
Tuesday 26th of May 2015
Such a great idea! Love the makeover of your safe. Makes me want to get busy and makeover mine. Thanks for sharing at the #HomeMattersParty
Michelle
Wednesday 27th of May 2015
Thanks so much Vickie. We do love the changes we made to the file cabinets. They look so good in the house now.