Well, here we are again with my next kitchen remodel…part 4! Are you excited? I am sure you are. LOL. I am sad to say this will be my last update for a while. After this post you will be completely caught up with us and our progress. Since December and Christmas are looming in the near future it will probably be after the first of the year before we get going again. But…you never know, my husband could surprise me…not likely though. He would never work on it if I didn’t ask and ask and ask and ask…well, you get my point. He just isn’t motivated anymore. It has been a long haul and though he wants to be done, he doesn’t want to work on it anymore. If you missed parts 1, 2 & 3 you can find them here, here and here!
We still have these things to finish:
Board and batten along the three more walls (well, really it is two walls and then behind the refrigerator),
thresholds on the floor going into the back porch, the laundry/bathroom and the pantry,
base trim around the island and the board and batten walls,
and lighting. WE NEED MORE LIGHT!
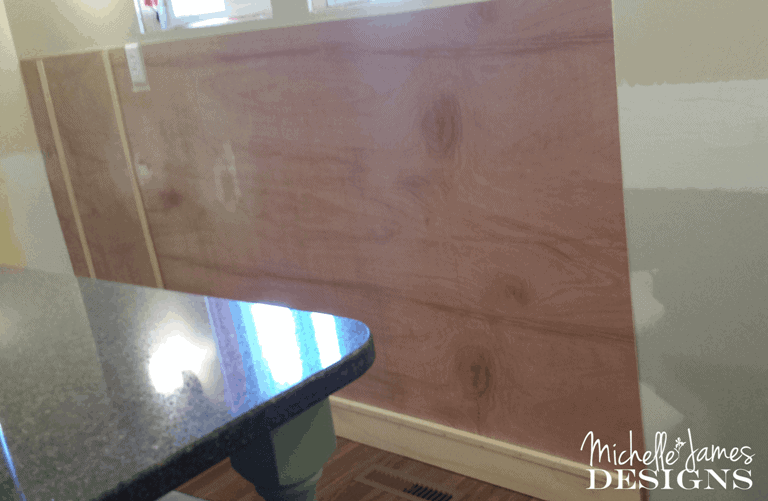
So, let’s get to the good stuff. We are starting off with the board and batten on the window wall. I am telling you, the reflection from my beautiful counter top is awful. Anyway, our walls are pretty bad. I wish we could have used the system for board and batten that just allowed us to place the vertical pieces and a small molding across the top but this was not the case. We have holes and all sorts of weird things on the walls. So we used a pretty thin piece of wood called Lauan. It needs some sanding and has some imperfections but it is cheaper than plywood and thinner. It worked out well.
When we finished off this new wall our original plan was to put the wainscot (like Jeff put on the island) all the way around and about 3.5 feet up from the floor. We changed our mind. Well, I changed my mind. But Jeff thought it was a good idea. I love the look of the board and batten. It is cleaner, simpler and less busy looking. We are going for a clean and simple look so it fit well with what we wanted. But, we did not plan for that when we installed the light switches and electrical outlets on the new wall. They are too low because we wanted to the board and batten to be 4 ft high and we did not have them sticking out enough for the wood. So we worked around it and I think it will be fine.
This is the first piece to go up. There is a base piece with a small trim piece too. I love it.
 Here is another view without as much of a glare of the counter.
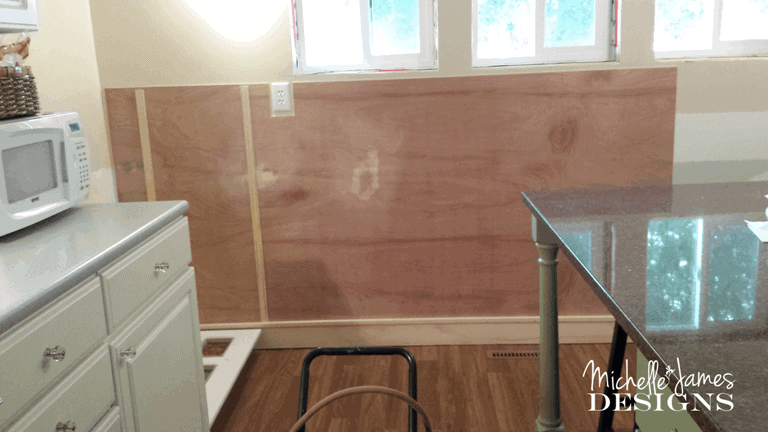
Moving along.

With the primer. I wanted to primer everything since the wood was so dark. I used Kilz.
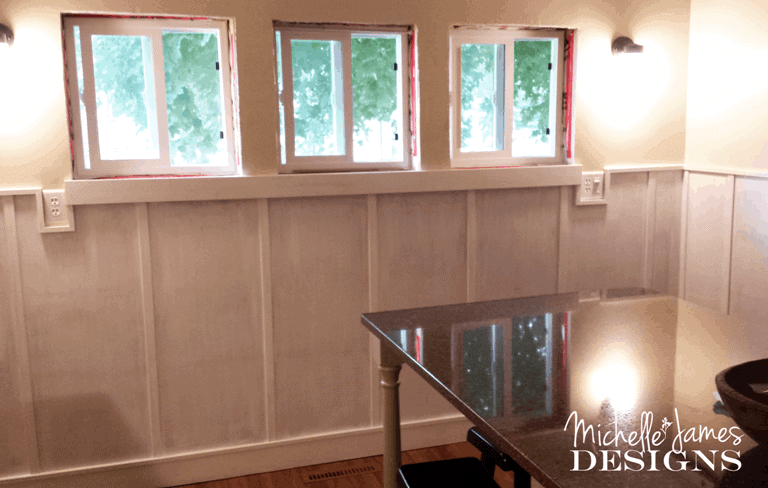
And then went over it with 3 more coats of white paint. I think I may even do one more.
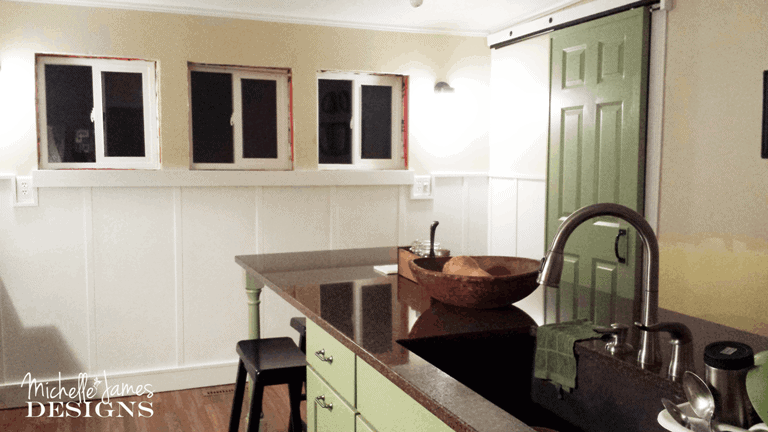
I think I forgot to mention in the last post by beautiful Delta faucet with a sprayer and a soap dispenser. Wow is it ever nice. I love to be able to remove the sprayer to clean out the huge sink. It really makes things easier. Did I mention that I LOVE my island and everything about it? LOL!
Also, I did not have pics of the bar stools we put at the eating area in the last post. They are black, pretty common stools but I really like the look of them.
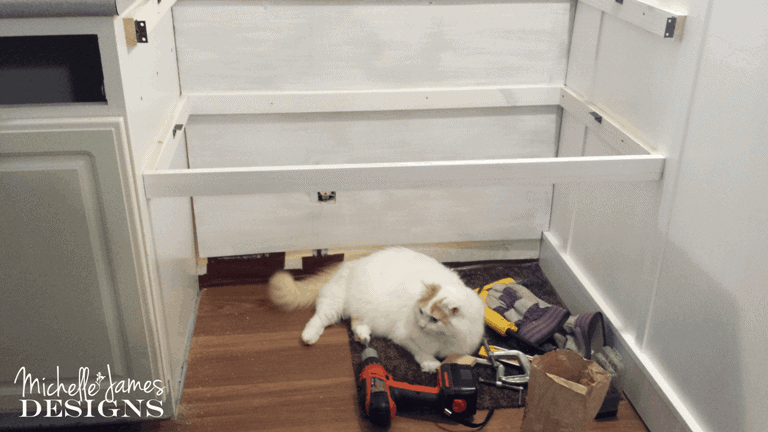
After this wall of board and batten was done we moved on to the funny little corner where the kitty food and water station is. I wanted an area that could house the cat food and bowls and above that house a small wine fridge and wine bottles and glasses. We started at the bottom and worked our way up. With Pee Wee’s help, of course.
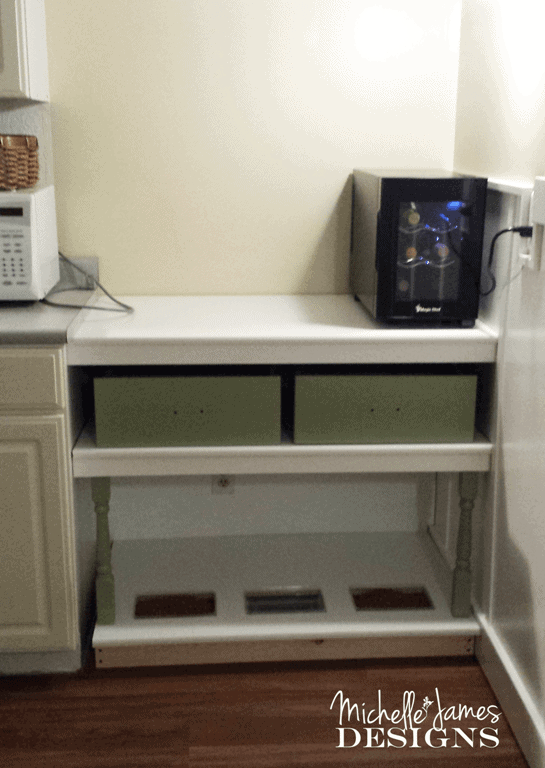
I wanted a shelf that I could use two drawers (from and old dresser that I redid) as organization for the kitty food and dishes. I really didn’t want the food and cat dishes to show.
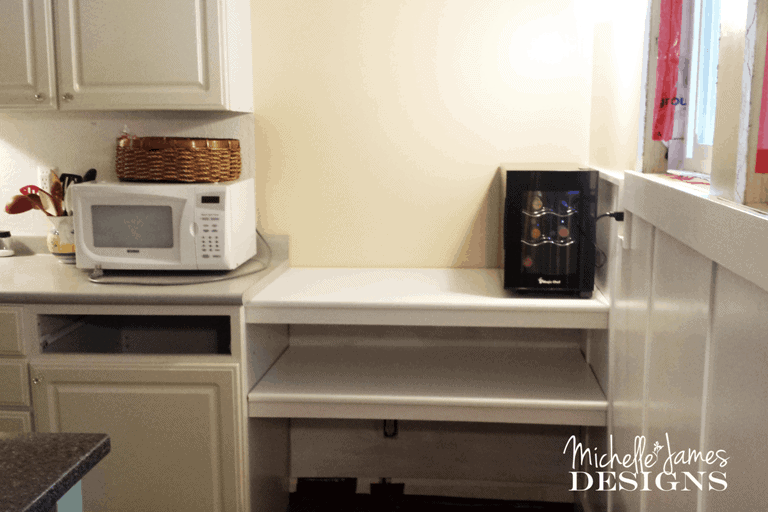
We used the pre-made shelving from Menards for the top pieces. I like them be cause they have a nice finish and look good. They cannot get wet though so I will need to be careful. The walls in our house are all crooked. It was built in 1891 so Jeff had to do some fancy cutting along the back of the shelves to get them to fit. What a pain. But it turned out nice.
We also purchased two small legs to place under the shelving. It just adds a touch of detail that I like. I painted the legs and my old drawers green to match island and they aren’t in this picture but we did add drawer pulls to match the island as well. Now these drawers are not on a drawers system or anything. We just manually pull them out when needed. We added some wine cork pieces to the bottom so they would slide. It is not bad. I thought we might pull to hard and it would end up on the floor but so far…so good.
We ended up with a small issue with the Kitty food area. Originally Jeff was going to build sides in this area and we changed our minds…again! So we have these funny gaps on the sides. We are really not sure what to do about them. We are thinking about it for now.
Because this shelving gets damaged by water (white finish just peels off) we are super careful with the water dish for the cats. But if it does get damaged we don’t want it to be permanently attached to anything. So we are attaching the legs at the top so we can slide that part out and re-do it if needed later.
I want to add some sort of lighting to each side to cover the gaps. I haven’t even looked for anything yet.
Then we started on the upper shelf. I wanted a series of cubbies for wine bottles and I wanted my wine glass holders to be on the bottom of the shelving unit to hang the glasses.

Jeff had all sorts of freaky ideas about installing a cleat under the shelf for stability and such and I was having none of it. So he devised this system. He used a 2×4 and placed the upper shelf on top and the lower shelf underneath with the 2×4 sandwiched in between. This way he could use the studs that are not equally spaced on the wall to support the shelf as well as a piece on each side.
He cut them and then he placed the wine glass holders on the under side of the bottom shelf.
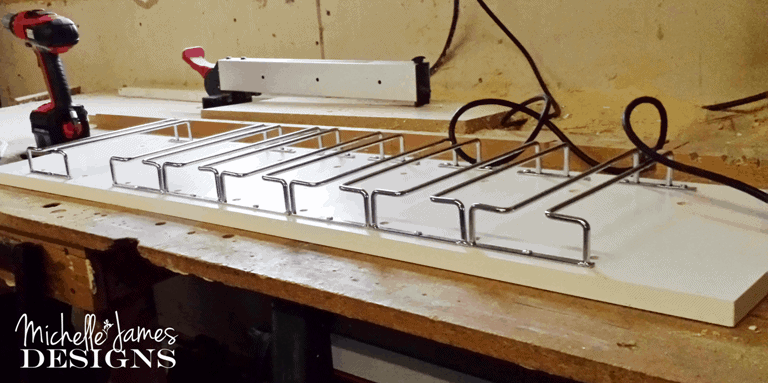
Then he cut nine pieces of the shelving to fit between the two shelves to create ten cubbies for wine bottles. (I know that is a lot of bottles) Here is the final result.

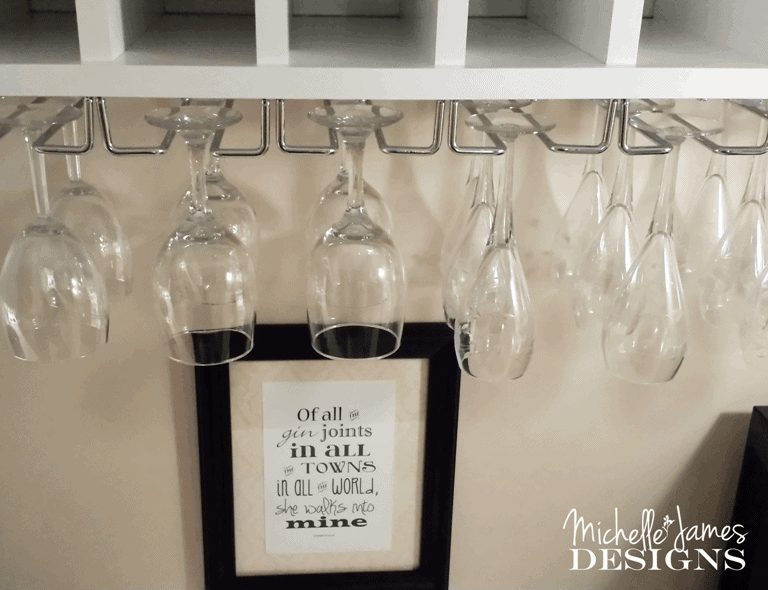

Isn’t it just the prettiest thing you have ever seen? I think so. I am so happy with it. I just keep going in there and staring at it. LOL.
So, during all of this and between some of these projects that Jeff had to do I was working on some decorating of my own. Things I knew I could do that would not interfere with the construction process.
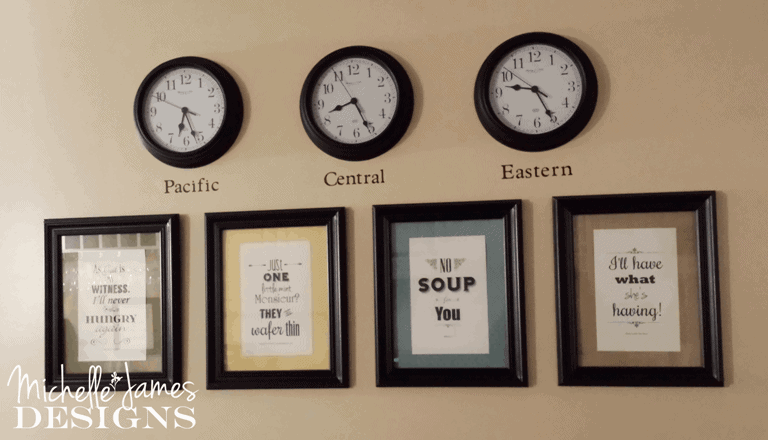
One of my all time favorite blogs in the whole, wide world is In My Own Style. I just love everything about her home and she really does have some great projects that she has done. One of things I loved was her Mud Room Organizing Wall. She used three clocks with the time zones and labeled the towns with a sign above each clock. I took her idea and used my Cricut to create vinyl words for the wall. I used Pacific (where my sissy lives), Central for my family and my parents, and Eastern (where my brother and his wife live).
Jeff and I are also avid movie and tv fans so I got an idea from pinterest to make some prints using movie and tv quotes. But I wanted them to fit into the kitchen theme so I chose food related quotes. The one I originally saw was from and Etsy shop but it was out of stock. I knew I could make my own so I did. Here is the wall now.

I just love it. I think I have mentioned that a couple of times in these kitchen remodel posts, huh? Sorry I just can’t help it.
So here are the quotes I chose so you don’t have to strain your eyes looking at them. LOL
The one farthest away says: “As God is my witness, I’ll never be hungry again”. This is from Gone With the Wind.
The next one is from Monty Python’s The Meaning of Life and says: “Just one little mint Monsieur? They are wafer thin”.
Then we have “No soup for you” from Sienfeld, of course. Then the next one you can probably read is from When Harry Met Sally and it says:
“I’ll have what she’s having”. The funniest line in the movie.
There is one more that you probably saw in the photo above below the wine glass shelf. It is from Casablanca and says: “Of all the gin joints in all the towns in all the world, she walks into mine”.
Aren’t they fun? I love the way they turned out. I have them in 8 x 10 frames with some scrapbook paper behind the print. You can make one too. I am including the quote from When Harry Met Sally as a free download printable. You just have to click on the “add to cart” button below and then go to the checkout. You will not be charged but this is the process.
I hope you enjoy it!

This is for personal use only. Do not print for resale or use file for resale. You will not receive any physical product it is a printable download file.
I hope you enjoyed my final kitchen remodel installment for a while. I know I had fun writing and reminiscing (except for my broken ankle, yuck!) I can’t wait to get more done and write another post. What do you think? Please comment and let me know. If you like it please pin, share, google+ and tweet! That brings more people to see my blog. Thanks!


Diane@InMyOwnStyle
Wednesday 14th of January 2015
Hi Michelle - What a great transformation. Love the clocks and seeing all the details you added. The kitty... so cute and comfy even amongst all the tools. When my daughters cat lived with my husband and I, he always wanted to get in every photo and made sure he waggled his way into many as he could. :-)
Michelle
Wednesday 14th of January 2015
Diane - Thanks so much for taking the time to stop by. I consider it an honor. Aren't the kitties funny? They love to "help" with the kitchen remodel. And he always lays on or in things that seem so uncomfortable but will stay there for hours. Cracks me up. I am really liking my clocks. Such a great idea.
Deb Mueller
Sunday 30th of November 2014
I think you are awesome Michelle. .. Love you!
Michelle
Sunday 30th of November 2014
Awwww..thanks Deb! That is so nice.
Jann from Newton Custom Interiors
Saturday 29th of November 2014
Michelle, I love your movie and tv quotes! What a great idea for kitchen wall art.
Michelle
Sunday 30th of November 2014
Thank you Jann! I really love them and they are so us which makes it even better! Thank you for the comment.
Nancy Helgeson
Saturday 29th of November 2014
I loved following your adventure in remodeling your kitchen, Michelle! And I love the result! The board and batten turned out so nice! I did not know your house was that "historical" old. I know how that can be a challenge, since I owned an old house like that at one time. (Was declared a SD historical house.) You have been so creative in everything you did, and the way you write about it gives us a lot to learn from it. I redid my kitchen (on a real budget) a few years ago, and I remember how the last details were the things that made me feel I was "just done with it", just like your hubby is feeling. Such a nice way to feel connected to you! Have a fantastic holiday season, Michelle!
Michelle
Sunday 30th of November 2014
Thank you Nancy. Yes our house is an oldie. We really have a lot to do to it and it all takes time and money. We are just trying to tackle one project at a time and I don't want to start anything major until this kitchen is done. We really are so close. Thank you for the nice words.
Nancy Needham Janssen
Friday 28th of November 2014
Michelle; that kitchen is SO you. I love every aspect of it. I cannot wait to see what you'll do with the windows...if anything. I love light pouring into a room, especially a kitchen. Enjoy your wine corner; it's perfect. <3
Michelle
Friday 28th of November 2014
Thanks Nancy. I do have a plan for the windows. I hope it will look as good on the window as it does in my head. I don't want to block any light so it is just a bit of fabric and color. I appreciate you taking the time to read the post. Thanks again!