Create an inexpensive DIY burner cover metal tiered tray for less than $10 using Dollar Tree and Hobby Lobby products.
Hi there and welcome!
I am really excited about tiered trays. Not only can you make the actual tiered tray but you can also create all sorts of goodies to add to the tiers for different seasons, holidays or themes.
I have seen so many different kinds. There are metal, wood, glass and they all have a different look.
They are definitely my new favorite projects.
The first tiered tray that I made was also Dollar Tree products. It was 3 tiers and was made of mostly glass parts.
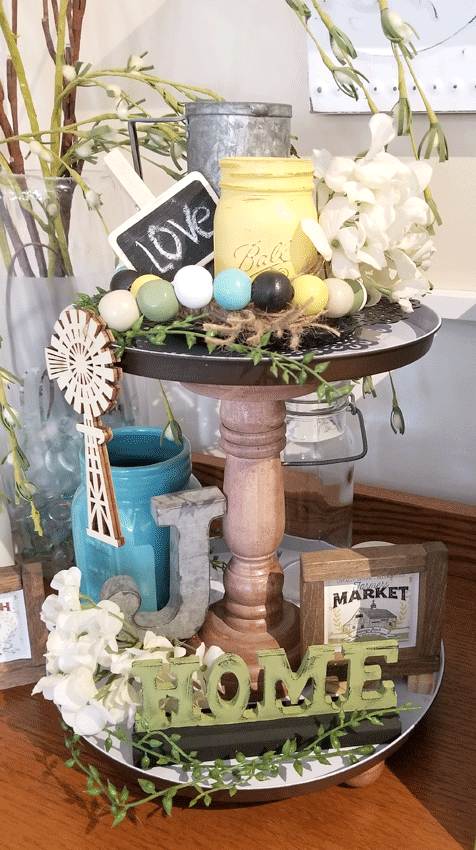
This one is made of metal and wood from the Dollar Tree and from Hobby Lobby. The best part about it, other than it looks fantastic, is that it was less than $10 to make.
You can recreate this tray and add your own decor to match your house and I am going to show you how to do it.
I am also showing you how to string the wood bead garland for a tiered tray! You can find it in video by scrolling down toward the end of the post.
If you love DIY metal projects you can click here to find more metal crafts inspiration!
and….
If you LOVE Dollar Tree crafts and gifts then you are definitely in the right place.

AND…
DIY Burner Cover Metal Tiered Tray
This is such a fun and easy project and you only need a few materials to make it.
Materials Needed:
I have added some affiliate links for your convenience. You can see my full disclosure here.
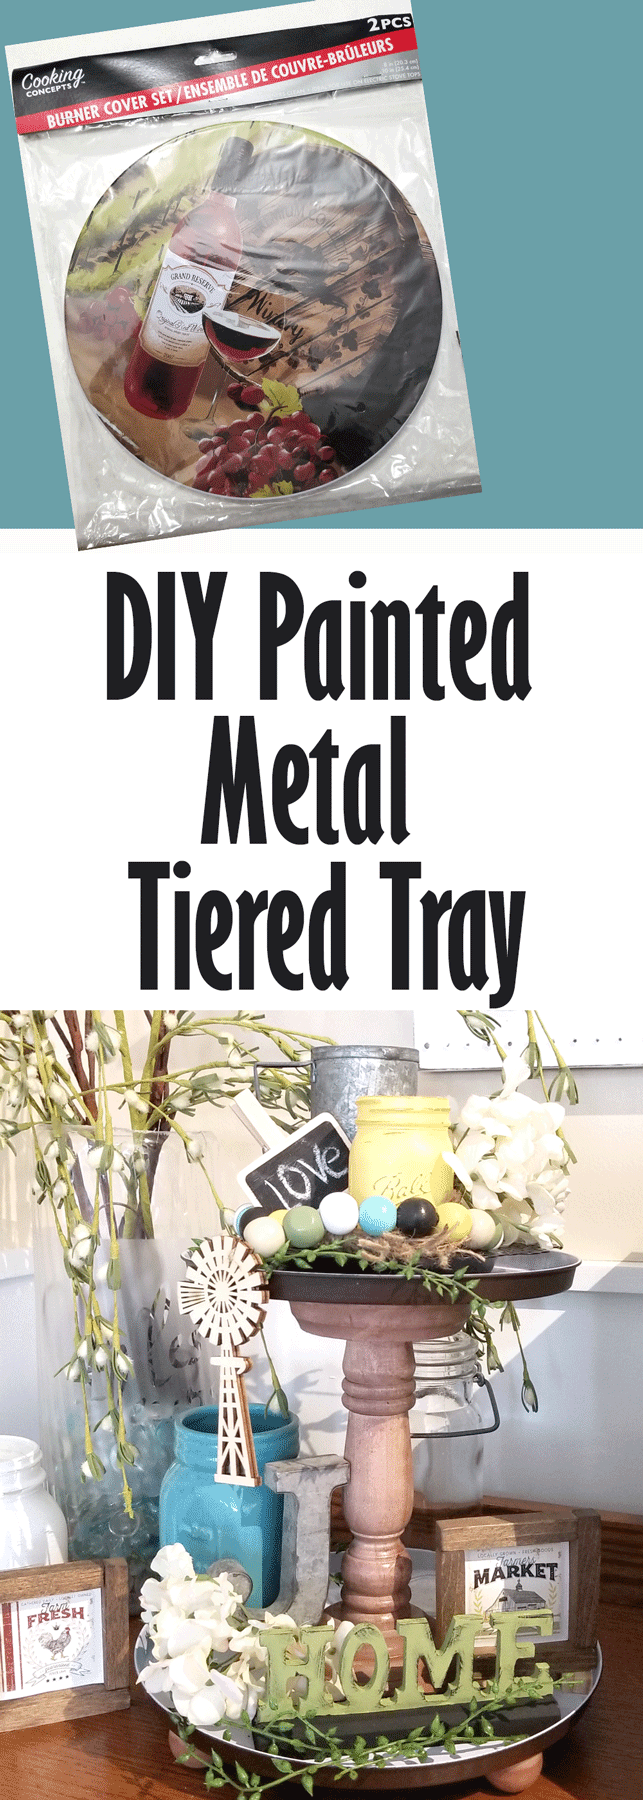
- Dollar Tree Burner Covers
- Wood Candleholder
- Wood Knobs
- E600 Adhesive
- Spray Paint
- Sanding Block
Step 1: Sand and Paint
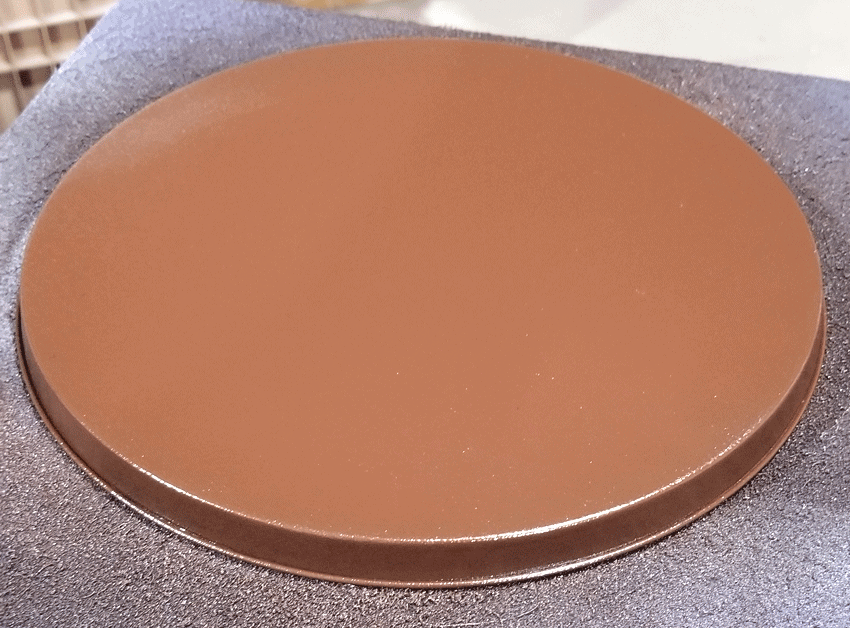
Anytime you are going to paint a smooth, metal finish you want to be sure to sand it and rough it up a bit. This will help the paint adhere better to the surface and you will have less chips and scratches.
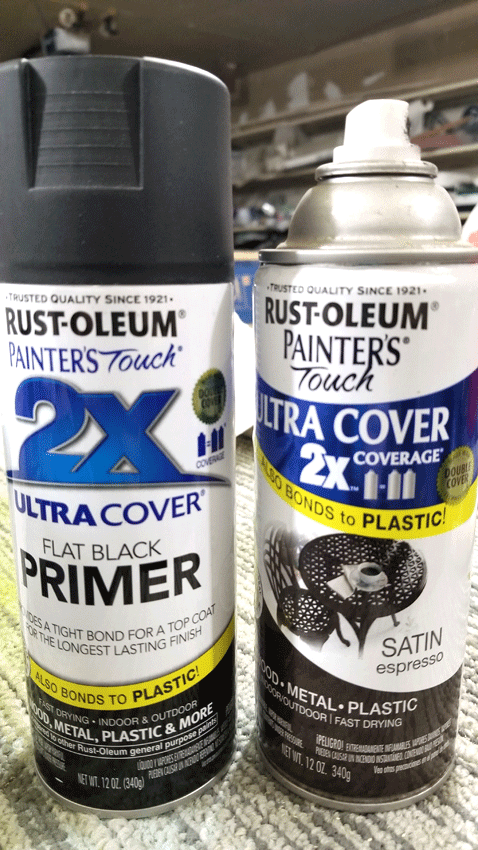
At first I wanted the bottoms of these burner covers to be black, then I changed my mind to brown. So I had already painted them when I switched to the brown.
The above photo are the spray paint colors I used.
It is actually a much darker color than this in real life.
Once the burner covers have been painted and are completely dry we can move on to the wood pieces.
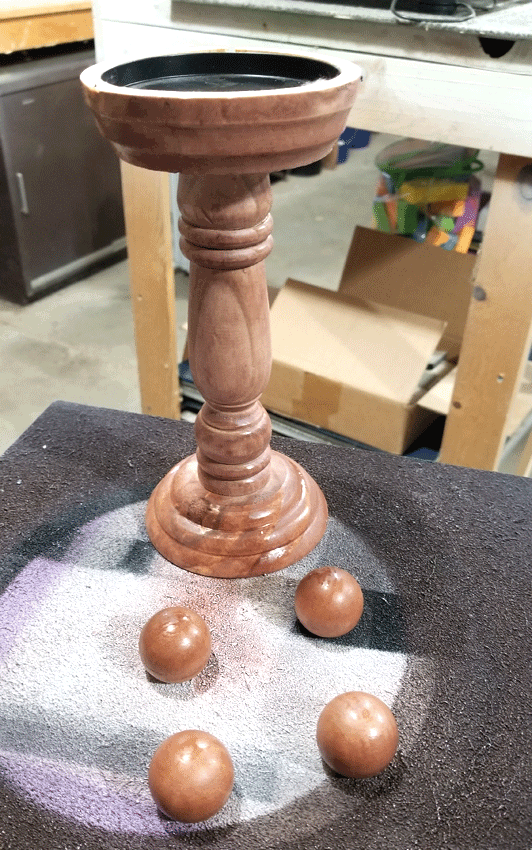
Step 2: Staining the wood pieces
The wood pieces I needed to make this project were a candle holder or something to go between the two tiers and I wanted some little feet to raise the bottom tier up a bit.
This is what I found at Hobby Lobby.

The chunky candle holder was exactly what I was looking for. It was normally $9.99 but I used my 40% off coupon. If you can wait until they go on sale then it would probably only cost around $5.
I was looking around my garage for a wood stain and I came across this can of spray stain.

I have absolutely no idea where it came from and it looked pretty old. But I shook it up and tried it anyway.
It worked beautifully and I love the way these wood pieces turned out. The color is Walnut.
Step 3: Putting them together
The E6000 is perfect for this project. I laid out the little feet onto the bottom tray then glued them down.
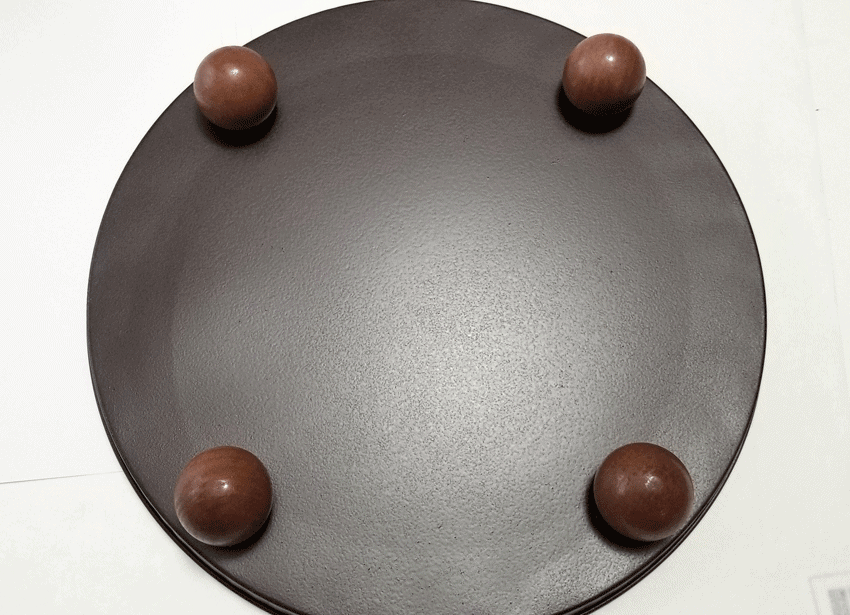
I also glued the candle holder to the bottom of the top tier at the same time.
They need to set for a while (at least 4 hours) then you can merge the two together to complete the tray.
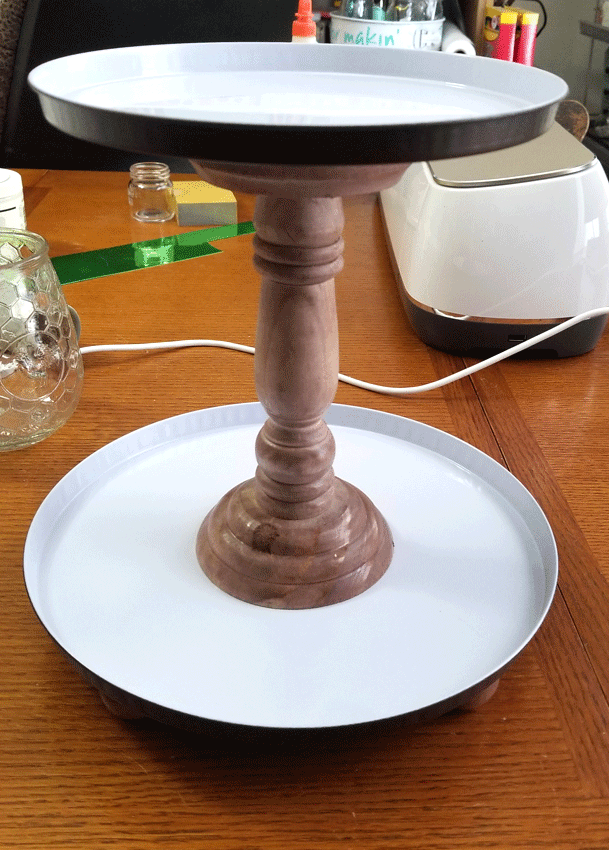
I let it dry over night before starting to decorate it.
Isn’t it just so cute?
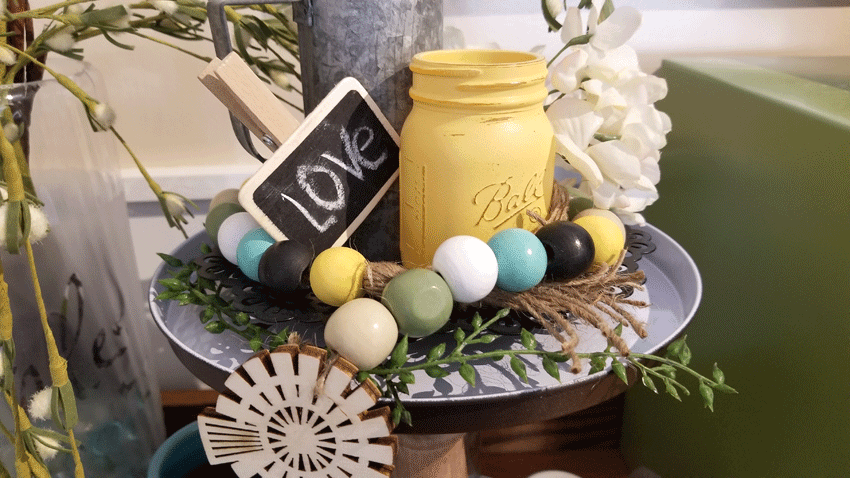
Step 4: Decorating your tiered tray
This tray is going into my kitchen. I have every intention of changing it up every once in a while but for now I wanted a farmhouse theme to match my kitchen colors.
Some things were gathered from around my house and other parts of the decor were purchased.

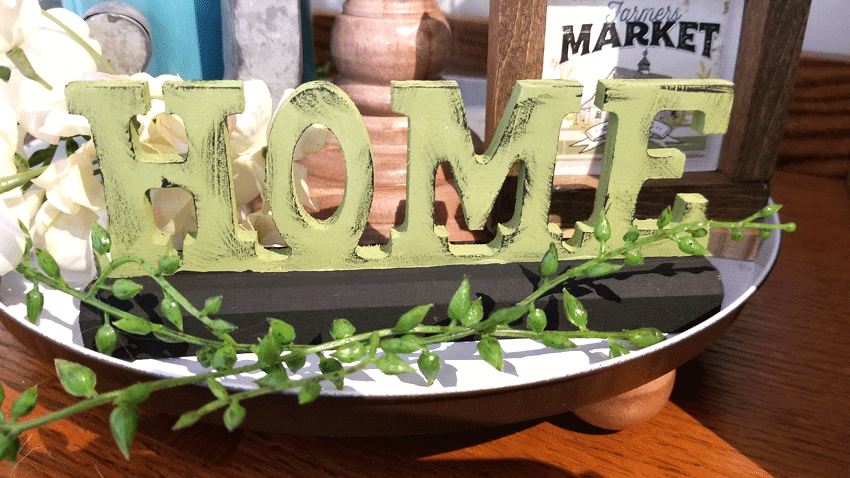
The home sign is from the Dollar Tree. It was plain wood when I got it.
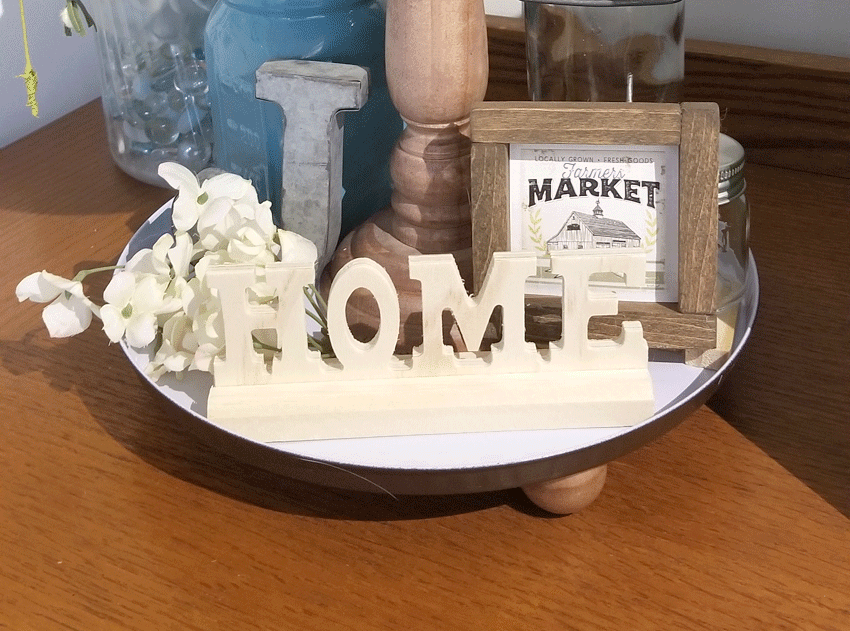
I was going to leave it plain but decided to paint it instead. It looks so much better painted.
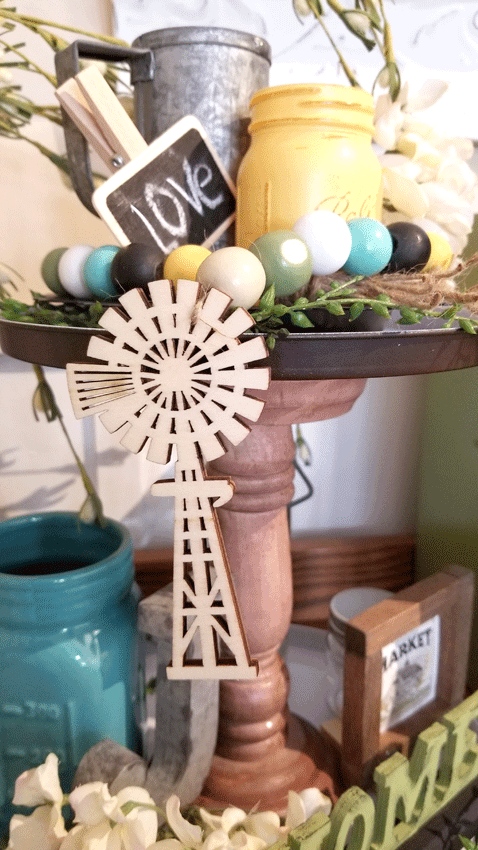
I also made the wood bead garland. Hobby Lobby has some packages of already painted beads so I grabbed the teal, green, tan and teal package but it did not include yellow and black.
There was a small package of the same size beads that were unpainted so I grabbed them and painted my own using spray paint.
The windmill was also from Hobby Lobby and was perfect at the end of my garland.
The only other thing I purchased was the greenery from Hobby Lobby.
Then it was just a matter of placing things so they looked good. I tweaked and tweaked until, in my eyes, it was perfect.
Want to learn how to string the wood bead garland? Here is a video for you!
If you love crafting with wood beads check out this post at OurCraftymom. It is 25 DIY Wooden Bead Crafts. There are some awesome ideas in there.
I just love the entire thing and am so happy I made it.
I hope you enjoyed this post. I am having fun with these tiered trays and I am trying to inspire to make or purchase one and decorate it. It is so much fun.
Thanks so much for stopping by!
Michelle