Happy Spring! I love when the seasons change because then we get to start a new slough of crafty projects. Last week I wrote a post about 5 ways to use paint chips. This post is all about another fun version – paint chip bunny canvas.

Paint Chip Bunny Canvas
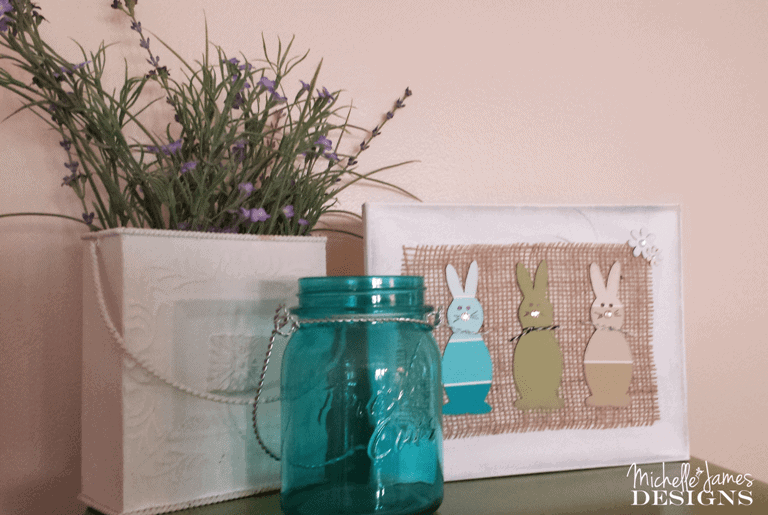
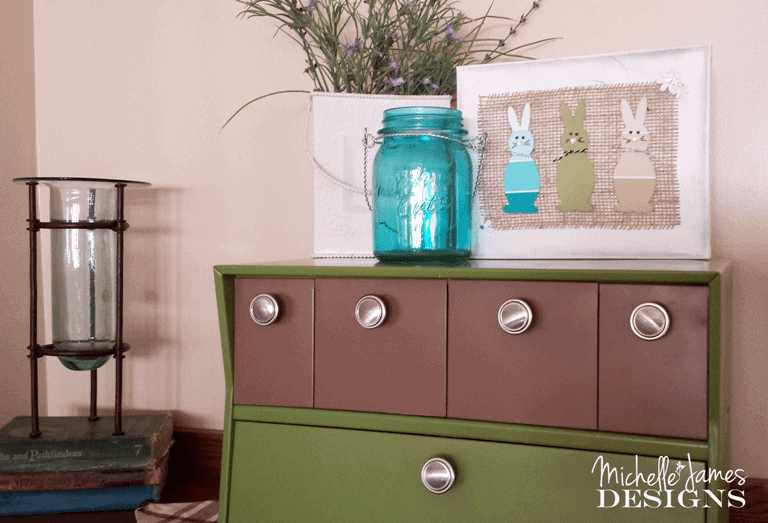
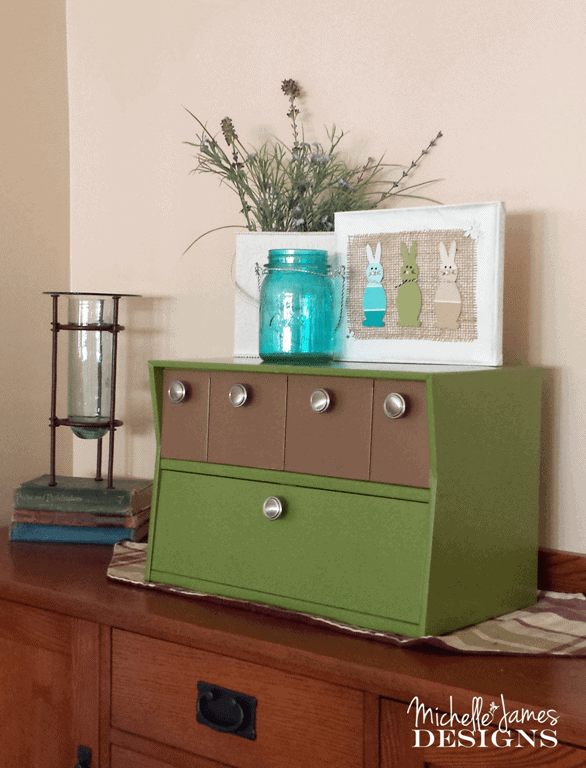
My friend Mary and I needed a project for a get together we were having and we came up with this cute craft. We used paint chips for the bunnies and added some burlap and some scrapbooking embellishments and placed it all on a canvas.
I don’t have a tutorial with step by step pictures but I will tell you step by step how to make it. I just didn’t think all of the photos were necessary this time because it is so easy to put together. I will, however, supply you with the cutest bunny printable ever so you can make your own at home.
Supplies needed:
Canvas – we used an 8×10 size
Burlap – we used a roll and just cut off what we needed
Paint Chips – you can, of course, get these at the paint stores. Grab three in the colors you want for your bunnies. I am trying to keep with a color theme as I create new decor so I used teal, browns and a green solid. The paint chips aren’t always the different shades on one chip anymore.
Bunny Printable (download from link below)
Pencil or Pen
Ink or Paint
Black Sharpie (fine tip works good)
Ribbon or Baker’s Twine
Flower Embellishments
Pink Rhinestones for their noses
Scissors
Glue (Fabri-Tac is the best)
Bunny Printable
Download Bunny Printable Here
Step 1 – Your Canvas
I started by “inking” my canvas. I used Quick Quotes Powder Puff Ink – Coal Miner. I like to lightly rub the ink pad onto the canvas until I have the right amount of ink. Start light because you can always make it darker.
If you prefer paint, then paint the canvas to the color you like. Each technique would look great. – You can see the gray ink on the canvas in the picture below.
Step 2 – Your Bunnies
Download the printable from above and cut out that cute bunny. Lay him on your paint chip and trace around the edges using a pencil or pen. I just traced right onto the front of the paint chip then made sure I cut off all of the lines so they wouldn’t show.
Now you need to decorate your bunnies. I used some baker’s twine in black and gray to tie around the necks, a black sharpie to create eyes and whiskers and a pink rhinestone for his little nose. You can use whatever you like or whatever you have on hand.
Step 3 – The Burlap
As I mentioned earlier I used a roll of burlap. I got it at Hobby Lobby and it is 6″ wide by I believe 5yds. I just cut off about an 8″ piece then cut the edges just inside the finished edge. Then I unraveled or pulled out one string on each side. I wanted it to have a frayed edge look instead of a finished look.

Step 4 – Adhere it to the Canvas
Okay. Now take those adorable paint chip bunnies and glue them to your burlap piece. It is always best to start in the middle. That way you can get them centered. After you have the bunnies glued down turn the burlap piece over and put glue just behind the bunnies on the back side. Glue it to the canvas. This way your glue won’t show through the burlap.
Then place a little bit of glue under the burlap in two opposite corners. These are the same corners that you will add a couple of flowers. Then, again you are hiding the glue under the flowers just in case it shows.

Step 5 – Display for all to see!
Congratulations you have finished your paint chip bunny canvas! Now find a prominent place in your home and display it with confidence! Everyone will compliment you and ask where you purchased it.
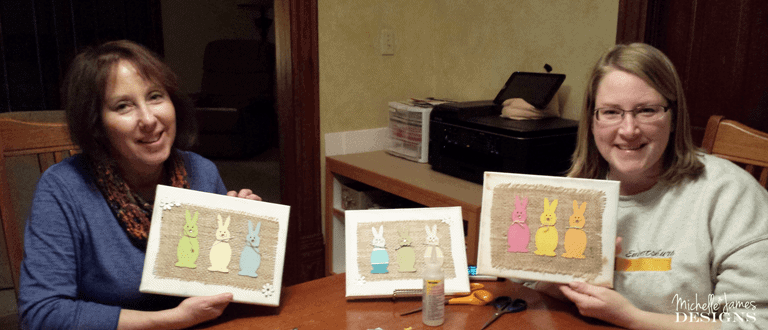
Here are our friends Patty and Darca with their finished projects. Super cute!

If you like this post please share with your friends on social media! Thanks so much for stopping by.
I am sharing this post at:
Monday Funday
This post contains affiliate links. If you click on a product link then make a purchase I will receive a small commission. I recommend and link to products that I have used and are always honest about my opinions.


jess
Monday 23rd of March 2015
these are so stinking adorable!! what a great project!!!!
Michelle
Tuesday 24th of March 2015
Thank you Jess! They did turn out pretty cute. Thanks for stopping by.
Robyn Petrik
Monday 23rd of March 2015
These bunnies are too cute! I love that the uses for paint chips are pretty much endless.
Michelle
Monday 23rd of March 2015
Thank you Robyn! I love paint chip crafts. You are right...pretty much endless. Thanks for stopping by.