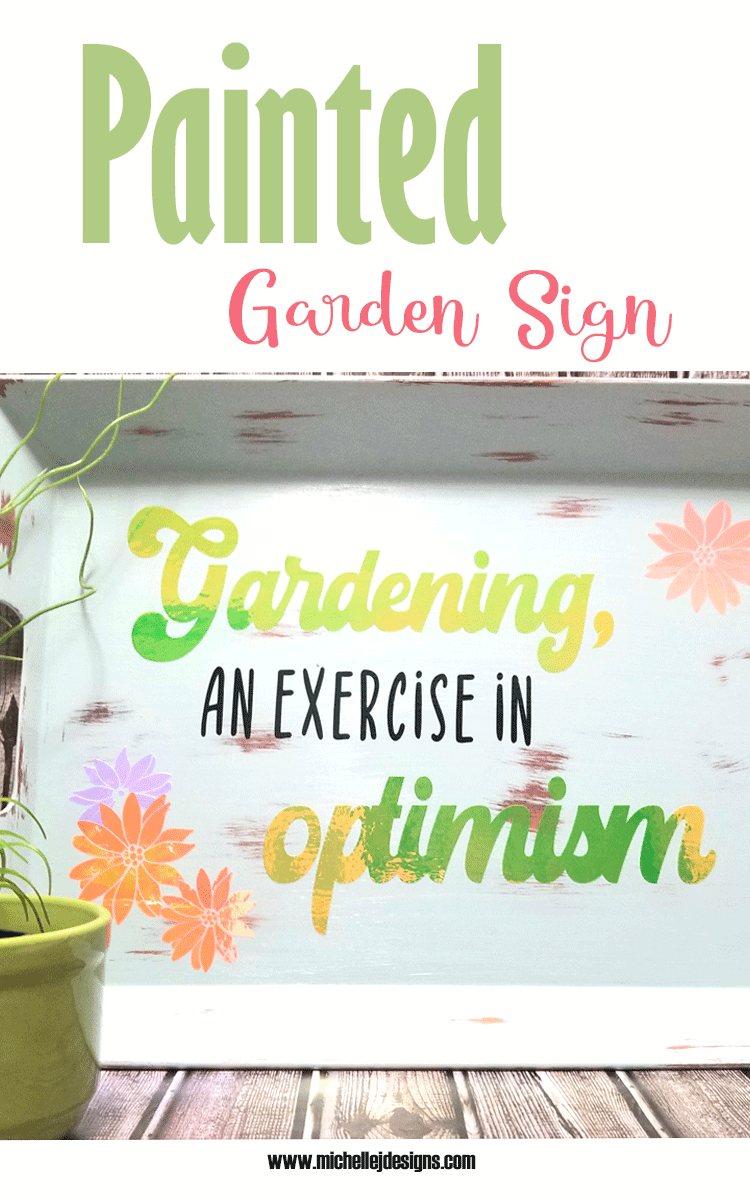
Create a fun, humorous painted hanging garden sign for your outdoor space. In this post I will show you how to distress paint to look worn.
I cannot wait for spring. There is a snow storm and it really makes me long for warmer, sunny days.
I created a fun painted hanging sign that will hang on the fence by my new potting bench that I am getting this spring. Planning ahead makes me excited. That never happens. LOL!
I don’t grow vegetables but I love colorful flowers all over my back patio space. They are all in pots so I can put them wherever I want. Plus, it is fun to paint planters and pots to match my color theme too.
This painted garden sign is not my usual style but I love it for my patio. And it will look great with the colors I have back there.
I used my StyleTech Craft opal vinyl. It is such a fun product. I have used it before on Harper’s pool toys and on some cards. So it is versatile too.
This vinyl will also hold up outside for about 4-5 years! So, it should be perfect to hang on the fence for a while.
Painted Hanging Garden Sign
So before we get started I want to disclose my big error. You will notice in all of the “in process” photos that the word optimism is mis-spelled.
I didn’t notice it until I was taking photos of my finished project. I removed that word from the tray, re-cut it from the vinyl and added it back on. So the final photos are correct.
Now that that is out of the way, let’s get this started.
Materials Needed:
I have added some affiliate links for your convenience. You can see my full disclosure here.
- Tray – We picked up a bunch of these for $3 each at Walmart a couple of years ago
- Opal vinyl – Bright Green, Orange and White
- Chalk paint
- Mod Podge
- Paper transfer tape
Tools Needed:
- Cricut Maker
- Paint brush
- Foam brush
- Sanding block
Step 1: Paint the tray
When I started this project I thought this was a metal tray. It ended up being a plastic tray. Jeff had purchased a bunch of these a while ago and in my head I thought they were plastic.
Although this would be the same process if I was distressing a metal tray. I would use the same steps and the same type of paint. So if you are looking for a way to distress metal, this will work.

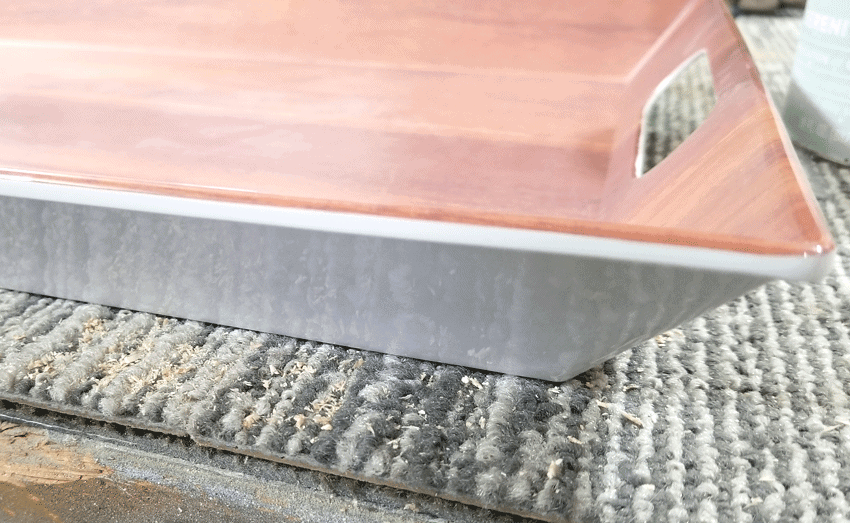
You can see that the tray is a wood look on the inside and white on the outside. I only painted and distressed the inside.
This Rustoleum Chalked paint in Serenity Blue is one of my all time favorite colors and paints. It is really easy to work with and this size can lasts a long time if you are painting small projects.
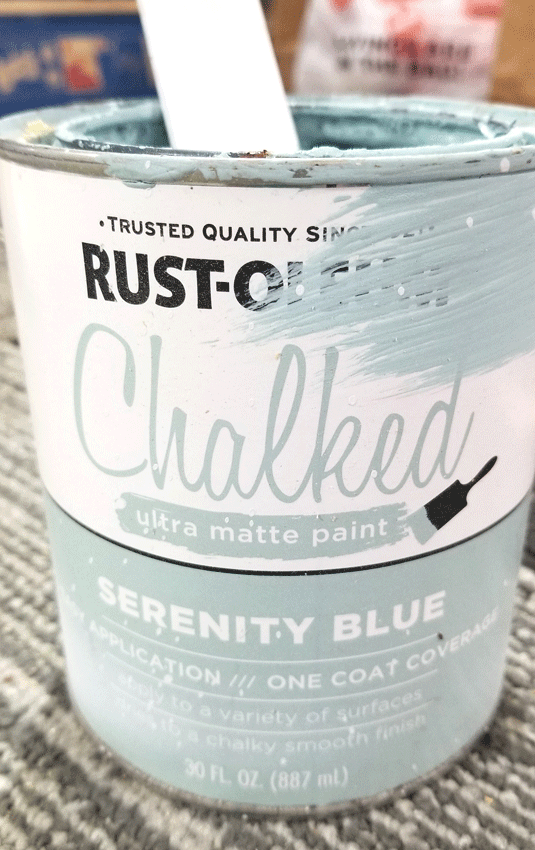
Use a paint brush and paint the inside of the tray. Mine needed two coats of paint.

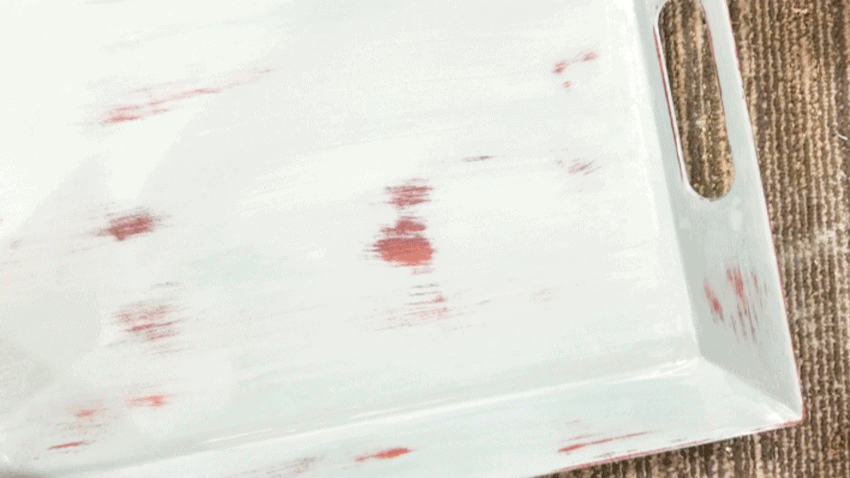
Step 2: Distress the paint
This is my “go to” way to distress paint. I use a good sanding block and remove paint in certain areas to make it look worn and old.
Start sanding in one spot until you remove the paint and can see the wood look of the tray.

The other thing I sanded were the edges where the paint sort of “gooped” over the edge of the tray.
This also carries the distressed look to the edges where paint would naturally wear off.

Step 3: Add a coat of Mod Podge
When the tray is sanded to the level of distressing that you like give it a coat of Mod Podge satin. You can use glossy if you want but I probably would not use the matte finish.
A glossier finish helps the vinyl to stick better.
This also helps to keep the paint from peeling up with the transfer paper. It has been very successful for me.
This is what it looked like with the distressing and the Mod Podge. It was still wet in this picture.
But I liked the way it turned out.
Step 4: Create your design and cut it out
Now is the time to get creative and design your sign in Cricut Design Space.
I drew inspiration from Pinterest for my design and found this fun saying. I tweaked it just a little but used a different font and added some flowers.
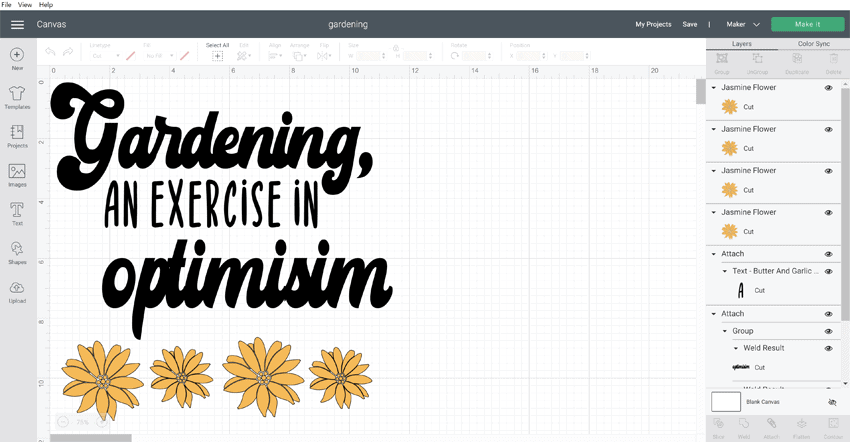
The two fonts I used are Mainstay for the words gardening and optimism and Butter and Garlic for “an exercise in”. Also, you can see my mis-spelled word, optimisim. There is no I after the S. I can’t believe I didn’t see it while I was creating this.
These are fonts that I have on my system already. I am a member of Creative Fabrica and I download fonts and designs from them all of the time.
Using your own fonts means you don’t have to pay for the Cricut fonts. I have so many of my own I don’t need to purchase from them.
In order to use your own fonts, click “system” when you are ready to choose a font. Then only your own fonts will be shown as choices.
The flower was .99. I wanted something bold for the opal vinyl and I didn’t have anything of my own.
To get this you click on Image on the left side. The you can search for different images and choose the one you like.
It will bring it into your design space before you pay so you can make sure it works for your project. I like that feature.
Once you have what you like go ahead and cut out the design with your favorite vinyl colors.
When they are cut, weed the designs and add the paper transfer tape.
The paper transfer tape is perfect for this design. It is less tacky and will not pull up the paint on the tray.
The Mod Podge and the paper transfer tape work together.
Step 5: Apply the design to the tray
Lay out the design to make sure you like it.
I started with the text.
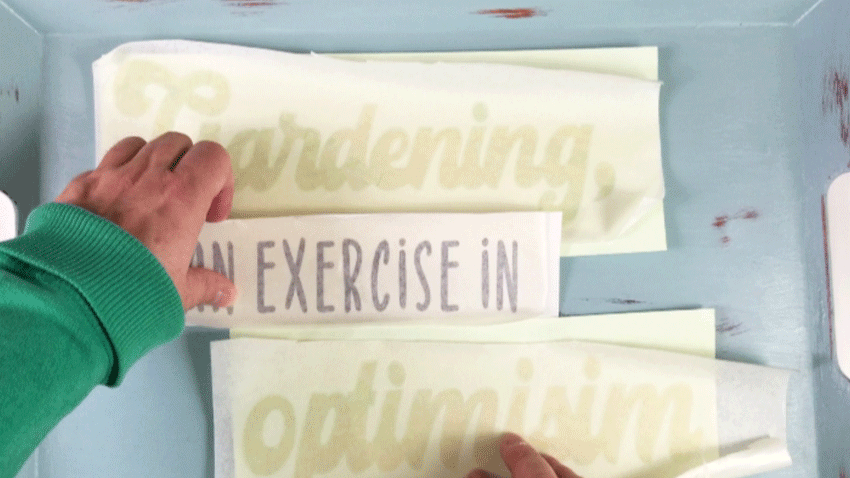
Remove the transfer paper and apply the design to the tray.
Then layout the flowers.
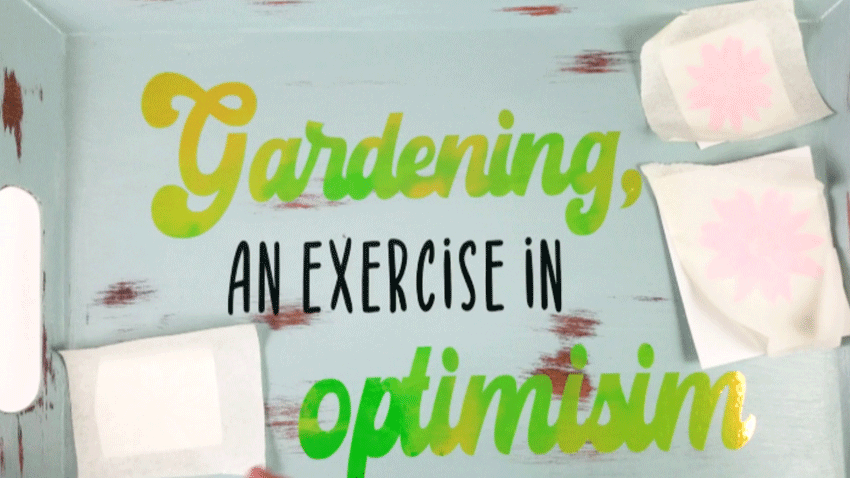
Once the flowers are placed exactly where you like them, apply them to the tray.
Then you are done. finished. ready to go!
Here are some final pics. I had to pretend it was hanging outside though. Our back patio is full of snow right now.
I will need to update this post with some new pictures once the potting bench is up and I have hung the tray.
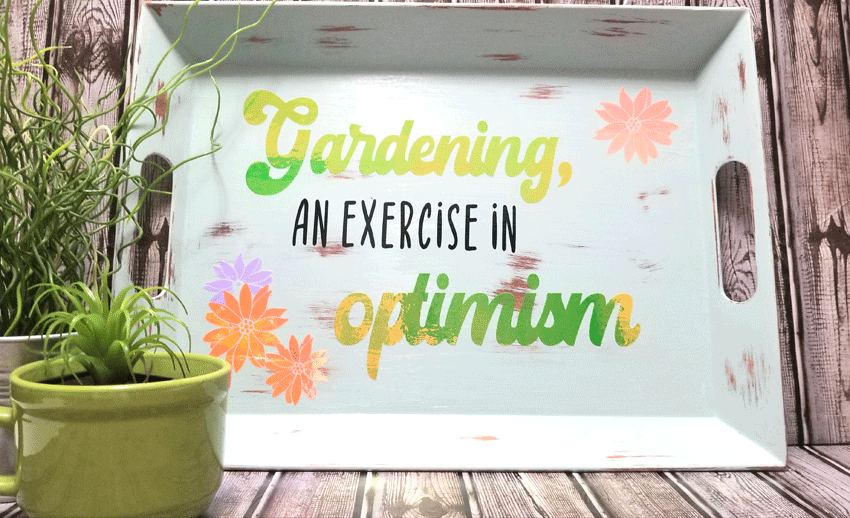
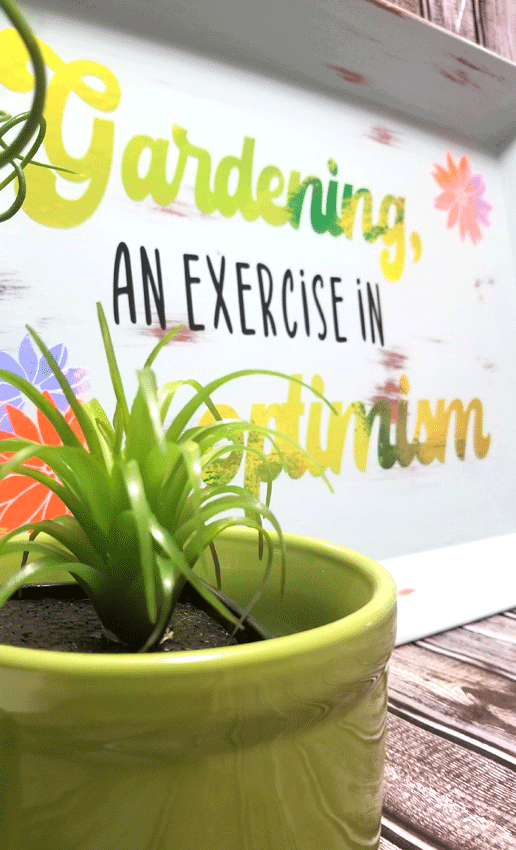
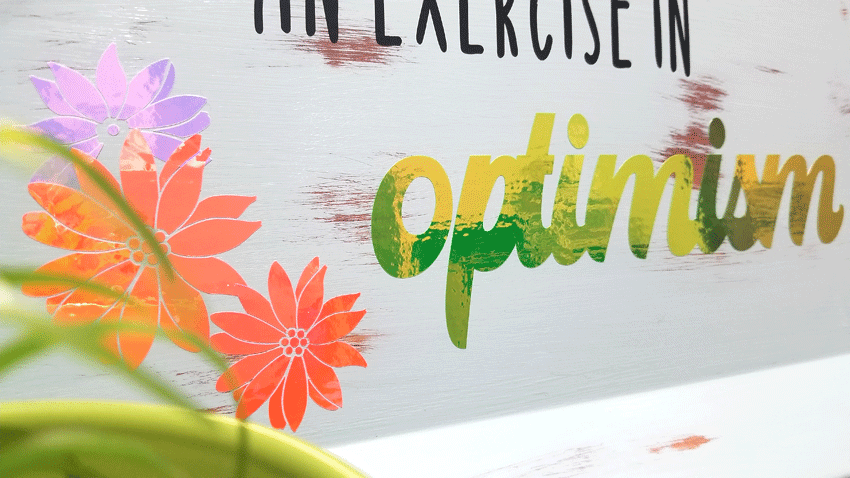
Isn’t the opal vinyl so pretty?
I just love it.
I hope you have enjoyed this post. Let me know in the comments what you think!
Thanks so much for stopping by,
Michelle


