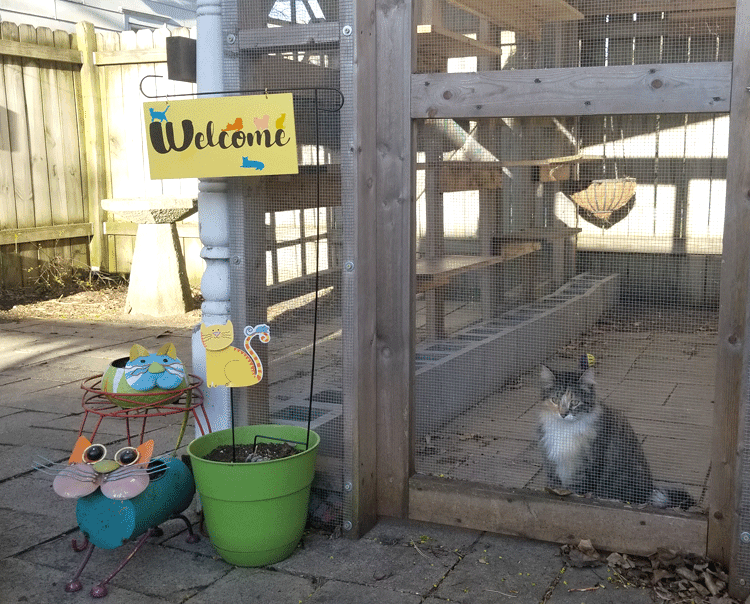
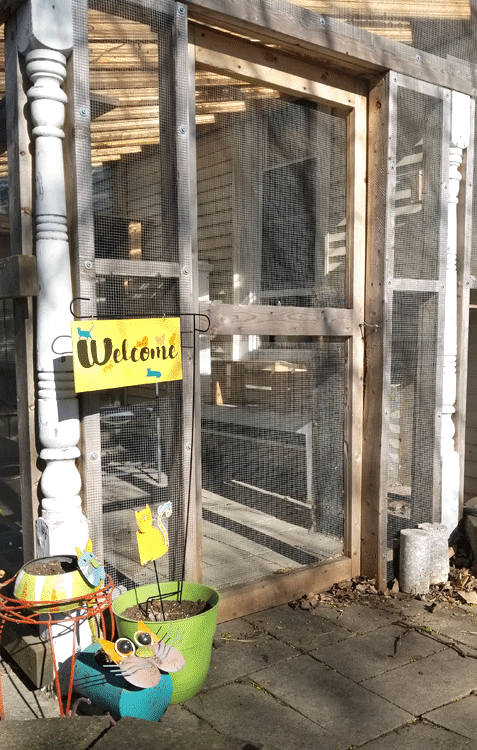
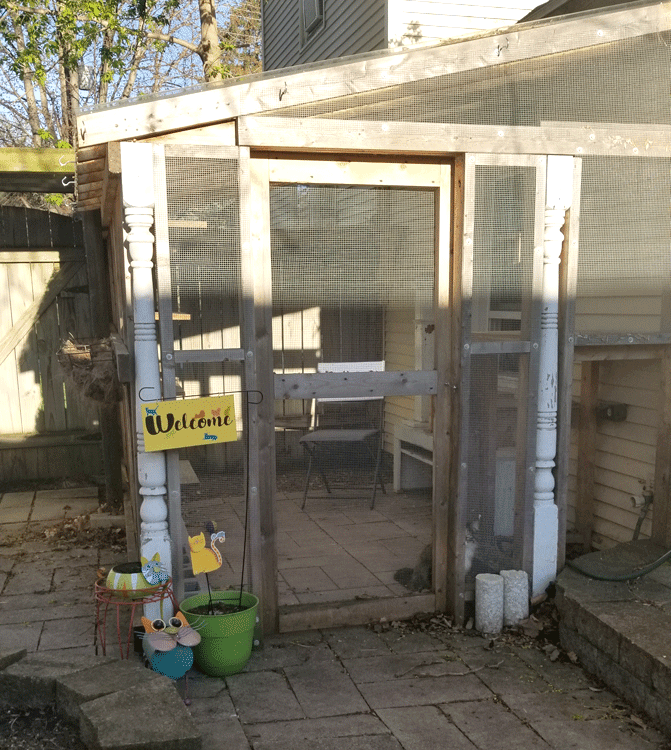
Hi there! I am excited to make outdoor projects now. I love adding to our patio space each year with something fun. This is just the start…I hope to the fun summer DIY’s. Today I am going to show you how I made a custom welcome sign for the Catio. This is not a typo. We created an outdoor space for our indoor cats. It really is a thing! They are called catios.
Last year I used DecoArt Outdoor paint to re-vamp our planters. So I wanted to match the colors in this welcome sign so it would match our space.
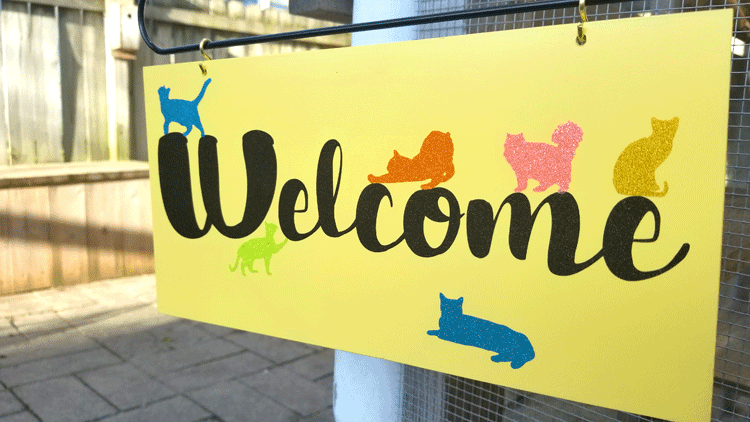
This is a sponsored post for StyleTechCraft, the best vinyl company! I used the transparent glitter vinyl for all of the pieces and when the sun hits the pieces are so sparkly and fun!

Custom Welcome Sign
I have wanted a welcome sign for the catio for some time now and this was the perfect time to make one. They are just starting to use it a lot now that our weather is finally getting warmer and I love to add something “cat” themed to our patio space each year.
The above cat planters have been the past few year’s add ons. It is fun and I love the pops of color.
This is how I made it and it was so easy.
Materials List
I have added some affiliate links for your convenience. You can read my full disclosure here.
A Custom Welcome Sign For The Catio

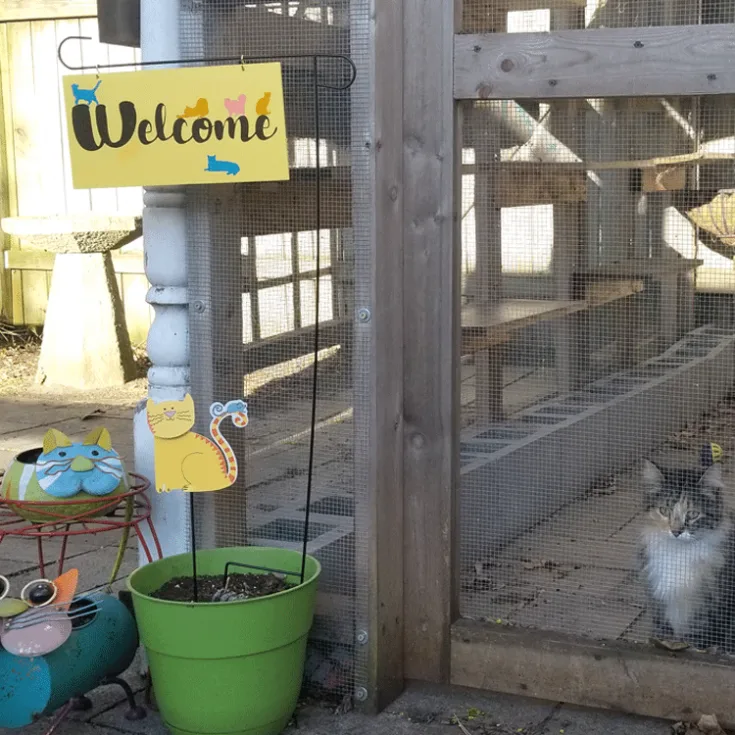
Our "catio" needed a welcome sign so I created one using transparent glitter vinyl from StyleTechCraft and a piece of PVC tile. It turned out so cute and is now on display in our backyard patio are.
Materials
Tools
- Drill
- Cricut Maker
Instructions
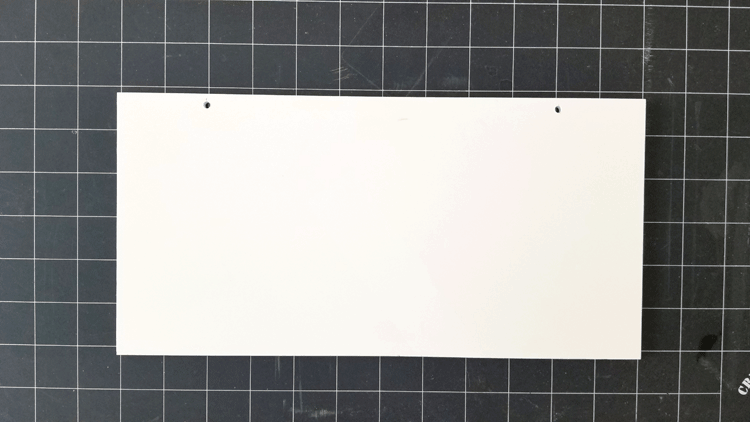
Cut the PVC tile to a 12 x 6 piece. If you don't have a saw for cutting ask at Menards, Home Depot or Lowes if they can cut it to size or if there is a saw available for you to use.
Drill two holes at the top for the S hooks. Mine were about an inch in and about 1/4 inch from the top.
Spray paint the front and the back of the sign with the yellow paint. I used a gloss paint because I knew the vinyl would stick really well to it.
When the paint has dried thoroughly you can add the vinyl pieces.
Download the SVG Welcome Sign File.
Upload the "separated" design SVG file into the Cricut Design Space
Ungroup the cats from the Welcome Text
Move the cats below the Welcome text so you can cut separate pieces of vinyl and cut them all out at the same time.
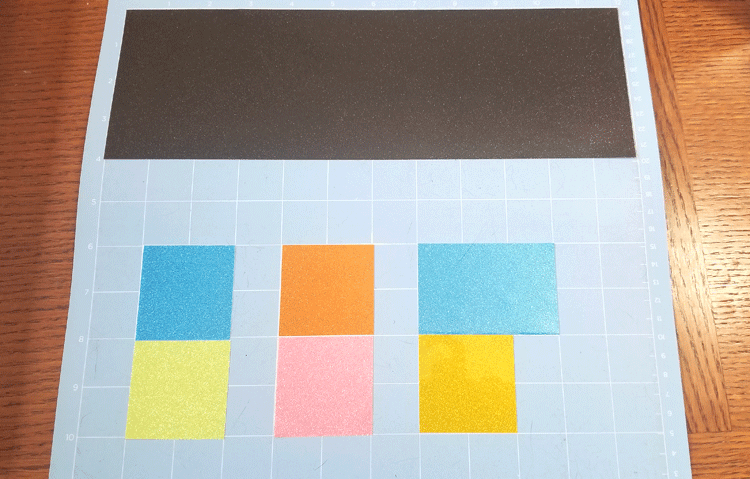
Cut the pieces of vinyl in various colors. Most of mine were 2 x 2 inch squares for the cats, then one 3 x 12 inch piece for the Welcome text.
Place the vinyl pieces onto the mat in the appropriate places according to the Cricut Design Space.
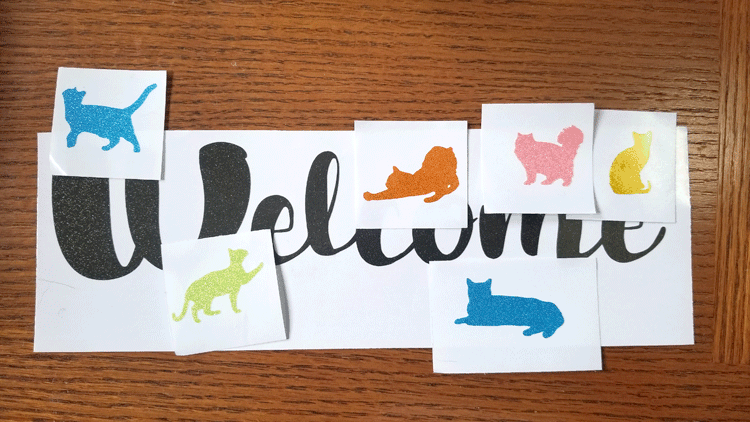
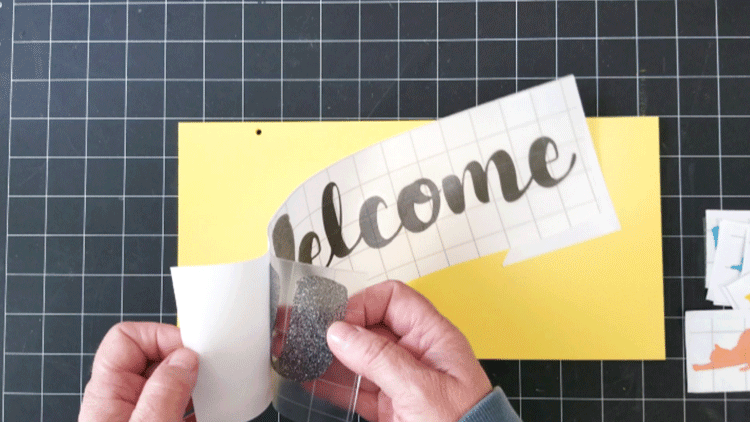
Cut the pieces all at one time.Add transfer tape to the top of each cat and the Welcome text vinyl pieces.
Remove the backing so the vinyl sticks just to the transfer tape.
Place the Welcome text onto the yellow sign exactly where you want it.
Remove the transfer tape.
Repeat these last steps with all of the cats placing them on different parts of the Welcome text.
Add the S hooks to the pre-drilled holes and then attach it to the flag holder.
Add to a planter or place directly into the ground.
Step 1: Cut and Prep The Sign
The PVC tiles come in a 2 ft x 2 ft square. So, Jeff cut mine down to a 12 x 6 inch sign. Then he added two holes for the S hooks that will be added later.
Sand the edges of the sign just a little bit to smooth any rough edges.
Use spray paint to add color to both sides of the sign. I used a bright, fun yellow from Krylon.

When the paint is completely dry you are ready to add your vinyl!
Step 2: Download the Welcome Sign SVG File
You can find this file in the resource library!


Step 3: Upload Design to Cricut Design Space
For the Cricut upload the SVG file into the Cricut Design Space and for the Silhouette you can use the DXF file.
If you want to cut out the design in all one color vinyl then the non separated version will work but if you want the cats and the text to be different colors be sure to upload the separated version.
Once in Design Space, ungroup the cats and the welcome text from each other but clicking the “ungroup” in the upper right corner of the layers panel.
Move the cats to the bottom of the mat under the welcome text and leave enough room between them to add different colors of vinyl for each one.
Then click the “detach” button at the bottom right under the layers panel. This keeps them in their place when moving to the next screen.

We are not using a heat press with this so you don’t need to click on the mirror.
Choose vinyl as your material and increase the pressure from “default” to “more”.
Load your mat with all of the different colors of vinyl.
Now you are ready to cut!
Step 4: Weed and Add Transfer Tape
Remove the extra vinyl around the designs. This is how mine looked weeded and laid out in the design I like. The StyleTechCraft vinyl is so easy to weed and look how pretty these colors are.
Step 5: Apply Design to the Sign
This is the best step of the whole project…in my opinion! Now we get to add the design to the sign.
Remove the backing from the Welcome text piece.
Place it onto the sign.
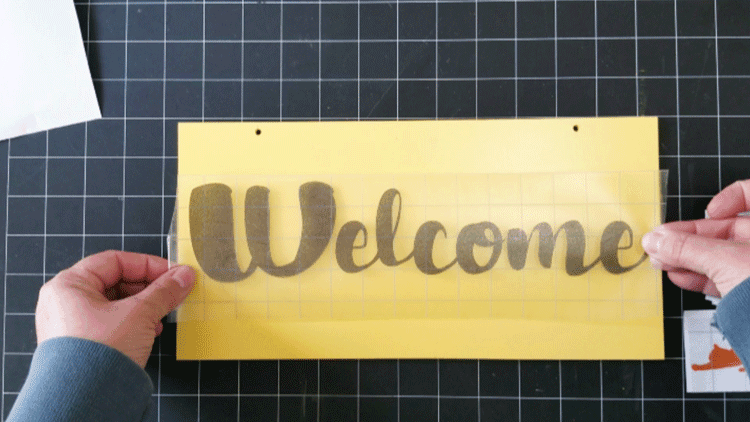
I got mine a little bit too high but I didn’t want to risk ruining it by trying to move it so I left it alone. Remove the transfer tape and leave the Welcome text behind.

Next add all of the kitties!
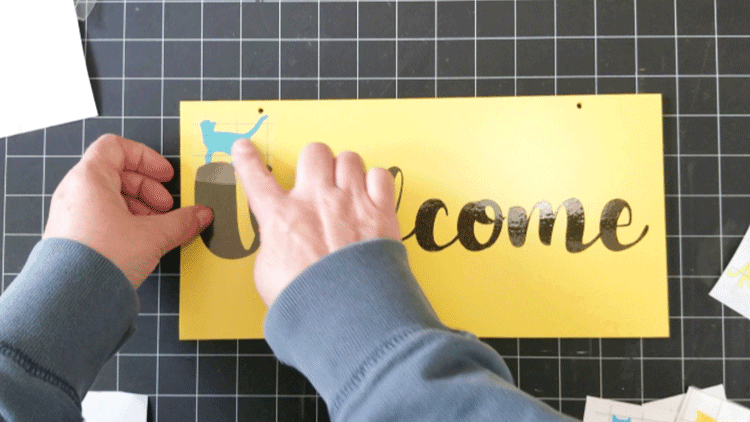
Continue with the rest of the cats until they are all placed in fun places on the sign.

Step 6: Add the S Hooks and Hang
I picked up some small S hooks at the hardware store.
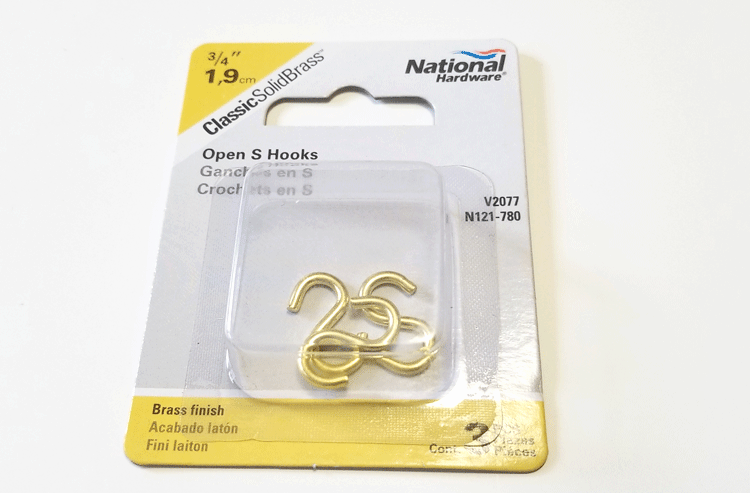
Place one side of the hook through the hole in the sign and the other side hangs from the flag hanger.
Except for one crazy windy day it has held onto the flag pole quite nicely. And this vinyl was originally made for car stickers so it will hold up outside for 4 years +.
I used StyleTechCraft vinyl for my Grinch Yard Art last winter. It was out from December – March (when I could finally get it out of the frozen ground) and it still looks perfect!
It looks so cute!
What do you think?

Look how sparkly the vinyl is in the sunshine. It is so fun.
Every time I see the sign in my back yard it makes me smile. It is just about the only pop of color out there right now because I have yet to plant the pretty flowers
I hope it brings a smile to you too.![]()
![]()
If you would like to follow them on Facebook where they introduce new colors and share awesome vinyl projects just click the link below!
Thanks so much for stopping by!
Michelle


Emil A.
Friday 12th of April 2024
Soo cute! I love your catio welcome sign! If only visiting cats could read!:)
Michelle
Wednesday 17th of April 2024
Thank you. We love it. I don't know...I think they can totally read it. LOL!
Nancy L Janssen
Wednesday 6th of May 2020
Everyone needs a bit of sparkle in their life right now, and this fits the bill! I can't wait to see a photo once you get your flowers in those adorable planters. Such a fun welcome to your home, Michelle.
Michelle
Wednesday 6th of May 2020
Thanks Nancy! I think it turned out cute. I always wait until after Memorial day to plant anything but they will be adorable when I am done. LOL