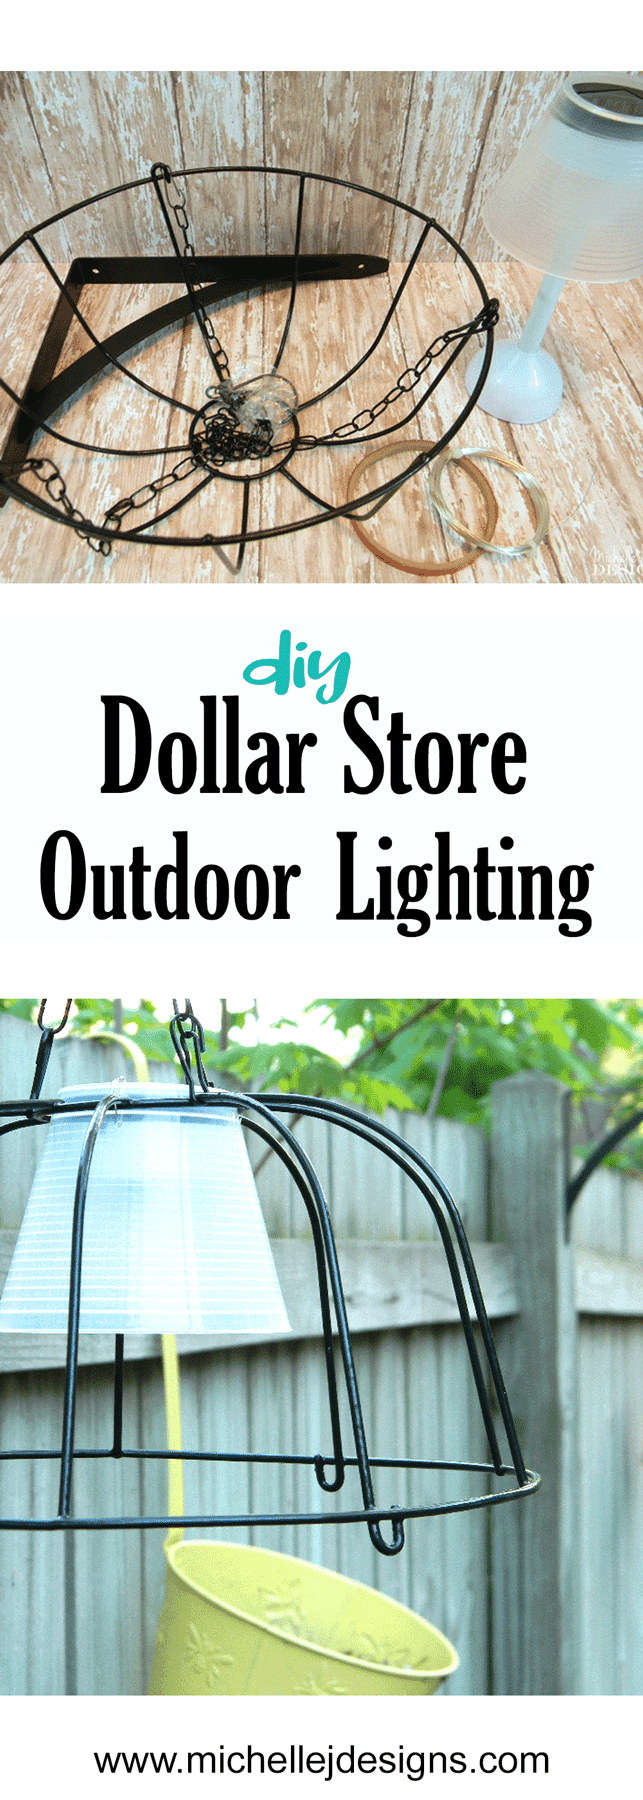
I wanted some outdoor lights that did not need electricity. Jeff and I were at the Dollar Tree looking around one day and I saw these little solar table lamps that stood about 7 or 8″ tall. They were really cute and the they were next to some wire hanging planters. This idea popped into my head that I could create some fun dollar store outdoor lighting from these two things.
Using dollar store items to make decor or lights, in this case, is just a practical, fun idea. I love solar lights and have created several different kinds. This time though, these two items came together and these hanging solar lights were the result. I hope you like them.

Dollar Store Outdoor Lighting
This post includes affiliate links for your convenience. You can read my full disclosure here.
Materials Needed:
hanging planter basket
solar table lamp
wire cutters
scissors and
pliers to manipulate the wire.
Getting Started
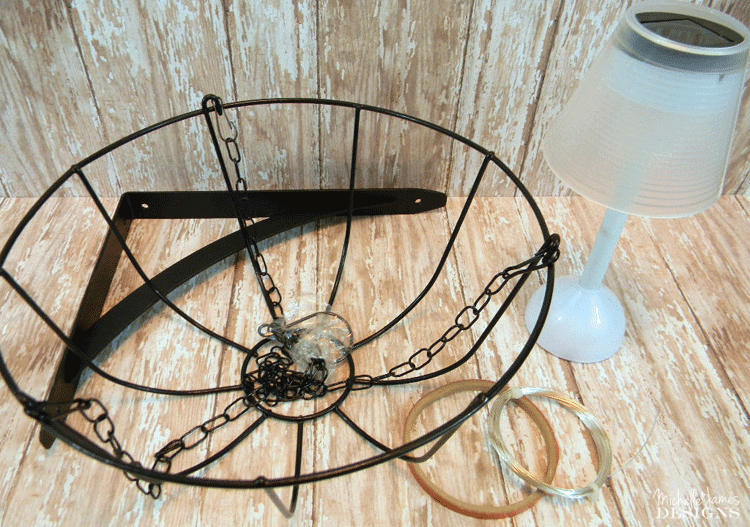

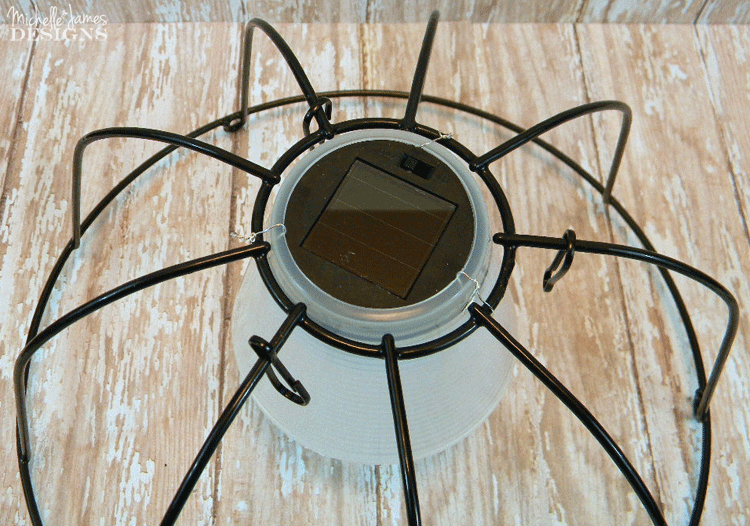
Step 1: Add holes to the plastic solar shades
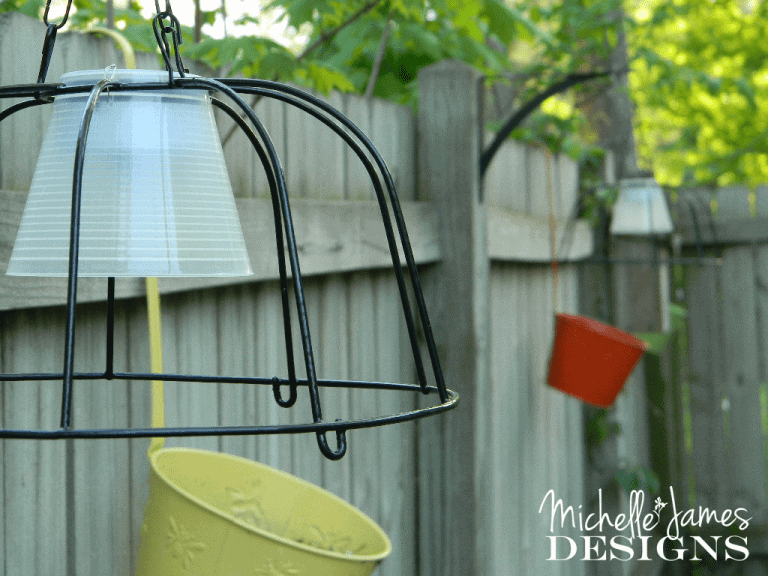
Remove the base from the lamp shade and take the solar unit out of the shade. Remove the chain from the planter and set it aside for later.
Drill three small holes equally spaced around the shades to add some wire. They are about .5″ or 3/4″ from the top of the shade.


Step 2: Spray paint the hanging basket if you want colorful lights
I did not do this but I think now that I should have! I think some colorful wire shades would be fun in an outdoor space. This is the time to get out the spray paint and paint the baskets!
Step 3: Add the wire
Cut three pieces of wire all about 2.5 inches long. The wire I used is pretty thin and flexible. It doesn’t have to be hard to work with. It just needs to hold the shade in place.
Place one end of the wire through the hole in shade and wrap the other side around the hole in what is usually the bottom of the planter but for this project we are turning it upside down. Continue this with all three holes and wire pieces.

You can tell if the shade is crooked and if this happens just tighten the wire on the lower section of the shade until it straightens out. Fold the wire down so it is not sticking up in the air and trim with wire cutters so the ends are not so long.
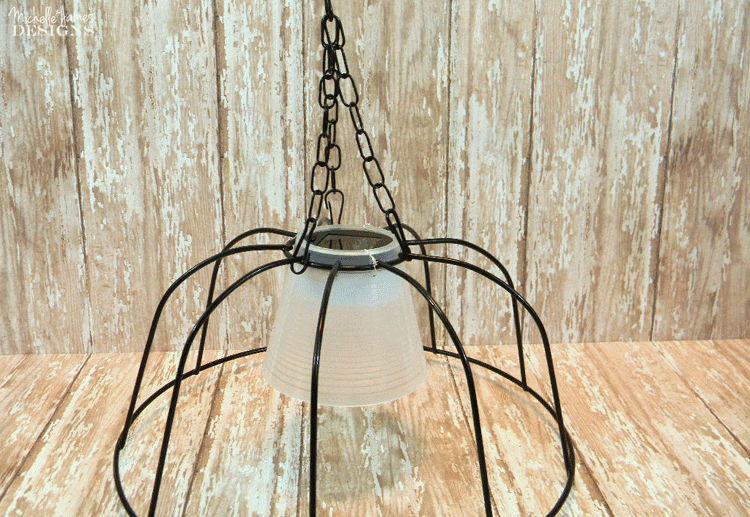
Step 4: Add the solar lights
Next we will be working with the little solar light itself. I place some double sided tape in two spots on the lights. My intention was to have the tape adhere to the inside of the shade to keep it from falling out.
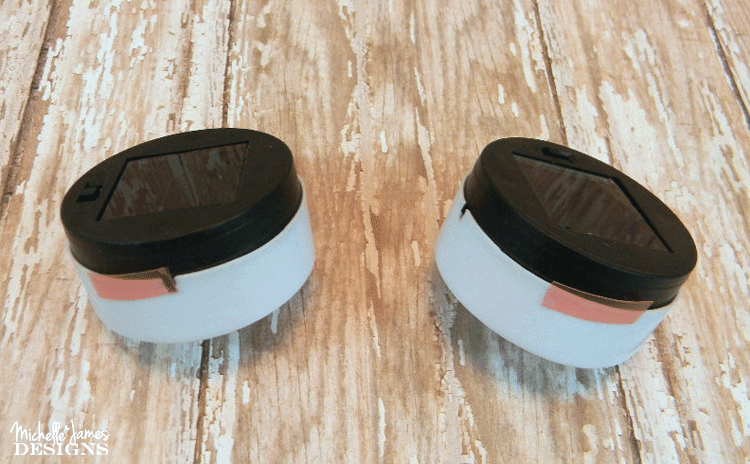

After you have the double sided tape on the sides, place them up into the shade.
I had to press pretty hard to get them all of the way. I wanted there to be no room for it to decide to come falling out of the shade.
By using the double sided tape you can always remove the solar light and replace it with a new one later.
If you glue them in it may be harder to replace the solar unit.

Step 5: Finishing Up!
The last step is to make the chain shorter and add it to what is now the top of the fixture. I counted 7 chain links from the top hook then removed the eighth one.
Do this on all three chains. Be sure to keep the clip at the end of the chain.
When you have them all shortened place the clips on the same three wires they were on before.

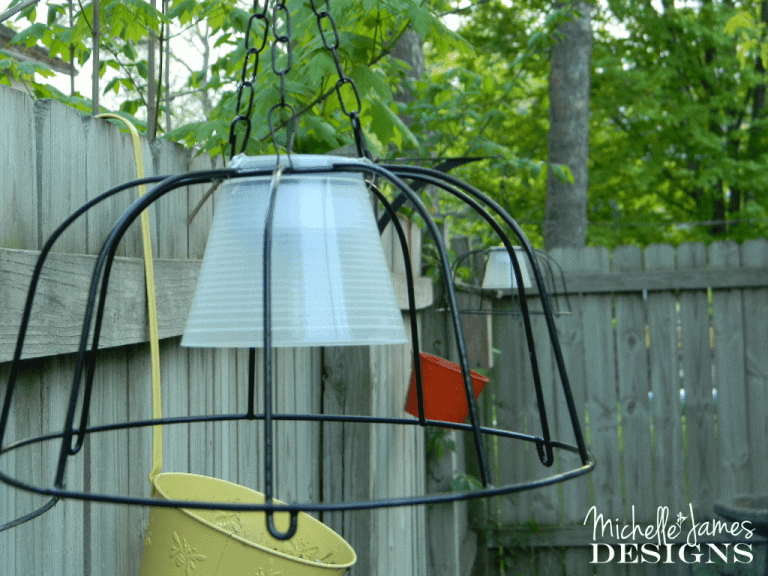
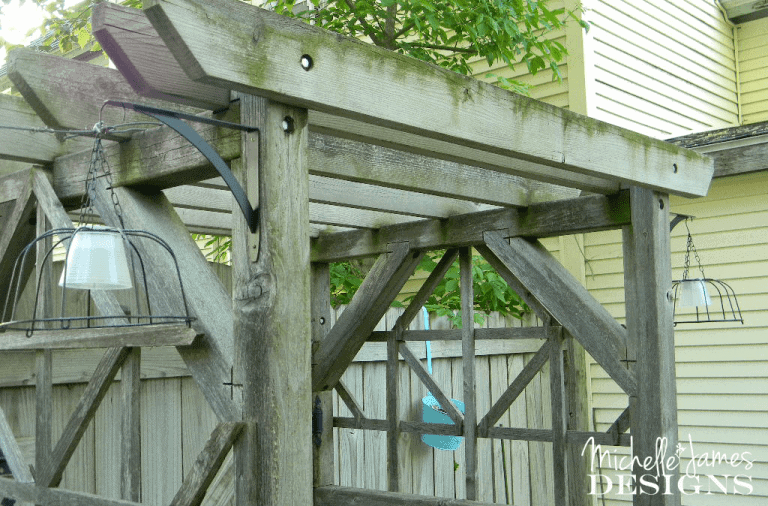
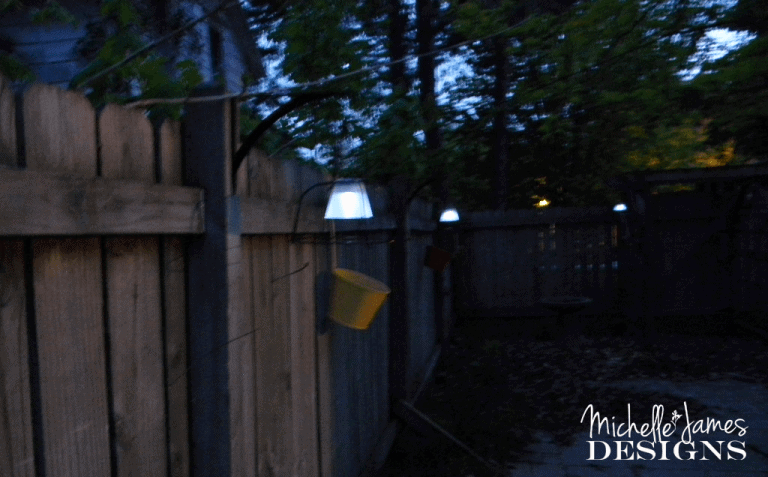
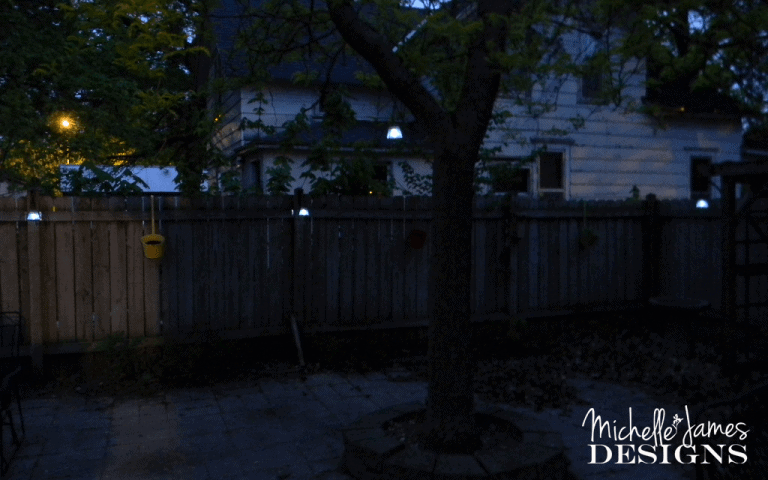
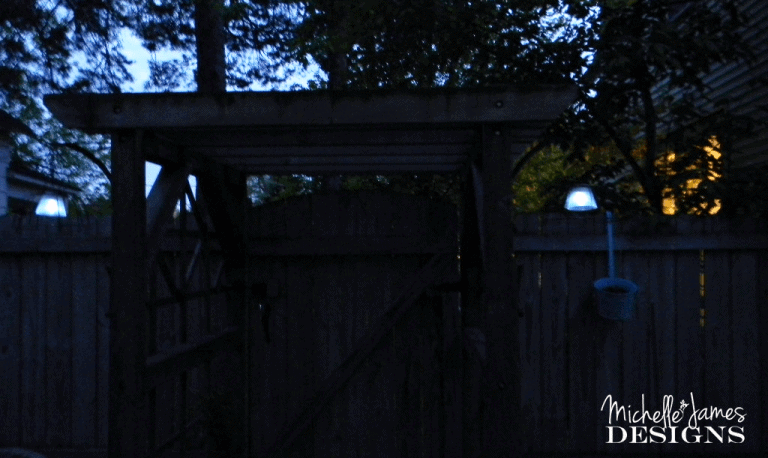
Ta Da!! You are all done with your dollar store outdoor lighting fixture. Now just make as many as you like for your space. I made five of them and it is fun to see them in different places spread out all over the back yard patio space.
Use the bracket to hang them from a fence post like me. I also hung one from the tree using a small hook.
Another cute idea instead of a bracket would be to hang the lights from a shepherd’s hook for hanging plants.
That would look amazing. And if you like some color go ahead and spray paint the planter before starting the tutorial.
I found out that taking pics just when it is getting dark is a lot harder than it looks but I wanted to show a couple of the solar lights lit up.
They don’t put out very much light but they do add a little bit of ambiance to the space. I think if I wanted more light I would use a more upgraded solar light and use that instead of the dollar store table lamps.
But these are fun and do the job for now.
Here are a couple more Dollar Store decor ideas you will love!
Relevant Posts:
Dollar Store Vases for Solar Lighting
Mason Jar Hanging Fairy Lights

What do you think? Do you have outdoor lighting and if so, what kind do you have? I would love to know. Stay tuned for more projects to spruce up my back yard space. I can’t wait!
Thanks for stopping by!
Michelle


Judi
Sunday 7th of March 2021
I LOVE this idea. I was just in the Dollar Tree next to me and saw those lamps and I knew there was something I could do with them, but nothing would pop into head, so I left. Now, I can go back to the bigger store across town and get those lamps. Thank you so much for a great idea Judi
Michelle
Thursday 11th of March 2021
Yay! I am glad you like these and that I inspired you to make them. Can I just say...I am so jealous you have more than one Dollar Tree. I would LOVE that!
Sue
Friday 1st of April 2016
As I was reading I was thinking that this would be so popular on Hometalk and low and behold it is. Honestly you're a gold mine of DIY ideas.
Michelle
Friday 1st of April 2016
Thanks Sue. I have put some things on Hometalk. You are right. It is the perfect place for it.
Carolann
Friday 1st of April 2016
I am lighting obsessed! Love this Michelle. thanks for sharing such inspiring ideas!
Michelle
Friday 1st of April 2016
Thank you Carolann. I didn't know you were obsessed with lighting. I love it!
Alexis @ Chemistry Cachet
Thursday 3rd of September 2015
Such a fun idea and it looks great! I really love turning something like that into a great item for the yard! Have a wonderful day!
Michelle
Thursday 3rd of September 2015
Thanks Alexis! These are nothing compared to your pergola but they were fun to make and are still working. LOL! Thanks for stopping by!
KariAnne
Tuesday 21st of July 2015
You are so clever! I love this idea and we have a dollar store just around the corner. :)
Happy day friend! karianne
Michelle
Tuesday 21st of July 2015
Thanks KariAnne! They came together pretty easily and they look great! I hope you can get the stuff and make some yourself!