Hi! Okay so these sconces are not technically on the headboard but they could be if you wanted them that way. Today I am showing you how to create sconces for a headboard!
I was given the paint used on the sconces as part of the Fab Furniture Flippin Contest from Country Chic Paint but all of the opinions are 100% my own.
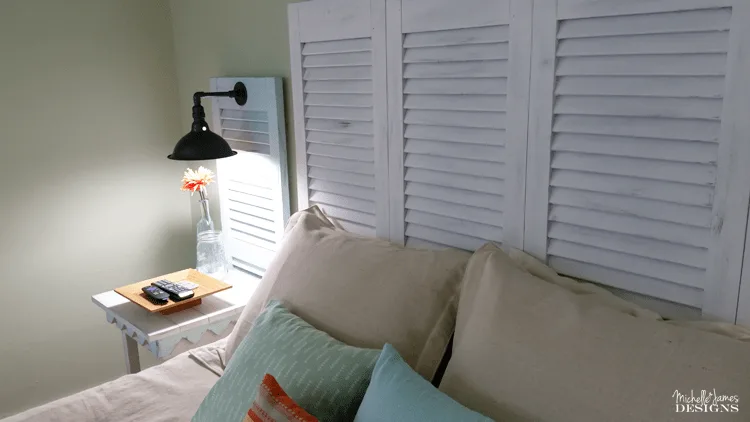
I made these to go with my awesome Shutter Headboard project but I wanted to show you how to make them too.
I have wanted lights by the bed for reading but our tables are pretty small and a lamp would take up a lot of that table top space. These metal sconces were the perfect solution.
If you love DIY metal projects you can click here to find more metal crafts inspiration!


How To Create Shutter Sconces
I created these with a short list of supplies: (some of these links are affiliate links and some are to the Menard’s website for your convenience)

1/2 in pvc pipe – not shown in photo
Super Glue
Metallic Cream Paint – Trigger – from Country Chic
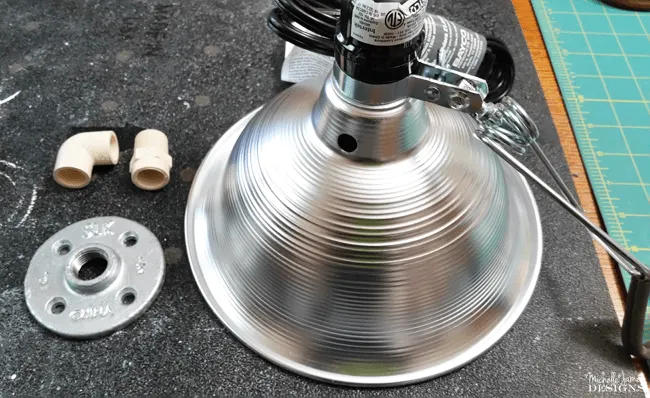
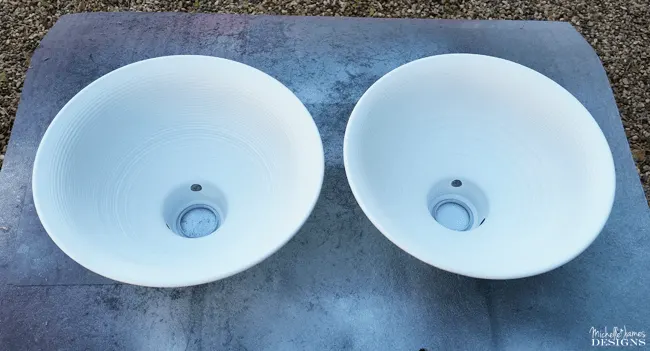
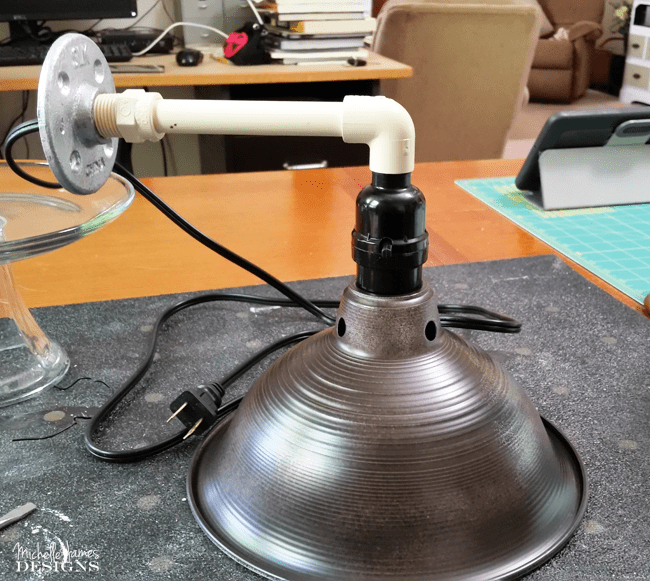
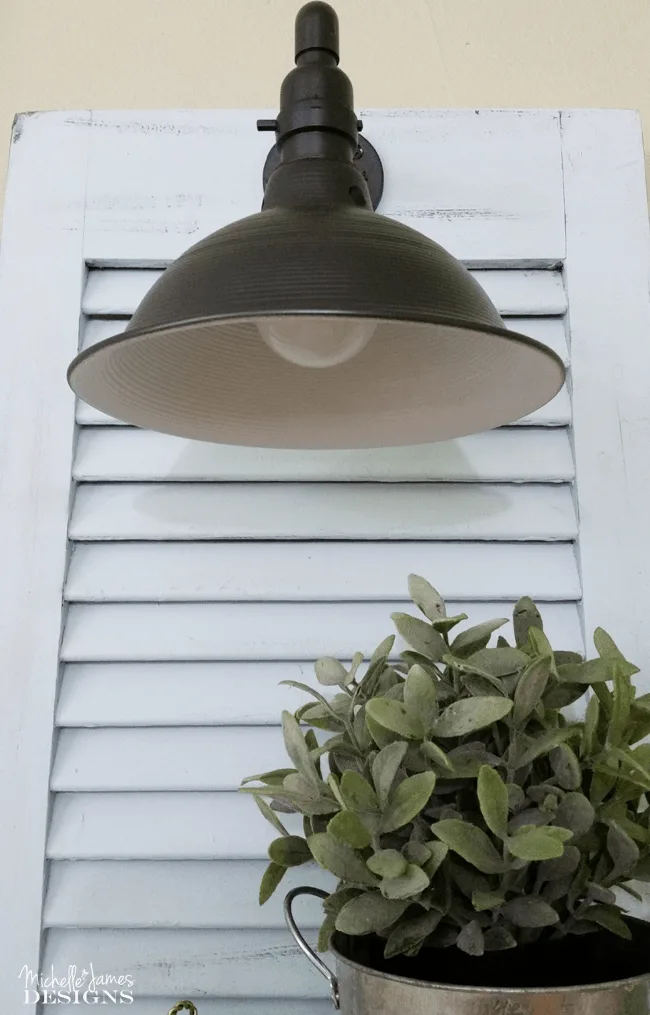
The first thing I did was to take the clip off the lamp and remove the socket and cord from the metal shade. I took the shade outside and sprayed the inside of them with my favorite Rust-Oleum White Paint/Primer. I wanted the inside of the sconces to be a lighter color to help reflect the light. I also primed the outside of the lamps with a darker spray paint. I wanted the metallic cream from Country Chic Paint to have a dark undercoat.

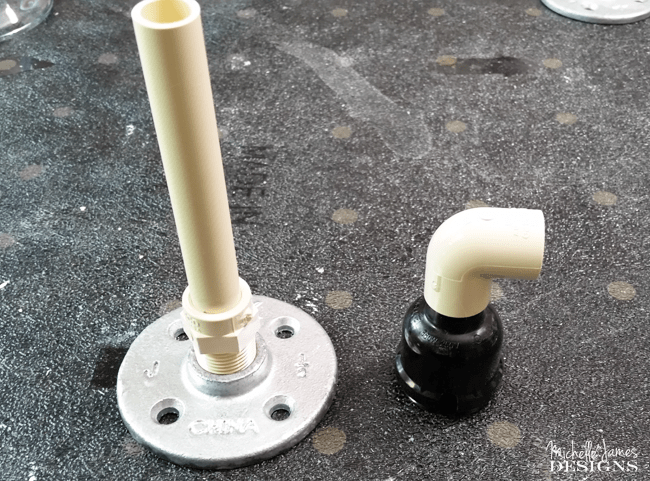
Then I worked on the wiring. I needed to wire through the elbow, pvc pip, connector and flange so I had to remove the wiring from the socket/switch.


I unwrapped the wire from the connector but there is a little “trip” that you have to push down for it to release the wire. Jeff used a tiny screwdriver to do this.
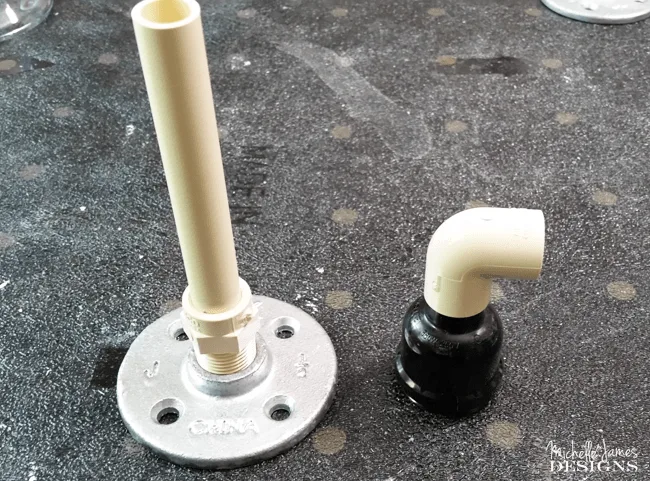
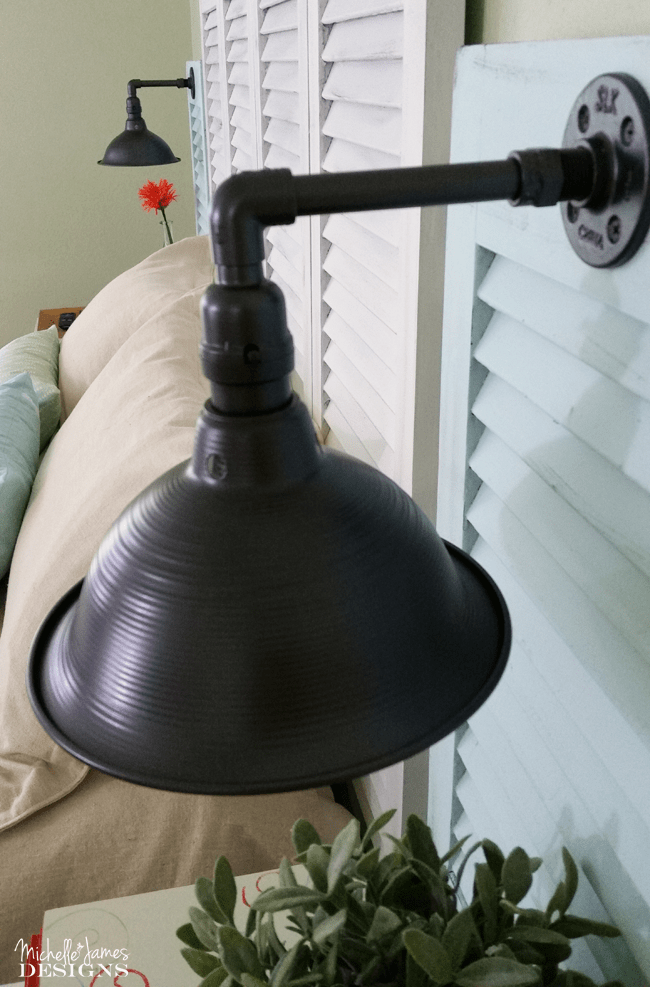
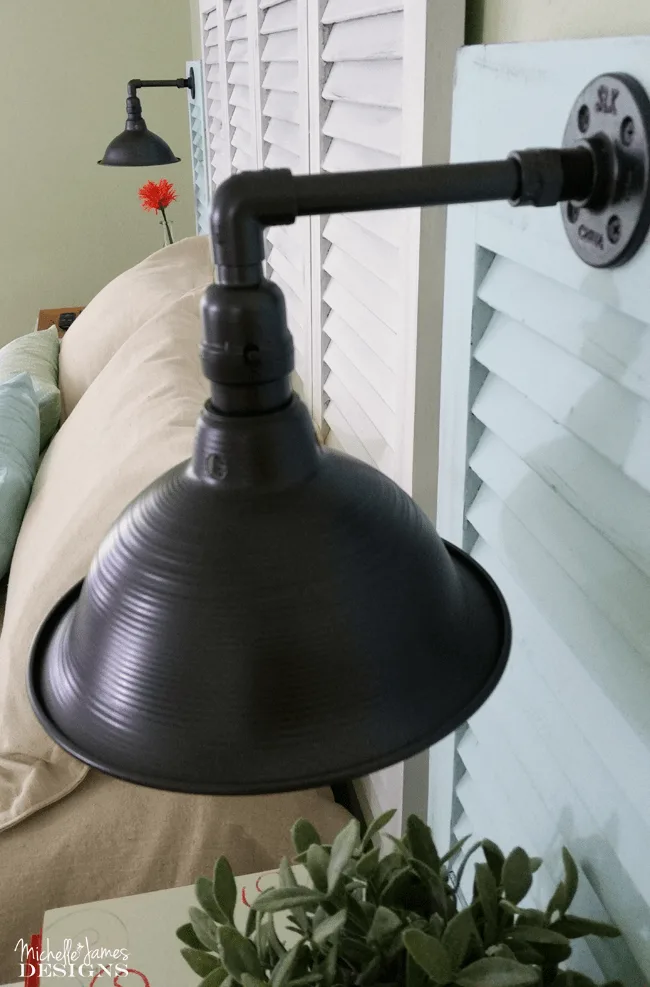
Then I created the pipe part of the sconce. When I purchased the lamp and the pieces it was hard to tell if the elbow fitting would fit into the socket piece. Of course it did not but I needed that size. Jeff got out the big guns. His super glue to glue the two pieces together. It is super strong and so far….everything is holding. He got this at Hobby Lobby.


This is how the pieces went together.
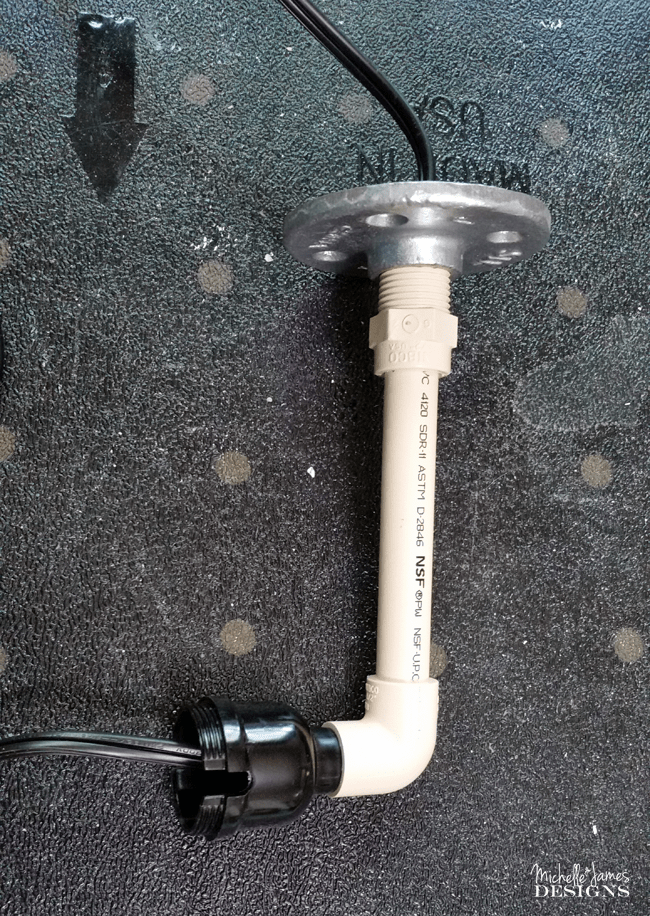
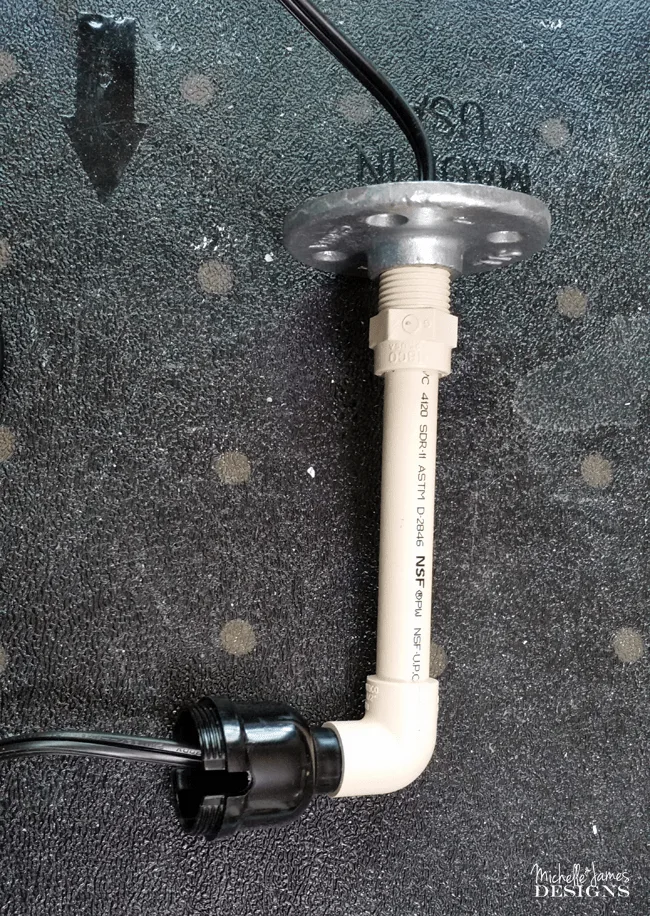
Then we threaded the cord through the metal flange, through the pipe, around the elbow and back into the socket. Then we re-attached the wires to the socket/switch and attached the shade.

Then I sprayed the entire sconce with the dark spray paint from before. I used a Rust-Oleum spray in the same dark walnut color. Then with the metallic cream. I love this stuff. It worked really well in the paint sprayer after being thinned quite a bit. It is a pretty thick paint.
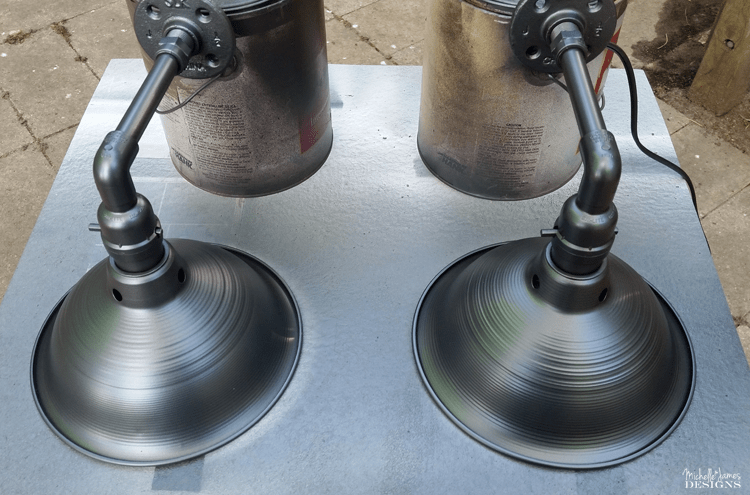

Don’t they look beautiful? Now they are ready to be attached to the shutter.
Putting It All Together
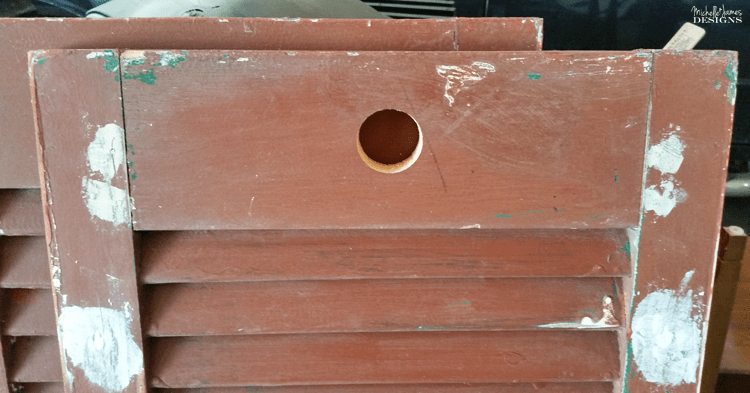
As I wrote in my headboard post, Jeff drilled a large hole for the cord to thread through so it would be behind the shutter then plug into the outlet in the floor at the foot of our bed.

The final look came out so nice.
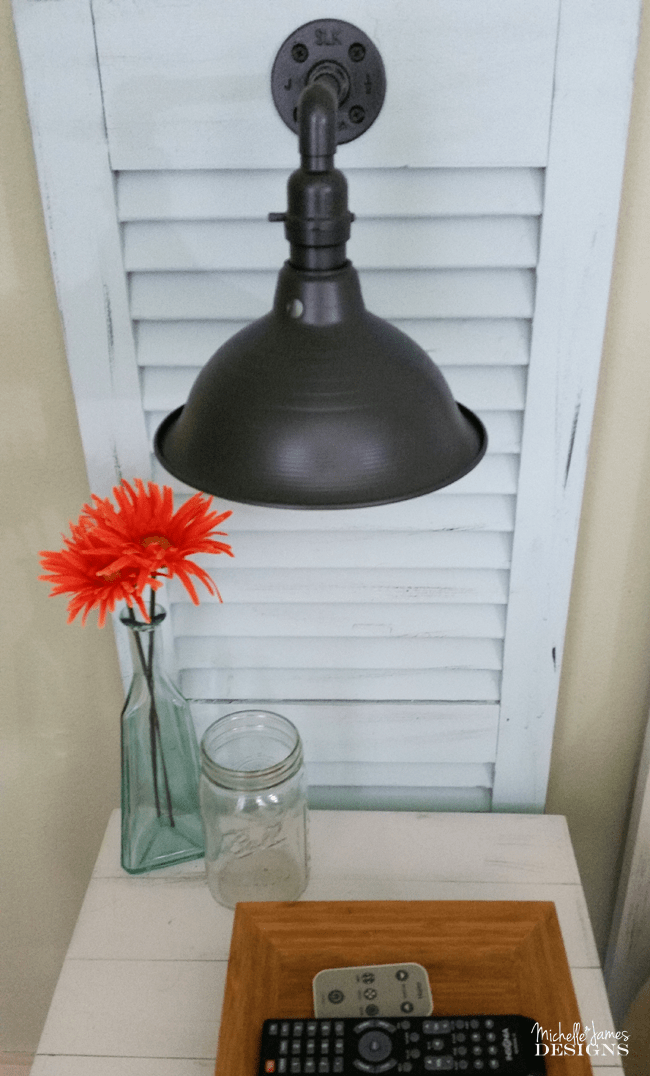


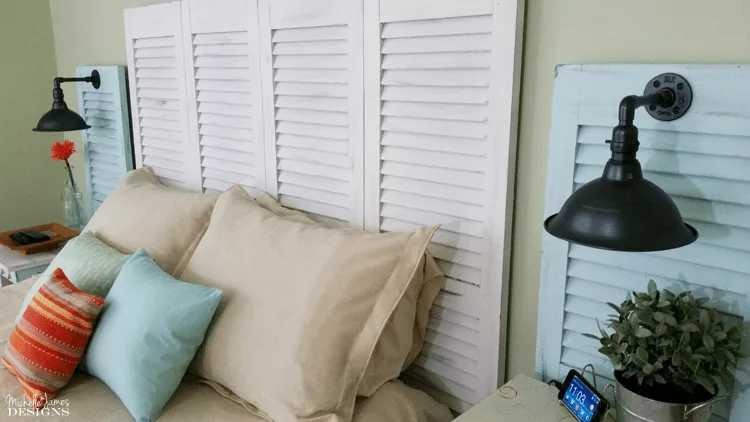
I just love the whole look but the sconces really steal the show! And I am now officially hooked on creating lamps, sconces and soon I want to make a pendant or two.
I urge you to try it. These sconces cost me about $12 each. Much cheaper than purchasing from a retailer and twice the fun.
You can find some of my favorite products and tools for creating these kind of projects in my Favorite Things Store. Take a look!
And, don’t forget to sign up to receive my email/newsletter! It goes about about every 5 days and you will get all my posts for the week.
Thanks so much for stopping by!
Michelle


Kippi Ohern
Monday 12th of July 2021
These are amazing DIY scones!!! Hugs, Kippi
Michelle
Monday 12th of July 2021
Thank you Kippi! We still use them everyday and they still look amazing!
Kay
Thursday 20th of August 2020
"unwrapped the wire from the connector but there is a little “trip” that you have to push down for it to release the wire. Jeff used a tiny screwdriver to do this" . Where is this little “trip” located? I too am not able to release the wires from the socket.
Michelle
Friday 21st of August 2020
Hi Kay,
We still have some of these lights and we just looked at the socket. Jeff thinks that inside where the wire goes in (it is a tiny space) there is a little trip on the side. It looks impossible to see. Maybe someone could hold a flashlight for you to see it. But once you hit it the wires will release.
I hope you get it. If you are having trouble, maybe the store where you purchased could help you out in person.
kelly f streeter
Wednesday 12th of December 2018
how did you get the wires out of the socket?i dont see a way to unwrap them did you pull
Michelle
Wednesday 12th of December 2018
Hi Kelly! Do you mean from the light socket? There are some screws that we had to loosen then unwrap the wiring. Then it comes out. I hope that makes sense!
Gayle Church
Tuesday 9th of August 2016
I have been looking for a DIY for bedroom lamps like these and I thank you for posting this with all of the great info. I want mine to have a more traditional shade attached instead of the metal. And I love the fact they are attached to the shutters! Thanks again.
Michelle
Tuesday 9th of August 2016
Yay! Hi Gayle. I am glad this helps you. If you have questions feel free to contact me. Thanks so much for the comment. You made my day!
Heather Northington
Tuesday 31st of May 2016
What an incredible job you did on these sconces! I love the industrial look you gave them against the shutters. Its a perfect mix match that works beautifully. I appreciate all the links to the supplies too. Can't wait to make something like this! Thanks Michelle.
Michelle
Thursday 2nd of June 2016
Thanks so much Heather! I am getting more and more into this industrial look. It is sort of out of place in my old, victorian home but we had sort of changed it all over so it's fitting in better! Thanks for stopping by!